How do you turn a regular video into a stunning masterpiece? Special effects!
From low-budget YouTube videos to top-rated, smash-hit Hollywood movies, special effects have always been the wands that bring the magic to your screen. Interestingly, special effects for videos can be as simple as a basic color adjustment, or as sophisticated as green screen manipulation. Either way, creating a great video with special effects is as easy as pie. You only need your enthusiasm, a Personal Computer, and a badass video editor.
In this article, we will introduce you to a pack of special effects from our magical video editor for Windows 10, Animotica, along with a step-by-step guide on how to use these special effects to give life to your imaginations.
Contents
How to Add Special Effects to Your Video [Spice Up Your Masterpiece]
If you don’t have Animotica on your PC yet, you should download it for free from Microsoft Store, so you can proceed with us to our video editing guide. ?
In this section, we’ll be showing you how you can apply Animotica’s special effects to boost your video’s creative flair. First, ensure you’ve downloaded and installed Animotica by the link above if you still don’t have it.
Then, you can follow the steps below.
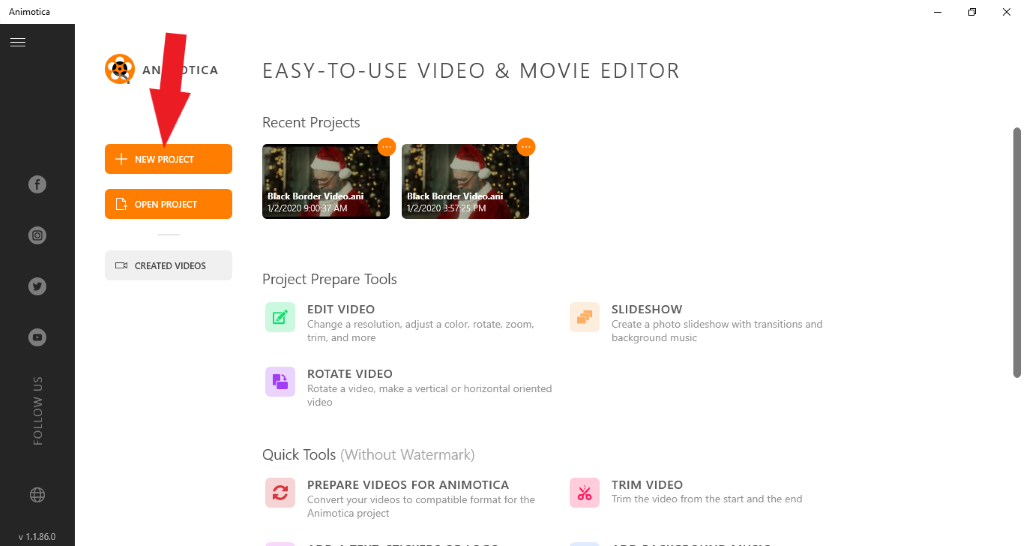
Step #1. Create a New Project
Open Animotica and proceed to the New Project button. This will take you to a new window where you upload your files for action.
Step #2. Add Video/Photo Clips
Ensure you have your videos and photo clips ready in your storage area. Hit Add Video/ Photo Clips.
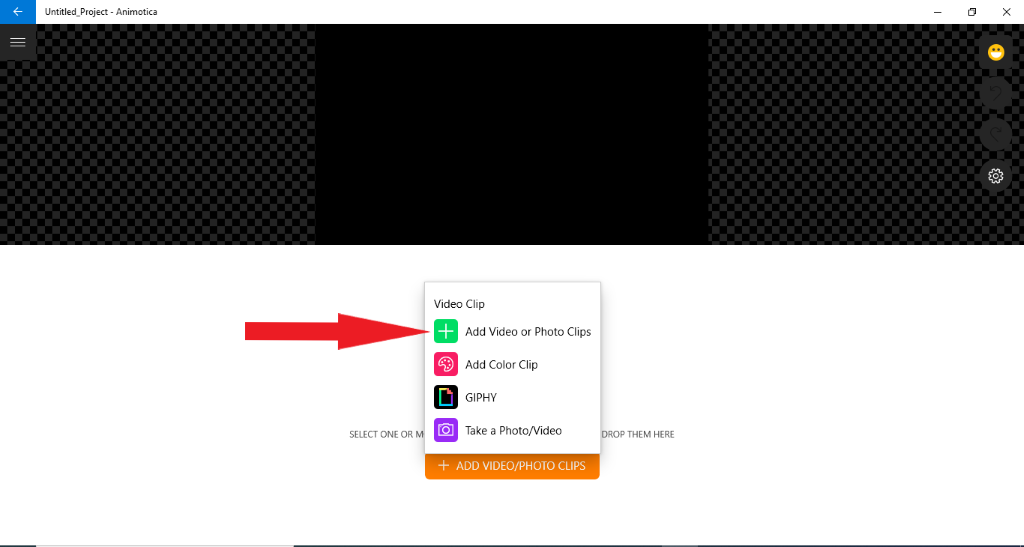
From the pop-up, just click on the option with the same name. This takes you to your storage area. Navigate to where you have your clips stored, select them, and click open. In case if you don’t have any video clips ready and you just want to try the effects out, you can download royalty free video from one of these websites.
You should be able to see your clips in the preview screen in no time!
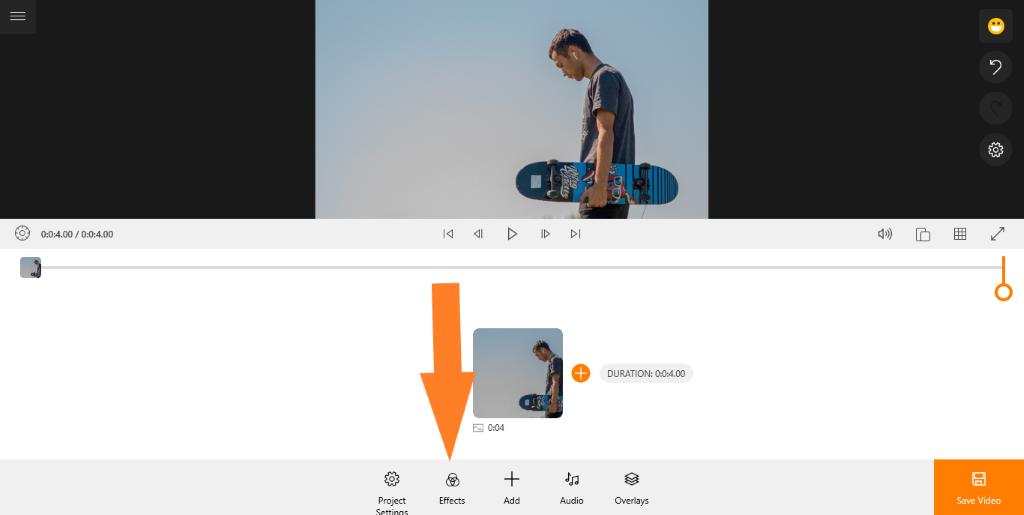
Step #3. Add your Special Effects
Say hello to playtime! At this point, you can do a lot of things to your clips to give them the flair you want. For adding basic effects:
Step #3.1. Click on the Effects button to view your options—color, black, mirror, and collage effects.
Step #3.2. Click on the interesting once to see how they look on the preview screen.
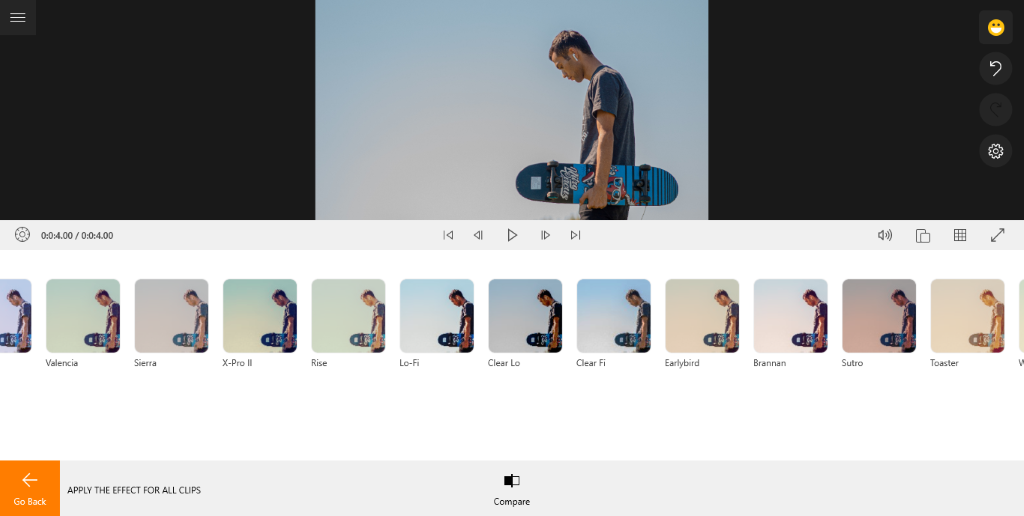
Step #3.3. When you’ve got the desired effect, select Go Back.
For more advanced options, tap on the smaller clip box to activate your editing options. You can see a number of tools you can use to spice up your clips: transform, motion, effect, adjust, flip, etc.
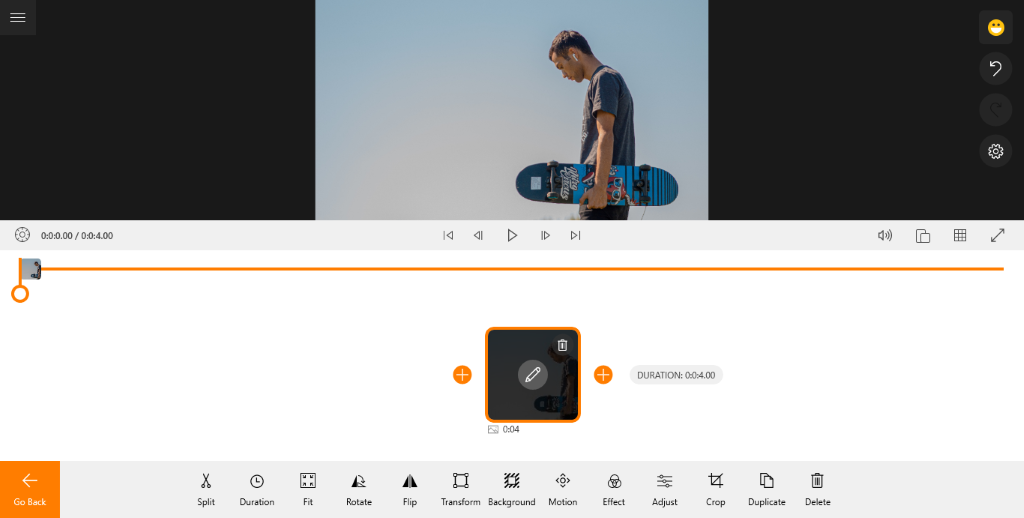
Just play around with these in your spare time, that’s how you become a pro while having fun!
You can go further by adding transitions in between your clips or even using the green screen/chroma key effect.
If you make mistakes, hit the undo button or just tap ‘Ctrl Z’ on your keyboard.
Step #4. Export Your Video
When you’re done, you’d have to export your video. You can do that by simply hitting Save Video. This takes you to an export window.
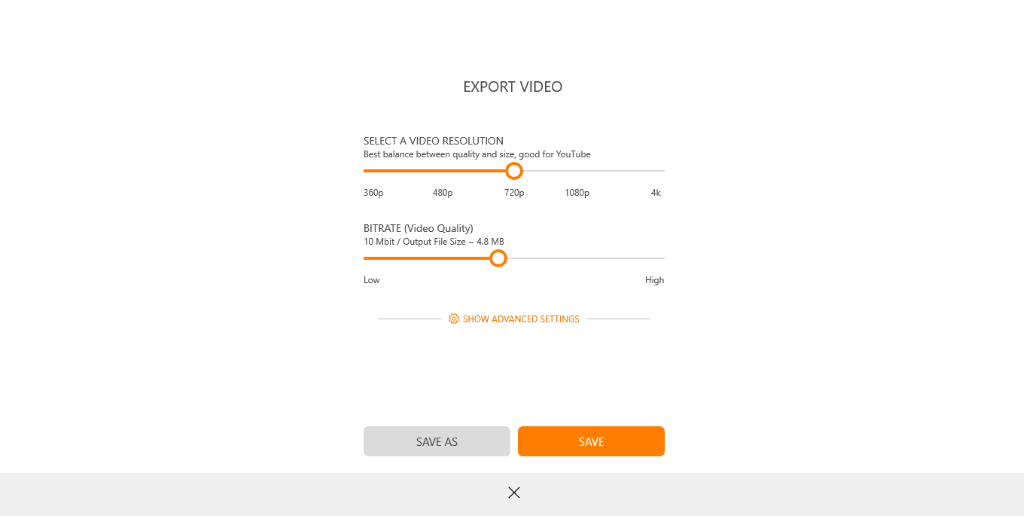
For the best quality between size and quality, it’s advised you head straight to Save As, without making any changes to Resolution and Bitrate.
On the new window, just input the filename you’d like to save your video as. Then, hit enter.
At this point, you just have to grab a cup of coffee and watch Animotica complete the setup.
What Kind of Special Effects Are There? [Explore with a free Windows 10 movie maker]
Among the several things that make Animotica standout from the crowd of video editors, Animotica has several easy-to-use effects, which you can add to your videos and slideshows with only a couple clicks to give different angles to your visual expressions. If you still don’t have this software on your PC, you can download it and use it for free here.
Animotica’s Effects tool packs over 50 filters in four categories. Each of these will show different results on your preview screen.
These effects are a part of video color grading and helps video to look special…even surreal.
For color and black effects, you can increase the intensity to get different levels of shades for each filter.
That said, let’s walk through them!
Tell a Vivid Story with Color Effects
Animotica’s color effects allow you to create visual stories that people can actually feel.
With its several shades of magic, there’s a lot you can do! Let’s see a few.
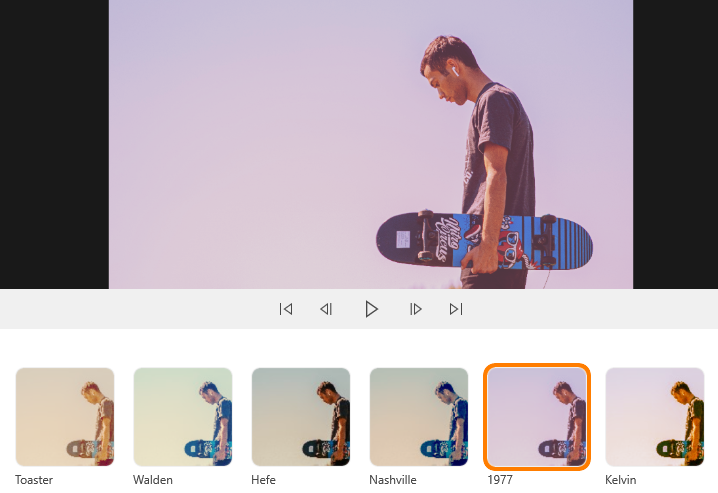
1977: For Old School Vibes
Wanna let them get the feeling from way back? This color effect will do just that. 1977 works perfectly if you’re trying to do a flashback into the 70s, tell a story set in that period, or just want to have fun.
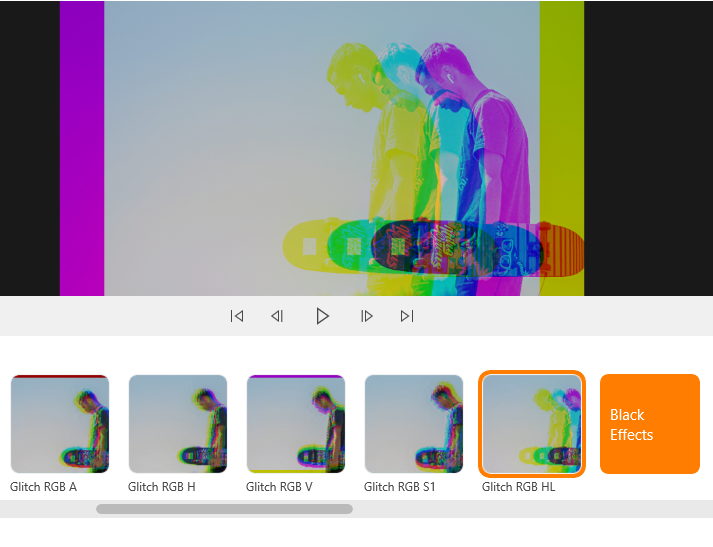
Glitch: for the Spooky Sci-Fi Feeling
If you fancy great futuristic fantasy visuals, then Animotica’s Glitch series can give you a piece of that. From Glitch RGB A to Glitch RGB HL, this effect pulls what looks like a rainbow-shadow effect on your video, giving it an aura that evokes a little bit of horror and excitement.
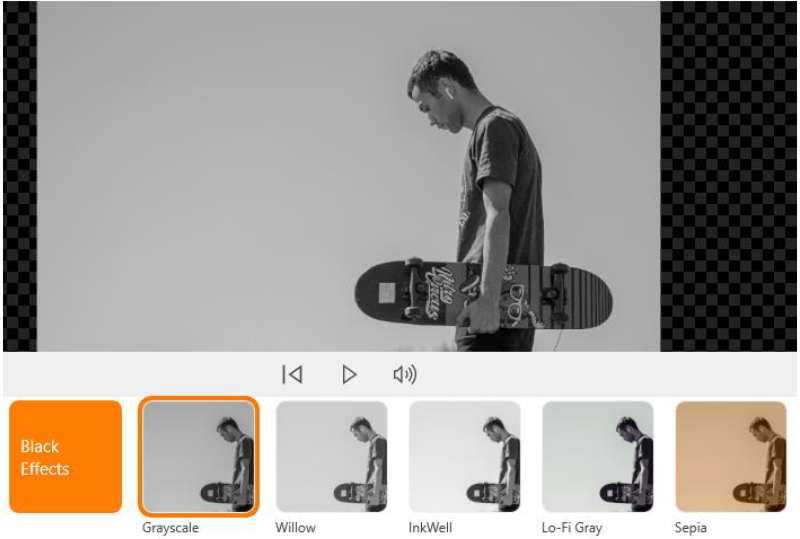
Go Raw with Black effects
Nothing screams original, louder than black. Black tells a tale of hardcore energy and resilience. A perfect fit for throwbacks, Animotica’s black and white effects let you tell a story that lives through the tests of time. Here’s a couple of effects from this category.
Grayscale: For the Love of Gray
Grayscale gives you a raw, buttery-smooth black and white effect. Its simplistic nature makes it a great option for video makers who want to make something that everybody can relate to.
Sepia: For a Quick Meet with the Past
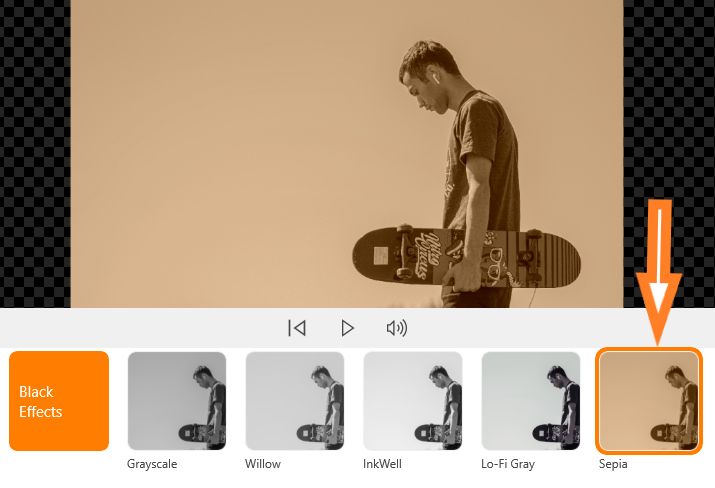
This effect is birthed from a mix of red and brown hues with a touch of grey. In the world of video effects, Sepia is popular among video makers who love to use elements of flashback in their videos. If you’re a retro lover, then, you will love Sepia
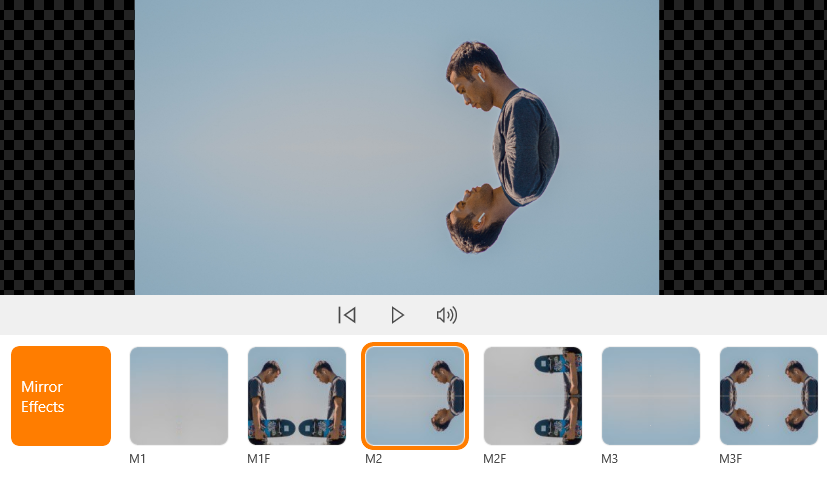
Double Impact with Mirror Effects
Ever wondered what it’d look like if you were an identical twin? Animotica’s mirror effects might have an answer. The Mirror Effects can be used to pull several visual stunts, no matter what clip you’re making. Here are a few to show you what’s up!
M1F: Two to Tango!
This effect simply flips your clip around while splitting it into two. The aftermath of this is a clean, realistic representation like the one below.

It is important to note that your results will depend on the type of picture you’re using.
M2: Level up the Horror
This mirror effect works by splitting your image from the mid-section. The aftermath of this effect is a piece of art that bears a rather unsettling aura. You can try out all the mirror effects to see which works best for you, depending on your aim.
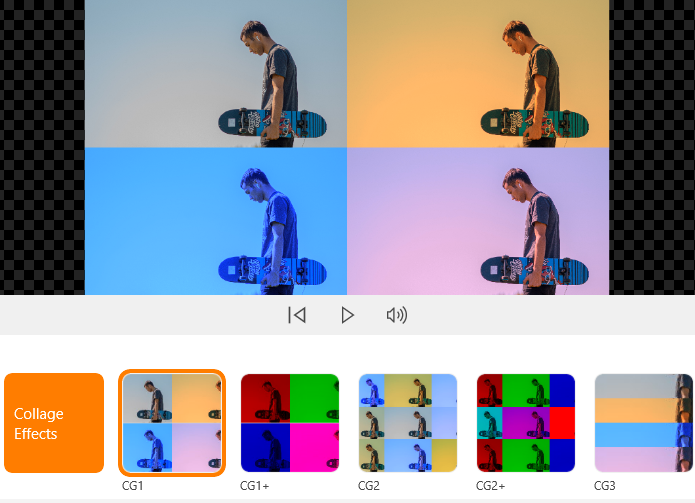
A Million Tales with Collage effects
If a picture is worth a thousand words, wonder how much words a collage is worth? Animotica’s collage effects pack a lot of fun styles you can use to juice up your videos.
CG1: A Mix of Wonder
This effect reproduces four copies of your clip, applying different color filters to each of them to give it a rich feel of diversity.
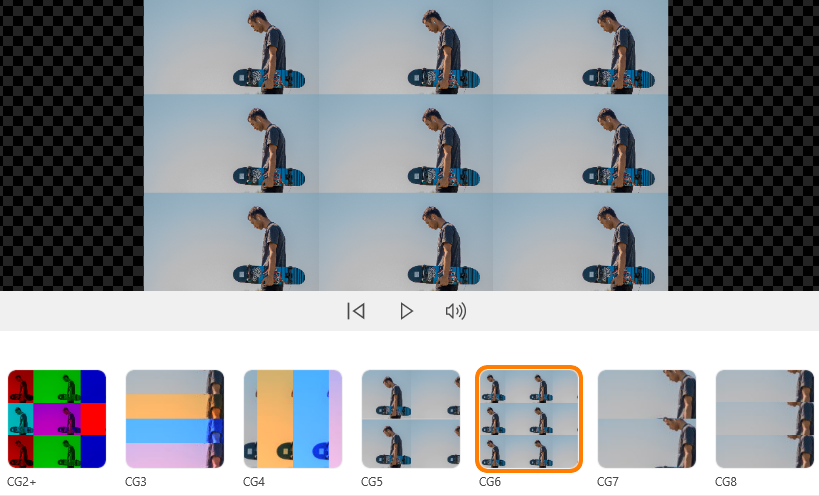
CG6: Elegant Simplicity
This collage effect does so much by doing so little. It simply recreates your clip in six places without altering the clip’s default effects. CG5 is another collage effect that has the same behavior. It, however, produces four copies of your clip.
Animotica 3 Years Anniversary Pack
Animotica recently clocked 3 years with nearly 4 million users. To celebrate this, we released a new pack of special effects.
The cool thing about these effects is that they’re animated!
Let’s take a look at a couple of them!
Glitch 100: Take Suspense to another Level
Whether you’re making a sci-fi type clip or some horror type video, Glitch 100 and 200 brings a new type of suspense to your videos.
Feel free to use it as your creativity permits!
Wave 100: Dreamy Vibes
Remember how dreamy scenes transition back to reality in Hollywood movies? Now you can recreate that with Animotica’s new special effect, Wave 100.
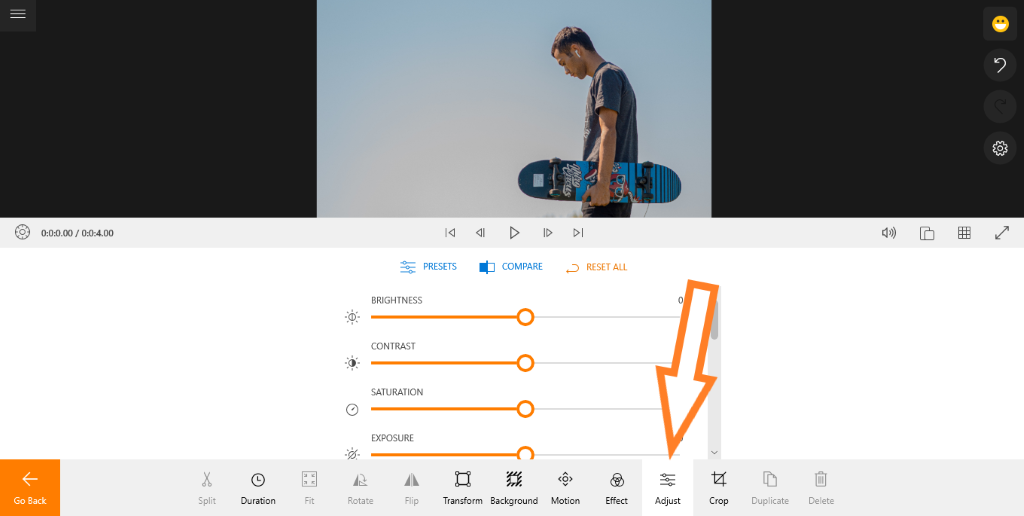
Filter on Your Terms with the Adjust Tool
Do you have this specific tint in your mind but can’t really get around it with the filters from the effects tool? The Adjust tool gives you that flexibility to modify your clip’s brightness, contrast, saturation, exposure, tint, highlights, and more!
Make your Slides Go in Style with Transition Effects
With Animotica’s pack of 42 transition effects, you can make your videos and slideshows progress from one scene/slide to another in style. Say farewell to boring slides.
Here’s a guide on how to use Animotica’s transition effects.
Make it Move with Motion Effects
Animotica’s set of 13 motion effects (so called Ken Burns effects) takes away the stagnancy in your slides, replacing it with a dynamic vibe that’s both suspenseful and dramatic.
Create Your Own Special Moment with Overlays
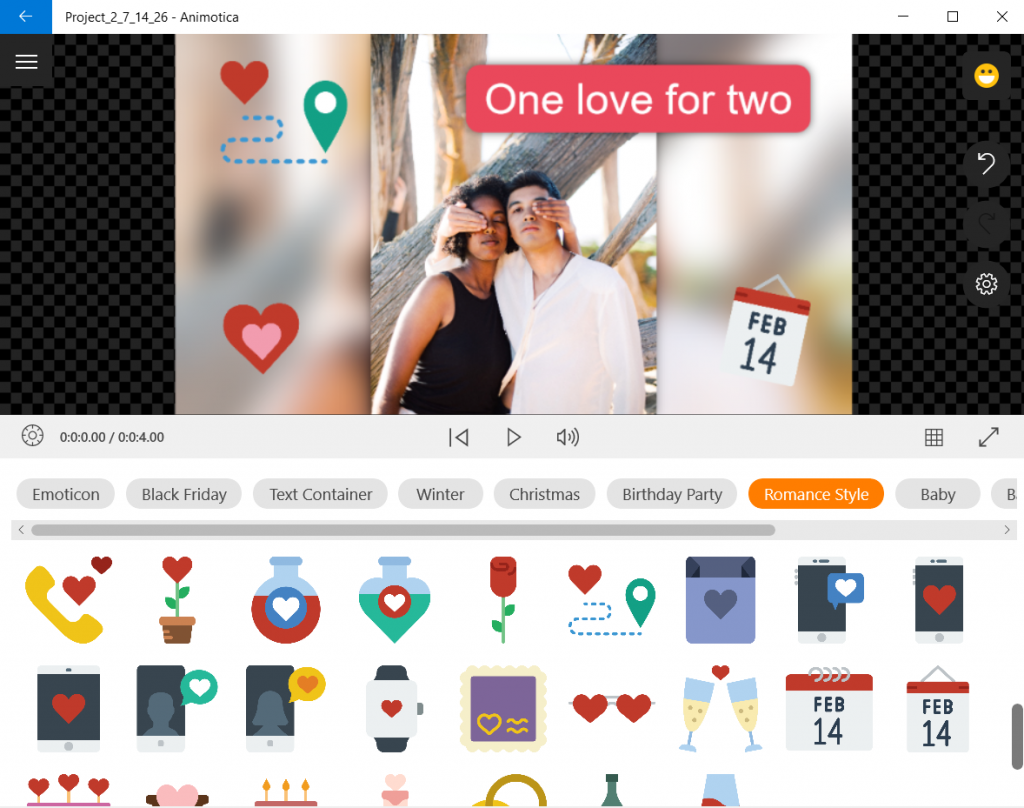
Overlays allow you to add GiFs, stickers, images, videos, and texts over your slides to give them that extra theatrical flavor.
It doesn’t just end at that. You can apply special effects such as opacity and blending, shadow, motion, and transform to your overlays to help them blend in a lot better. Furthermore, if you’re interested in green screen, here’s where it goes down! Learn about the best practices of adding overlays to your video.
Go the Blockbuster Way With Green Screen Effect
via GIPHY
Fancy the classic scenery of Lord of the Rings, Terminator, and Game of Thrones? The green screen effect brings all that magic to your fingertips. Known as chroma key in Animotica, this feature can be accessed by using the overlays tool. Here’s a quick blog on how to use the green screen effect to turn your video background from basic to epic.
Highlight Moments with the Freeze and time-lapse Effects
Want to slow the roll a bit? Perhaps you’ve been craving for a bite of that creative pie after seeing several top-notch freeze effects from The Matrix. With Animotica, you can do that in just three steps! Learn how to do that in this blog.
On the flip side, you can compress hours and days—and even more—into minutes using the supersonic time-lapse effect. This is how Nat Geo Wild blows your mind. Learn how to do the same here!
Conclusion
Adding special effects to your videos is not as hard as it seems. However, to master the art, you have to be acquainted with several effects within your video editor. This takes a good amount of practice. On the bright side, it’s quite a lot of fun, especially when you’re using a video editor that makes it all easy!
We believe that this guide will be helpful as you set out to create that masterpiece!
You may also like:
How to Do Color Grading Using 3D LUT Effects?
Blood-Chilling Halloween Effects To Make Your Video Pop (Plus A Bonus Treat)
40+ Tips from Successful Filmmakers to Beginners [Interview with PROs]


2 Comments
I just installed the pro version, & while only just started using it, I’ve discovered the speed-time-frame adjustor had me unable to properly adjust the sound to the video, due to my not being able to properly sync the allotted speed adjuster. My problem was that x.75 speed didn’t aline, with the imported music which became slightly off sync. If it had the increments adjustable between the sliding x.25 scaling it would be perfect. However, so far so good it’s one of if not the best editing suits. I’ve come across in years in this modern era. I’ve been making and editing videos now for 30+yrs & very impressed with your suit. If you could adjust the coding to include the x. 25-speed adjustment increment to a sliding scale in between the x.25’s that would be so fabulous.
Hello! You can submit your ideas on our ideas website!