
Whether you’re recording an interview or making a reaction video for your YouTube channel, knowing how to add a video on top of another video will come in pretty handy at some point. In more technical terms, this technique is called a video overlay, and it produces what is called a picture-in-picture effect (playing a picture within another picture simultaneously).
In this guide, we will explore the steps you can take to create your very first video overlay the easiest way possible.
But before we jump into that, let’s take a look at the common scenarios that might make you want to create overlays.
Contents
When should you make a Video Overlay – Use Cases
There are several cases that might make you want to learn how to put a video in the corner of another clip. Let’s consider the most common ones below:
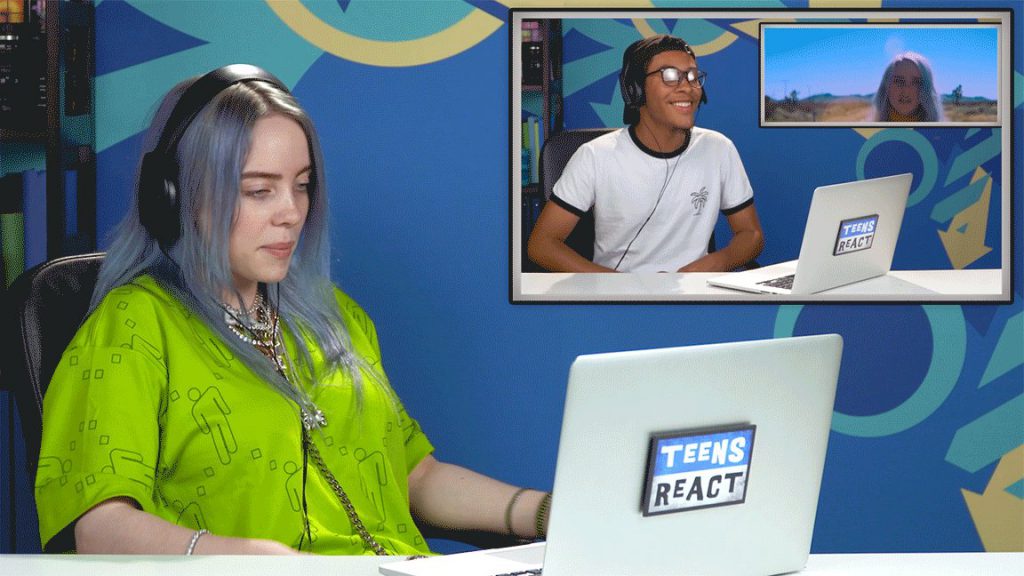
You want to create a reaction video with your face at a corner of the subject content
This is quite popular in reaction videos. Content creators just film themselves watching and reacting to another interesting clip. Afterward, they overlay the filmed clip at a corner of the content they’re reacting to so their viewers can feel more involved.
You want to stream a game while showing your face at a corner
Gamers also use overlays a lot. They just record the screen while playing games and also film their reaction and comments. Afterward, the clip of their reactions will be placed at a corner of the filmed gaming session.
You want to show the front and rear views of your camera in one clip
Video overlays can be used in demos as well. When you want to show the front and rear view of anything simultaneously in one clip, you can just film the views separately and then overlay them against each other.
You want to create a duet video with another person
Adding a video clip on top of another one comes in handy during a virtual duetting session. You simply take your partner’s clip, record your own part, and overlay it at a corner with your partner’s clip.
Demonstrate a software or a website with your face at a corner of the screencast
This is another instance of overlays being used for product demos. The demonstrator records himself completing tasks with his software product and also records his screen during the process. Afterward, he overlays the clip at a corner of his screen.
Show webcam conversations from two recordings
If you had an exciting webcam conversation with someone else and want to share that with your viewers, you can get the clips from both ends and create an overlay with them.
Note: To capture your webcam sessions more conveniently, feel free to use Screen Recorder by Animotica.
With Screen Recorder by Animotica, you can record video in video using both your desktop screen and web camera at the same time. You can also use the built-in Chroma Key to remove the background of your camera clip or change the shape of the web camera overlay.
How to Add a Video Overlay on Top of another Video: The Steps
While it might seem like rocket science on the surface, it’s pretty easy to overlay videos, especially if you’re using a good editor like Animotica!
To get the most out of your video editing experience, it’s important to have a high-performance laptop for video editing that can handle large file sizes and intensive editing tasks.
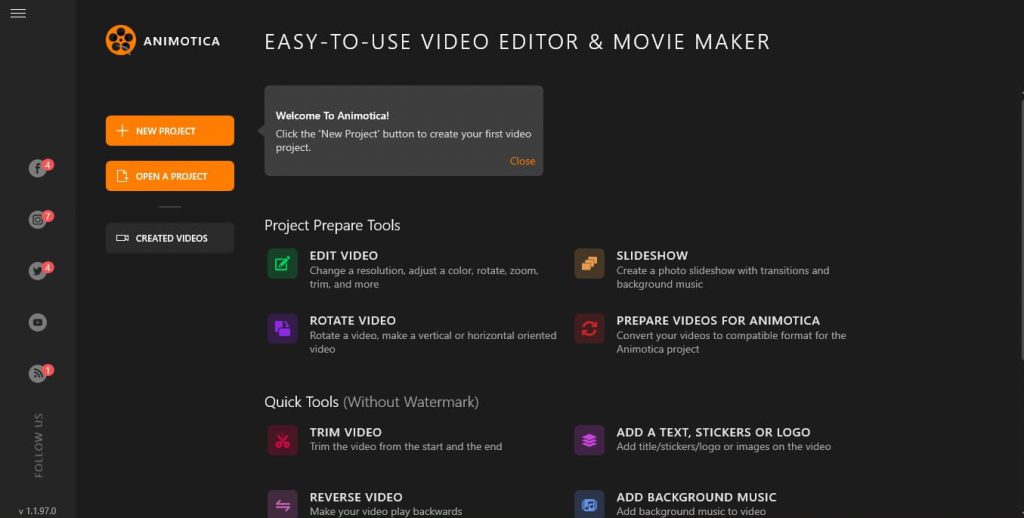
Animotica is a simple and rich editor that lets you have fun while creating videos the easiest way possible. With Animotica, you can literally add a clip on top of another video in five steps:
- Upload your base clip
- Add your overlay
- Resize, move or rotate the overlay
- Adjust the length of your overlay
- Save
Click on the button below to download Animotica for free.

After downloading the app, launch and select New Project, and you’ll be ready to roll.
Now, let’s dive into detail!
Step 1: Upload your Base Clip
Tap on Add Video/Photo Clips to upload your base clip. Afterward, navigate to where you’ve stored your file, select it, and hit open.
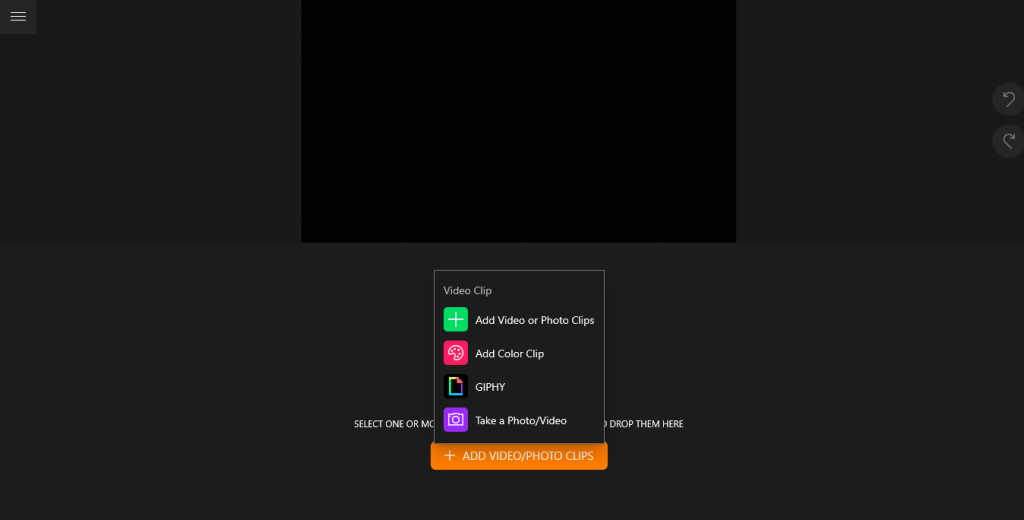
Now you should find your clip in your project window.
Step 2: Add your Video Overlay
Select Add to reveal the options for adding media files. On the Layers/Overlays section, select Add Video or Photo.
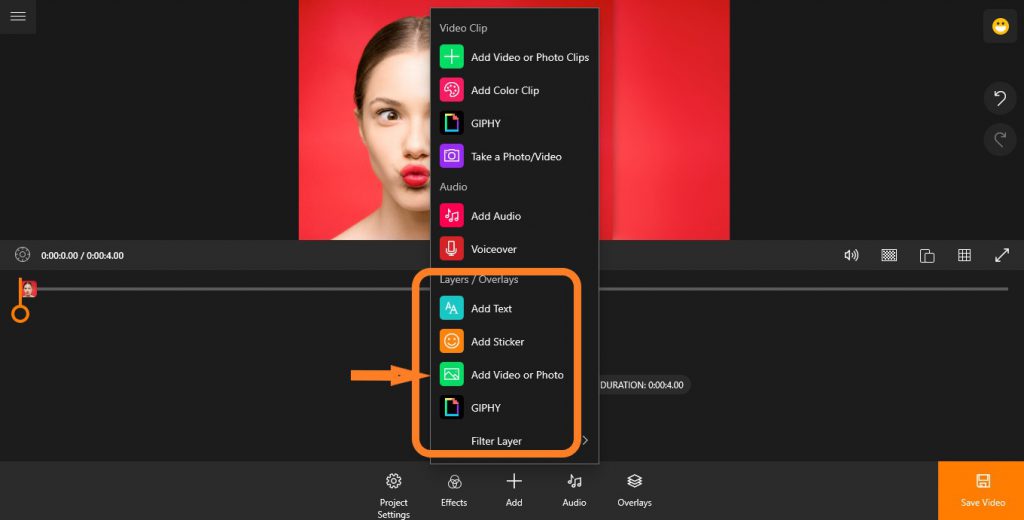
Navigate to where you’ve stored your second clip, select it and hit open.
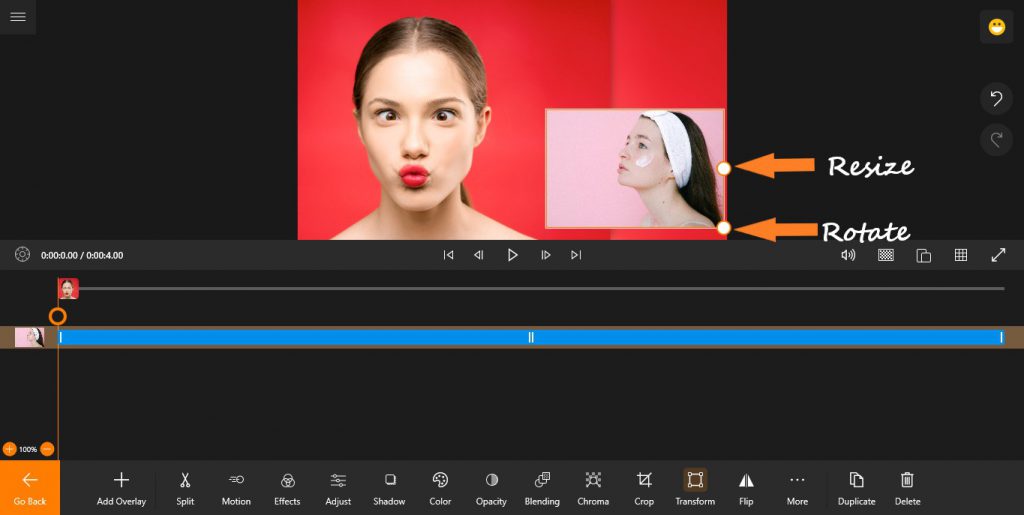
Step 3: Resize or Move the Overlay
There are two rings around the overlay’s border. One is for resizing the overlay, and the other is for rotating it.
- To resize the overlay: hold your cursor down on the middle ring (labeled in the screenshot below) and drag.
- To rotate the overlay: hold down the ring at the edge of the box (as labeled below) and move it in your desired direction.
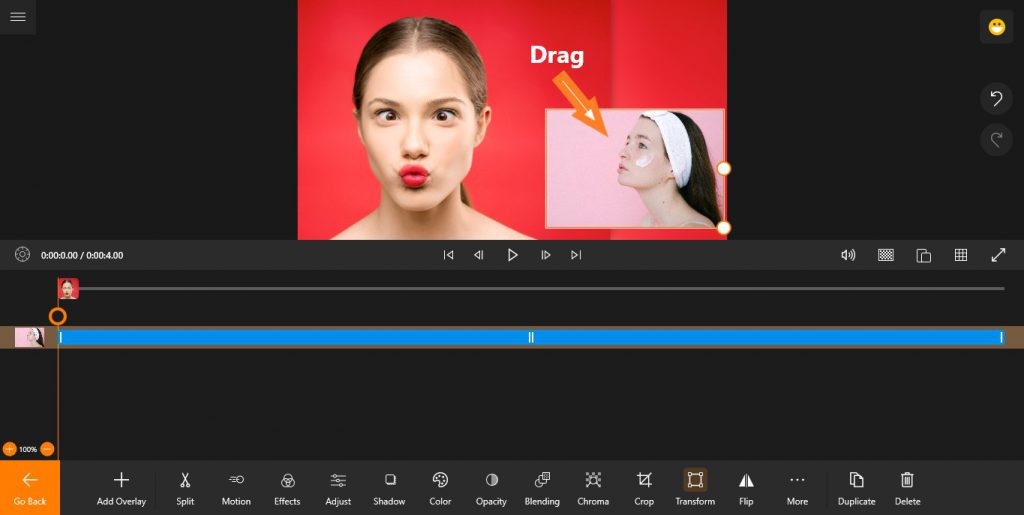
You can also adjust the placement of your overlay by moving it around to your desired position.
- To adjust the placement: simply hold the cursor down on any other part of the overlay and drag (as shown below).
Step 4: Adjust the Length of the Overlay
You might want to adjust the length of the clip especially if you only want to include a portion of the entire clip. You can achieve this by trimming the beginning or end of the clip.
Tap on the ‘overlayed’ clip to reveal the overlay bar.
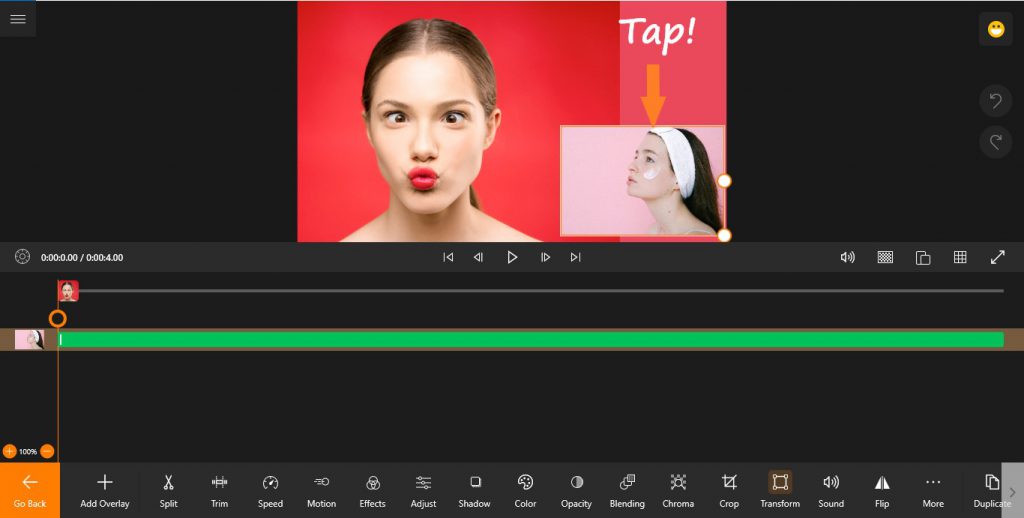
Afterward, select Trim. Now, you can drag either end of the clip to adjust the length!

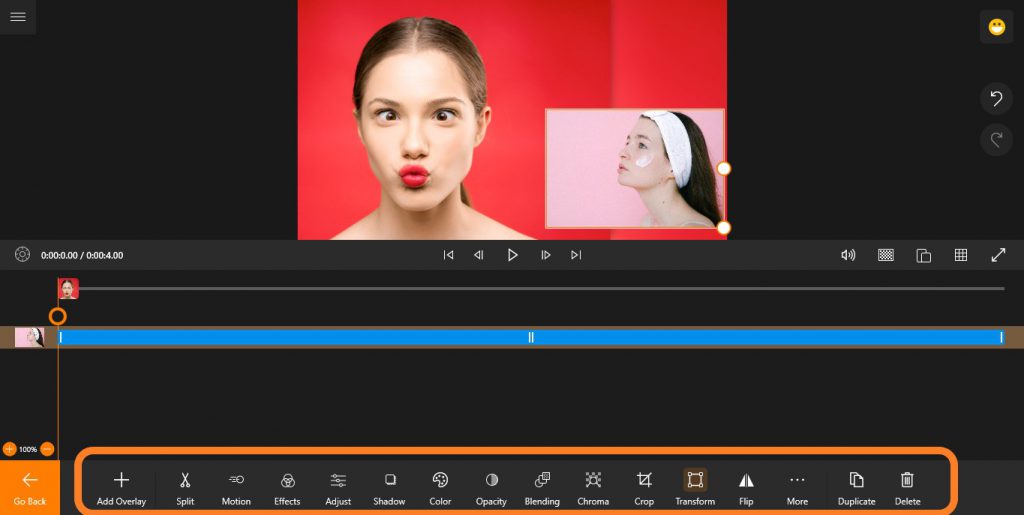
You can also find editing options for the overlay by looking at the project window’s foot. Here you can add effects, change the background, flip, set motion, and more!
Step 5: Save
To save your project, simply hit on Save Video. On the next window, select Save As to give a name to your file and select your preferred storage location.
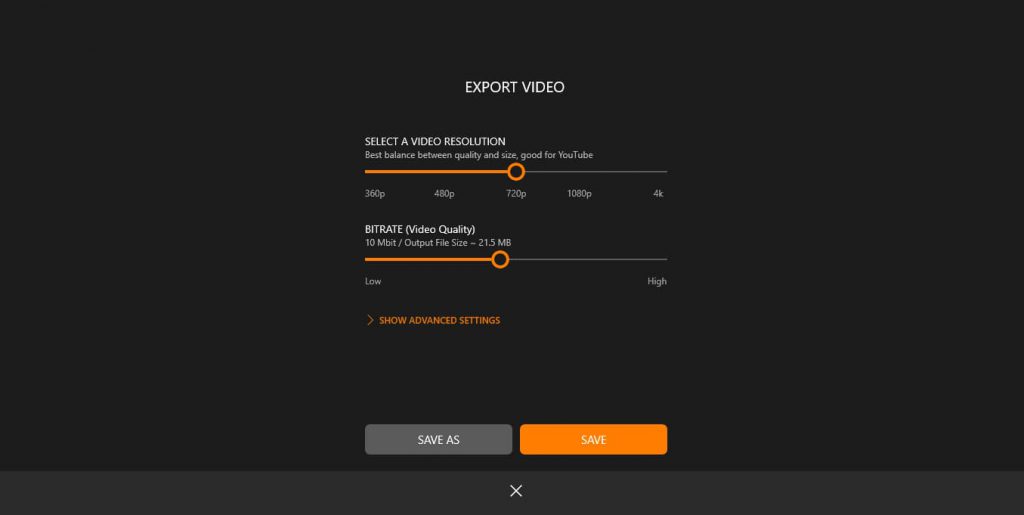
Next, hit Save.
That’s pretty much it! You can now relax and wait while Animotica finishes up the job for you!
Conclusion
I hope this guide was helpful! As you can see, it’s quite easy to create a video overlay. Do let us know if you have any recommendations or inquiries.
Finally, always remember that practice is all it takes to reach perfection. So keep trying, you’ll do great!
Cheers!
You may also like:
How to Add Special Effects to Your Videos
How to Upload Your Vertical Video to YouTube for The First Time
How to Crop a Video in Windows 10


2 Comments
Can you add 128fps on the full pro version pls
Hey! You can submit your idea here