Imagine this: you’ve created a fantastic YouTube video your followers are raving about. You know it would perform well on Instagram, too…if only you could share it in a format that Instagram accepts! Sound familiar? You’re not alone. Many creators, influencers, and businesses face difficulty sharing their YouTube videos directly on Instagram due to format restrictions. But what if we told you there’s a go-to solution that makes YouTube to Instagram video transfer as easy as tap and click?
Welcome to your guide on everything you need to know about using Animotica – a user-friendly, intuitive tool that can quickly and efficiently convert your YouTube videos to the optimal format for Instagram. Whether you’re new to video marketing or a seasoned pro, don’t worry, we’ve got you covered. Read on, and you’ll soon be sharing your YouTube content on Instagram like a pro, boosting your brand’s visibility and reach like never before.
Contents
Why Post YouTube videos on Instagram?
Posting your YouTube videos on Instagram can boost your brand or business. It helps you reach more people who might not usually go on YouTube. This can lead more people to watch your original YouTube content and even increase your subscribers. It’s all about engaging your audience in the places they frequent the most.
What’s even better? You’re not just reusing content but enhancing it. Instagram’s fantastic features, like stickers, filters, and text overlays, let you add a personal touch to your YouTube videos, making them more notable and likely getting more shares, likes, and comments. Your YouTube videos can be more than just copied content – they can be a new and exciting experience tailored for your Instagram audience.
So, what’s the problem? Instagram’s format restrictions make it challenging to share your YouTube videos directly. How can you quickly convert and optimize your videos for Instagram while keeping them high-quality?
That’s where Animotica comes in, your top solution for a smooth YouTube to Instagram video conversion and optimization. With Animotica, you can easily tackle the Instagram video issue and delight your audience with eye-catching content across platforms. So, are you ready to broaden the reach and effect of your content?
How to Resize YouTube Videos for Instagram
Let’s now explore the process of sharing your YouTube videos as Instagram Reels. With the burgeoning popularity of Reels in today’s social media landscape, this could be your golden ticket to reaching a wider audience. We’ll guide you step-by-step on leveraging Animotica’s seamless capabilities to convert your YouTube content into an Instagram-ready format.
Step 1: Download a YouTube Video
Have you spotted a YouTube video that you feel aligns perfectly with your brand and want to share it on Instagram? First, you need to download this video. Don’t worry – there are plenty of apps and services to help you with just that, providing a range of formats and quality options. But remember, always respect copyright rules when downloading from YouTube. Have all the permissions you need before sharing the content. Need guidance on how to do this? No problem! We have a helpful tutorial on how to download YouTube videos.
Step 2: Upload a YouTube Video to Animotica
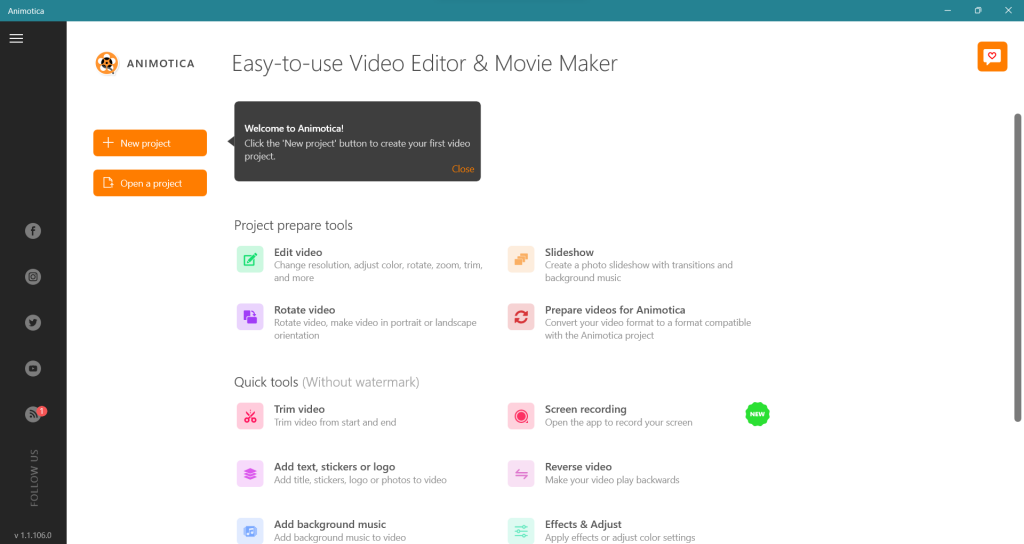
Now you have your YouTube video downloaded, it’s time for the pivotal moment – uploading your video to Animotica. This is where the fun begins. Ensure you have Animotica downloaded and installed on your computer. If it isn’t already installed, now’s the time to download Animotica for seamless video conversion.

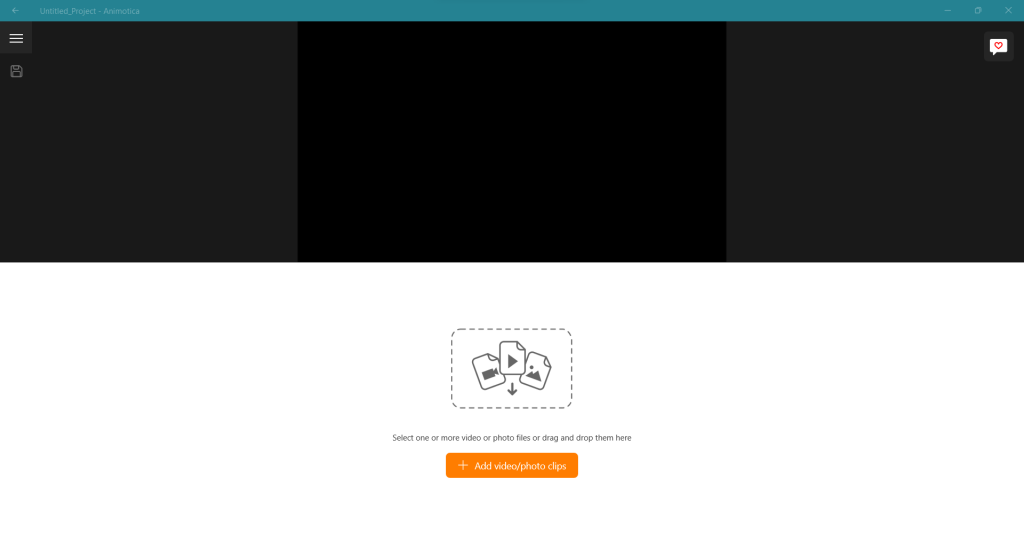
With Animotica open on your screen, click on the ‘New Project‘ button.
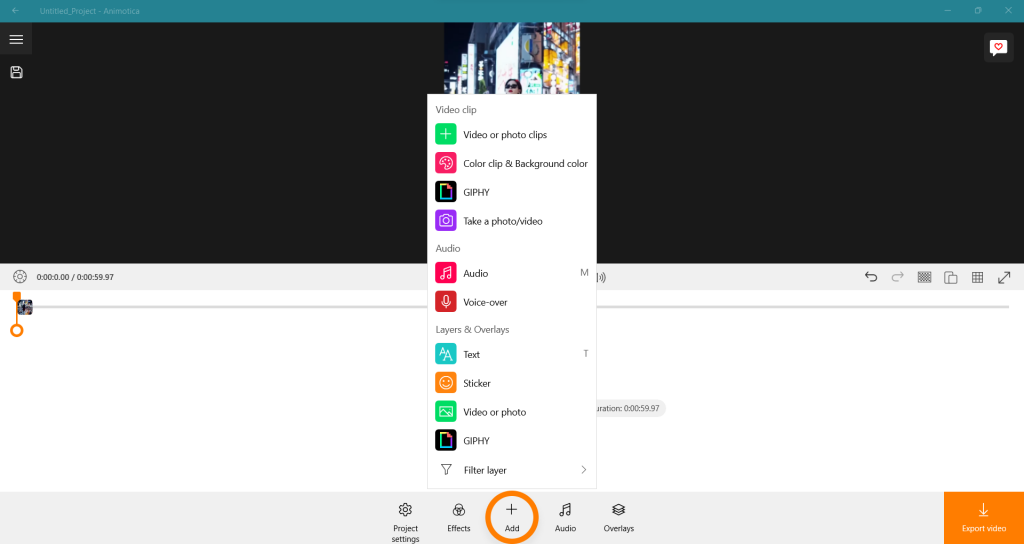
See the ‘+ Add video/Photo’ button at the bottom? Click that. Navigate to the YouTube video file on your computer and select it. Click ‘Open,’ and your video is successfully uploaded! Yes, it’s that simple – just like we promised.
You’ve just completed the most fundamental step to turn your YouTube content into Instagram-ready videos. You’re now ready for the next exciting step – video editing!
Step 3: Select an Aspect Ratio for Instagram
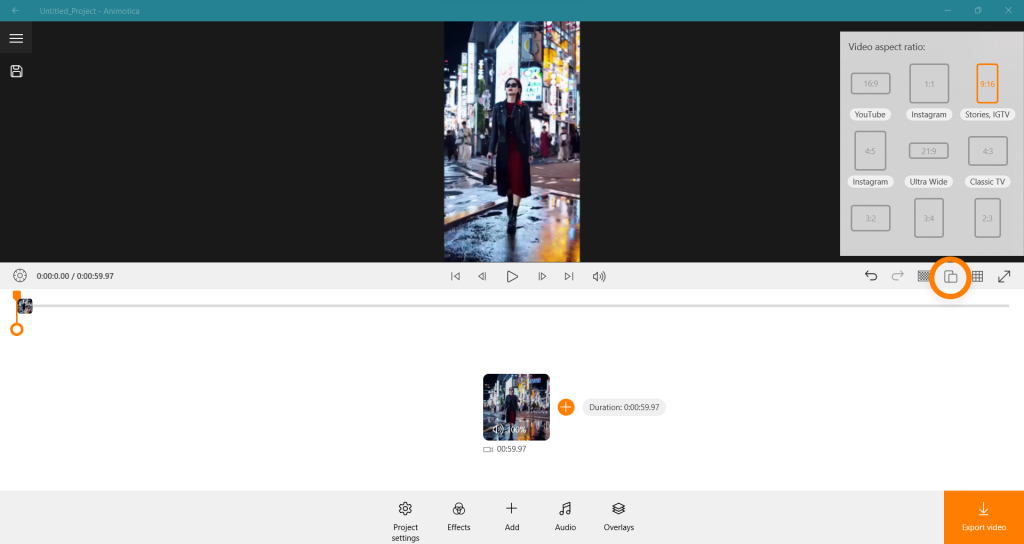
When sharing a YouTube video on Instagram Reels, it’s crucial to film in a 9:16 aspect ratio. But don’t sweat it if your video comes in a different ratio. With Animotica, tweaking ratios is a breeze.
- Select the Aspect Ratio icon and pick out 9:16 (Stories, IGTV).
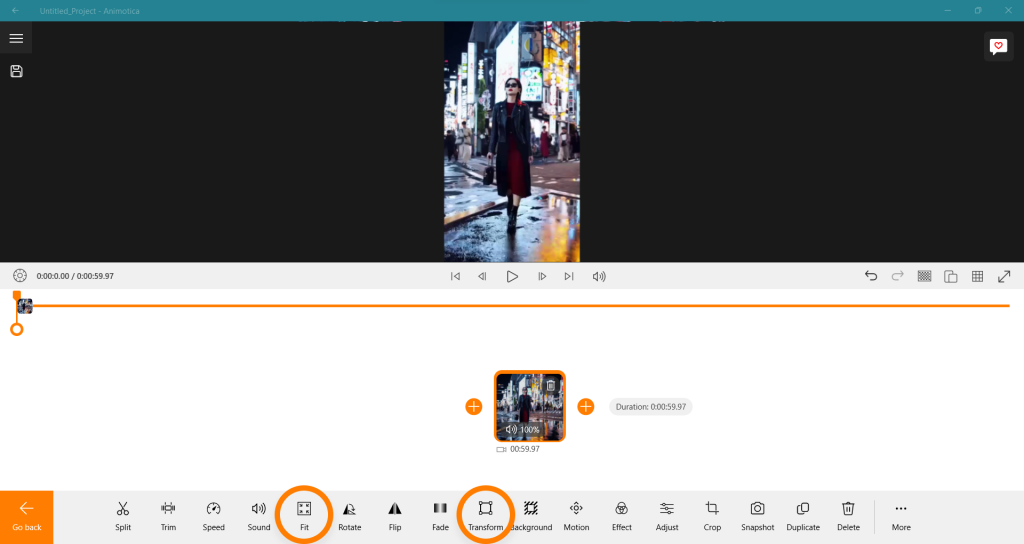
However, adjusting might result in parts of the frame being cut off. To correct this, you have two easy options:
- Choose the Fit option to ensure your entire frame is visible.
- Opt for Transform and adjust the Scale for desired frame coverage.
Step 4: Edit Your Video for Aesthetic Appeal (Optional)
Once your video is loaded in Animotica, you can tailor it to your style or brand. Though this step is optional, making your content more engaging, interesting, and branded is highly recommended. You want your videos to convey a message and appeal aesthetically to your Instagram audience.
Inside the editing interface of Animotica, you can easily trim your video, split it, and even merge it with other clips. Animotica’s array of custom features allows you to add filters, transitions, and effects with a simple button click. You can also adjust brightness, contrast, and saturation to enhance the overall visual quality further.
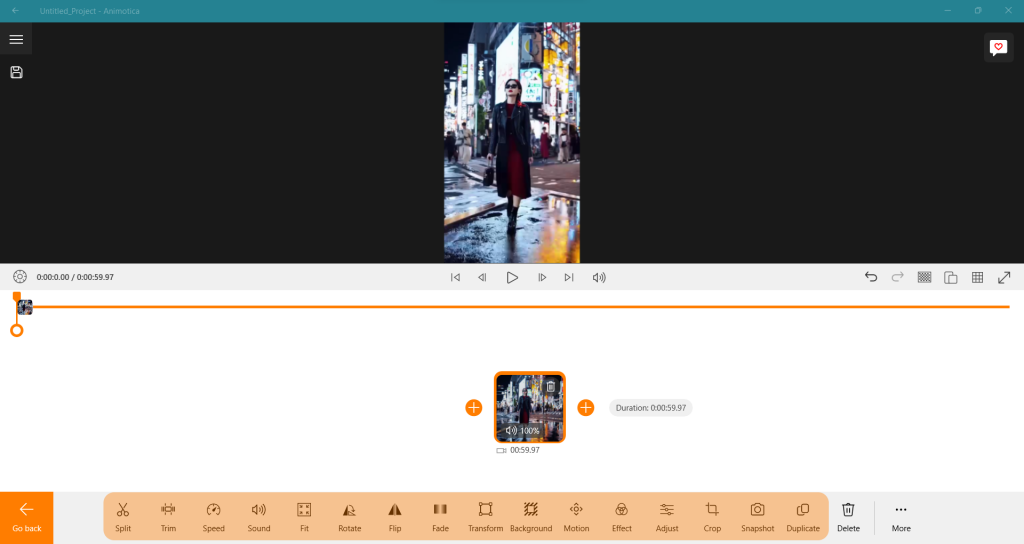
Planning on adding some text or voice-over? Animotica has you covered. You can overlay text, stickers, or audio clips, choosing from various fonts and colors. The voice-over feature allows you to add a more human touch, and it’s as easy as pressing the record button.
The ultimate goal is to make your YouTube video as Instagram-loving as possible, and with Animotica’s user-friendly editing features, it’s a cinch. Remember, a more polished and attractive video will stir more engagement, likes, shares, and saves on Instagram. So why not add that extra creativity to your content and make it stand out?
Step 5: Export Your Video
Made your video with Animotica and ready to share it? Don’t forget to save it to your computer first. Here’s a quick guide for you:
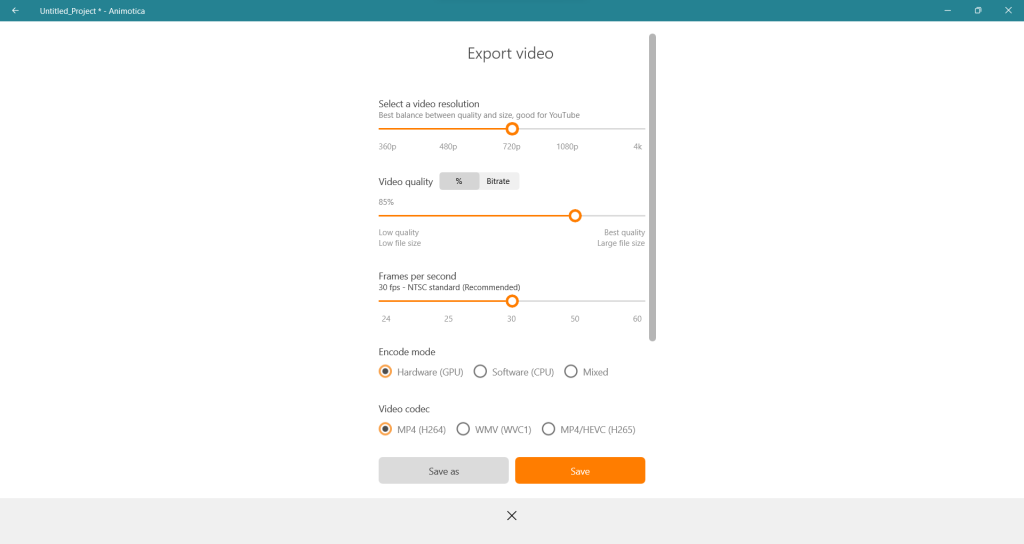
- Click ‘Export Video’ at the bottom right of your screen. You’ll see a menu with different options.
- Pick your desired quality. Animotica offers you a range of choices like HD, Full HD, and 4K.
- Hit ‘Save As’ and choose where you want to store your video.
Animotica then begins exporting your video. The time it takes depends on the size and quality of your video. But rest assured, when it’s done, you’ll have a high-quality video that’s sure to engage your viewers.
Remember, the video file format and quality you pick can significantly affect your final product. So, make sure to choose settings that align with your goals. For top-notch YouTube content, go for the highest resolution. But if you’re worried about storage space or upload speed, then you might want to lower the video quality a bit.
How to Share YouTube Videos as Instagram Reels
Instagram’s feature, Reels, is a great place to share your YouTube videos with more people. Because of format differences, it might seem tricky at first. However, with the user-friendly functions of Animotica, you can quickly adapt your YouTube content for Reels. Ready to share your YouTube Videos as Reels? Let’s get started!
Step 1: Transfer a Video from PC to Phone
Need a quick refresher on how to move a video from your desktop to your mobile device? We’ve got you covered! Check out our detailed tutorial, How To Transfer Files From Phone to PC . The process works both ways, making transferring files from your PC to your phone a breeze. Don’t delay; start today and invite your YouTube videos into the Instagram sphere!
Once you’ve seamlessly transferred your video from your PC to your smartphone, it’s time to start crafting your Instagram Reel.
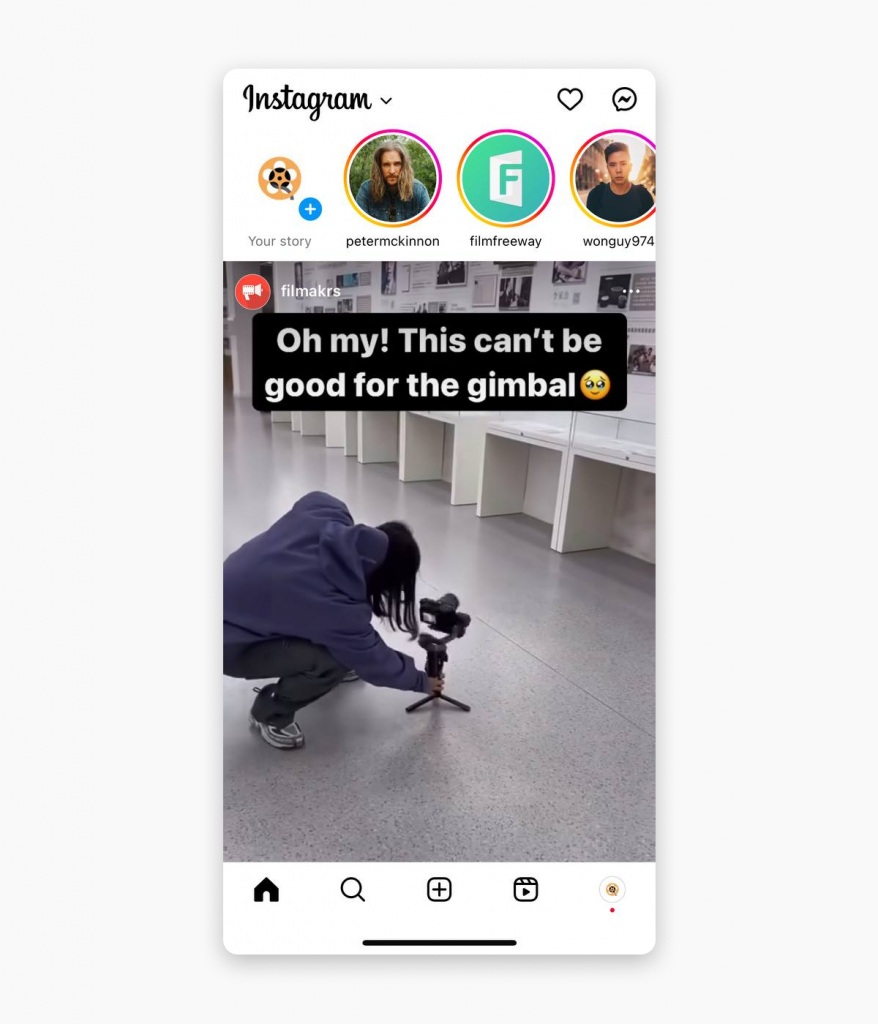
Step 2: Open Instagram and Navigate to Reels
Launch the Instagram app on your phone. At the bottom of the screen, you’ll see the + icon. Tap on it to start creating your Reel.
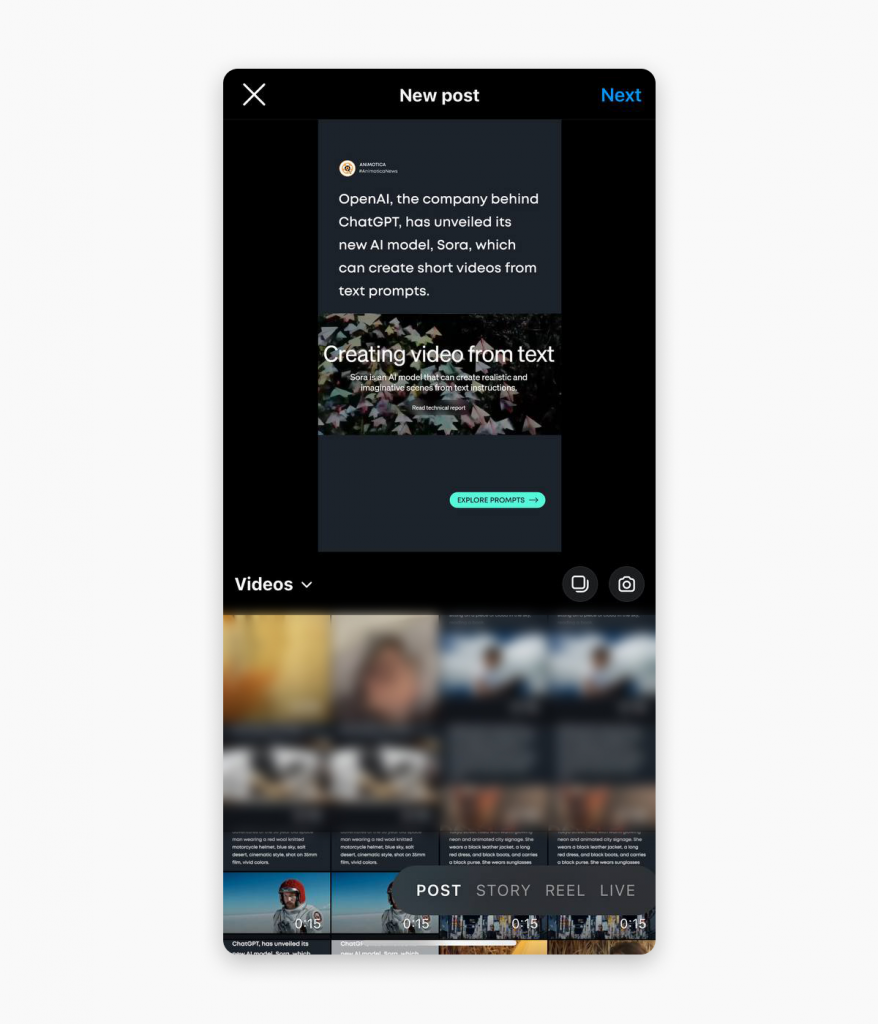
Step 3: Upload the Video
Locate and select the transferred YouTube video from your phone’s gallery. Finally, press the ‘Next’ button, and your video will be imported into Reels.
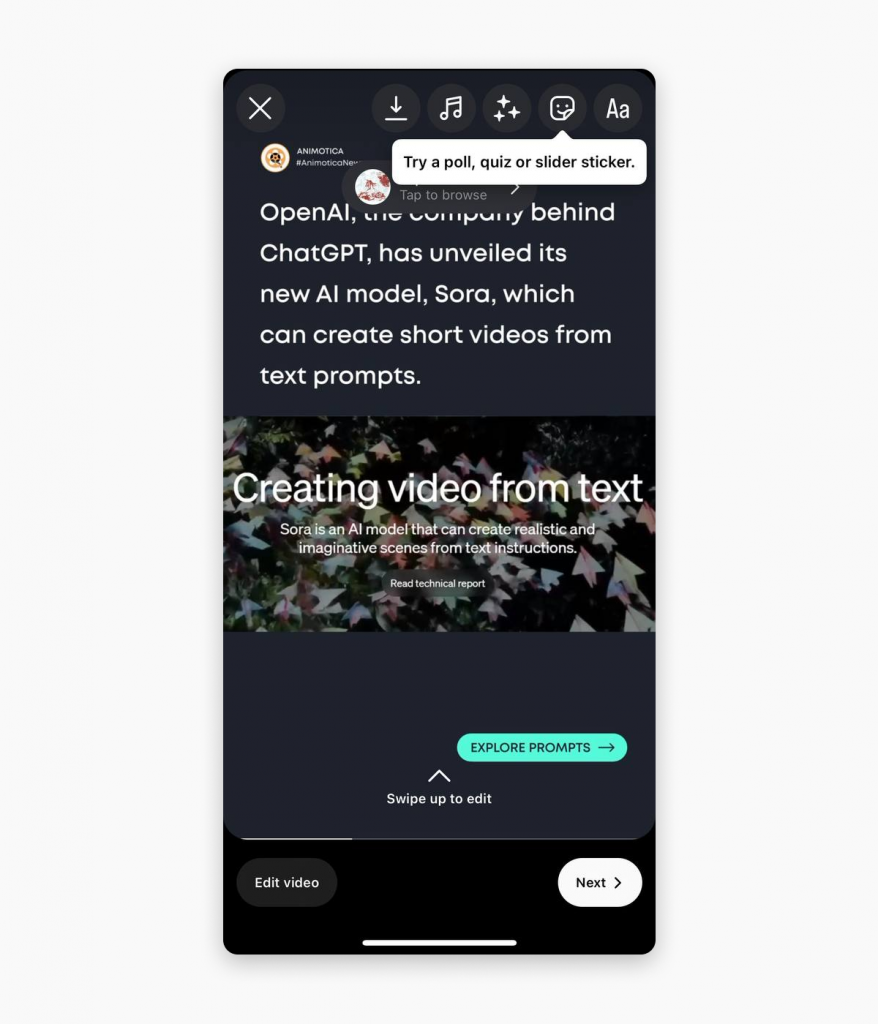
Step 4: Edit Your Video If Required
If your video needs any adjustments or enhancements, Instagram Reels offers editing tools for adding filters, polls, quizzes, slider stickers, changing the speed, and adding music. Feel free to explore and enhance your video’s aesthetic appeal.
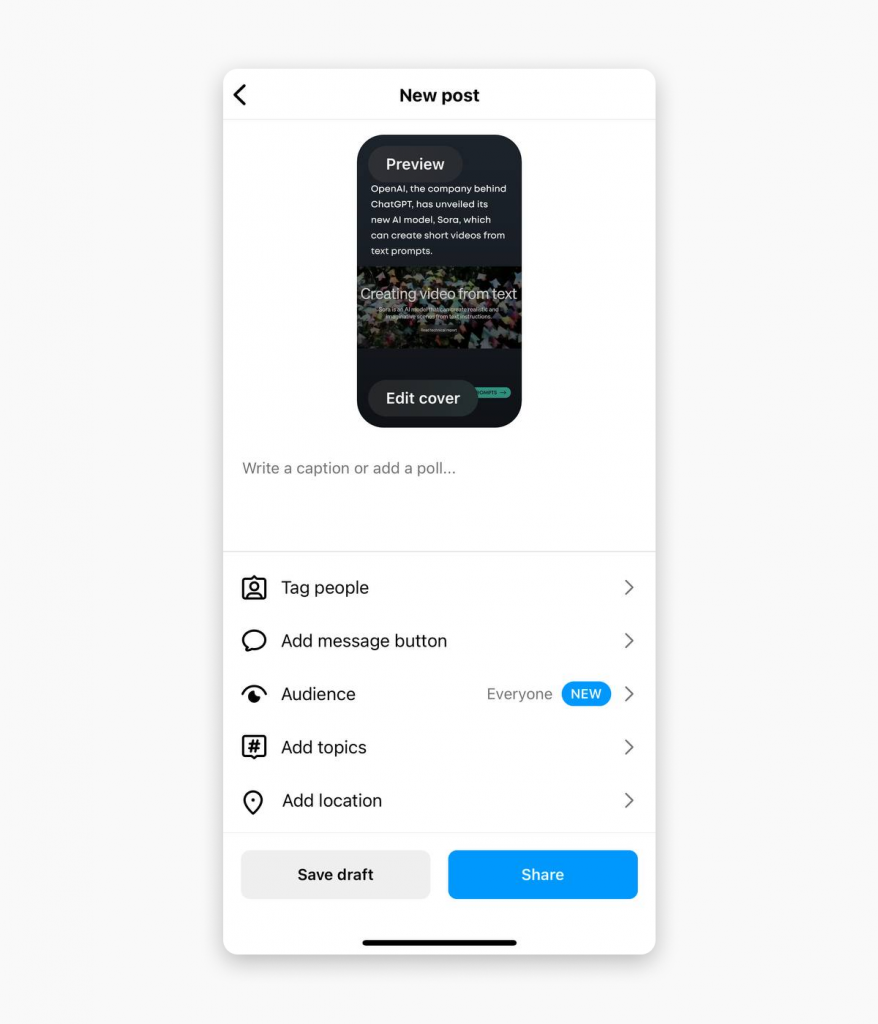
Step 5: Share Your Reel
Once you’re happy with your video, it’s time to share! Tap the right arrow, then add captions and hashtags to improve discoverability. You can choose whether you want it on your Reel feed or your main feed. Press ‘Share’, and there you go – your YouTube video is now successfully posted as an Instagram Reel!
Remember, success in video marketing is about getting the right content in front of the right audience in the correct format. Thanks to Animotica, sharing YouTube videos on Instagram as posts, stories, or reels is now easier than ever. Download Animotica today and start achieving your video marketing goals!
How to Share YouTube Videos as Instagram Stories
Now that you’ve learned how to turn your YouTube videos into Instagram-ready content and share them as Reels let’s explore another handy trick. In this part, we’ll show you how to post your YouTube videos as Instagram Stories. This guide will give you more ways to boost your Instagram activity using your YouTube videos. So, are you set to discover how to share YouTube videos on Instagram Stories?
Step 1: Transfer a Video from PC to Phone
As discussed earlier, check out our handy guide on moving files from your device to your PC and vice versa. Revisit our detailed tutorial, How To Transfer Files From Phone to PC. Get started now and bring your YouTube videos to the Instagram world!
Step 2: Open Instagram and go to Stories
Want to post your YouTube content on Instagram Stories? Excellent! Click on your profile picture at the top left of your Instagram home screen. Doing this will open your Instagram Stories, a fun place to share engaging content for 24 hours. It’s a great spot to share spontaneous moments, exclusive sneak peeks, or interact with your followers in real time. Once your Instagram Stories are open, you’ve moved closer to sharing that YouTube video and reaching a larger audience.
Step 3: Choose a Video to Your Story
After the initial preparations, it’s time to make your selection. Which YouTube video will you bestow the honor of gracing your Instagram story?
Here’s how you go about it: a quick upward swipe will reveal your gallery. Here, you’ll see the fruits of your hard work—the YouTube videos you’ve meticulously converted and optimized with Animotica. Pick the video you think would resonate the most with your Instagram audience. The moment you lock your choice in, the selected video will spring to life on your Instagram story creation screen, ready to captivate and entertain.
Step 4: Share Your Video on Instagram Stories
Once you’ve selected the right video and it’s prepped, it’s time to get it out there. At the bottom of your Instagram Story screen, you’ll see a button labeled ‘Your Story.’ All you have to do is tap this once, and voila! Your YouTube video is now seamlessly shared as an Instagram Story, easily accessible and ready to engage your audience. Remember, sharing quality content becomes effortless when you have the right tools like Animotica.

How to Share YouTube Videos on Instagram Story as a Link
Sharing YouTube videos as a link on Instagram Stories offers an innovative way to engage with your audience. However, it can seem quite challenging due to Instagram’s specific format requirements. But don’t worry, we’ve got your back! Here’s how you can do it effortlessly:
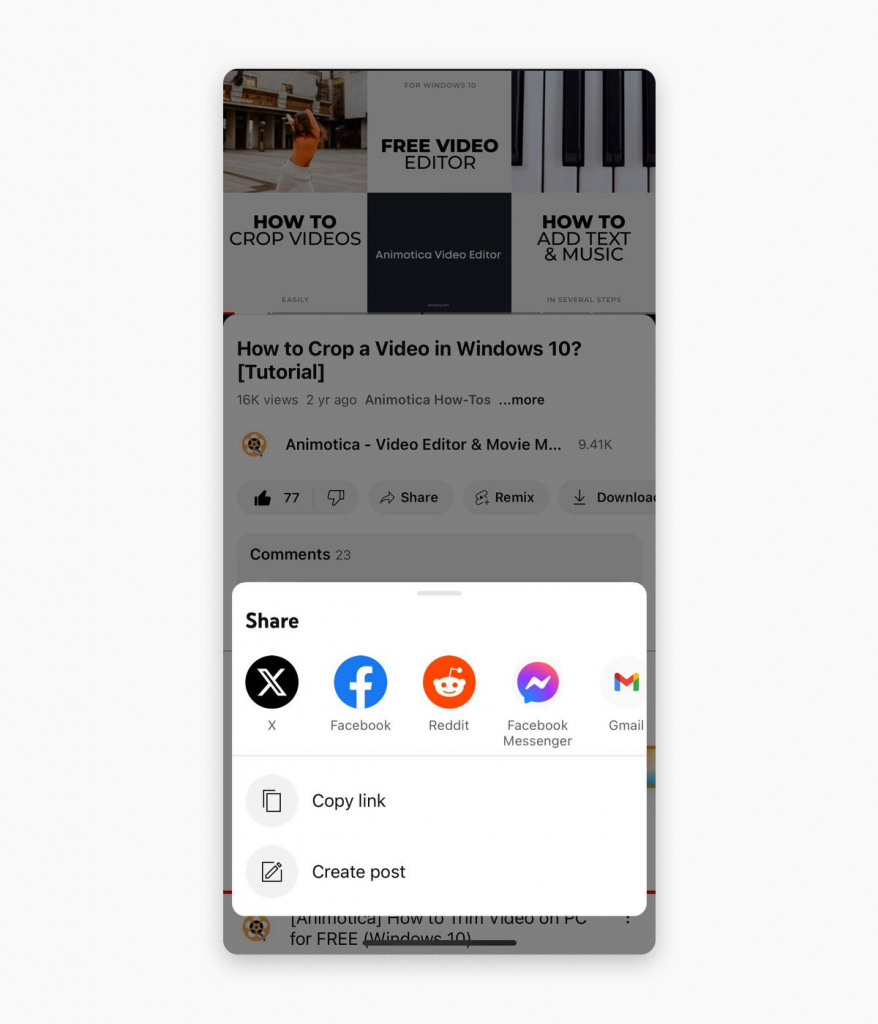
Step 1: Copy the YouTube Video Link
First, head over to YouTube and find the video you’d like to share on Instagram. Click the ‘Share’ button below the video and copy the link.
Step 2: Open Instagram and go to Stories
Tap on your profile picture at the top left corner of your Instagram home page to open Stories.

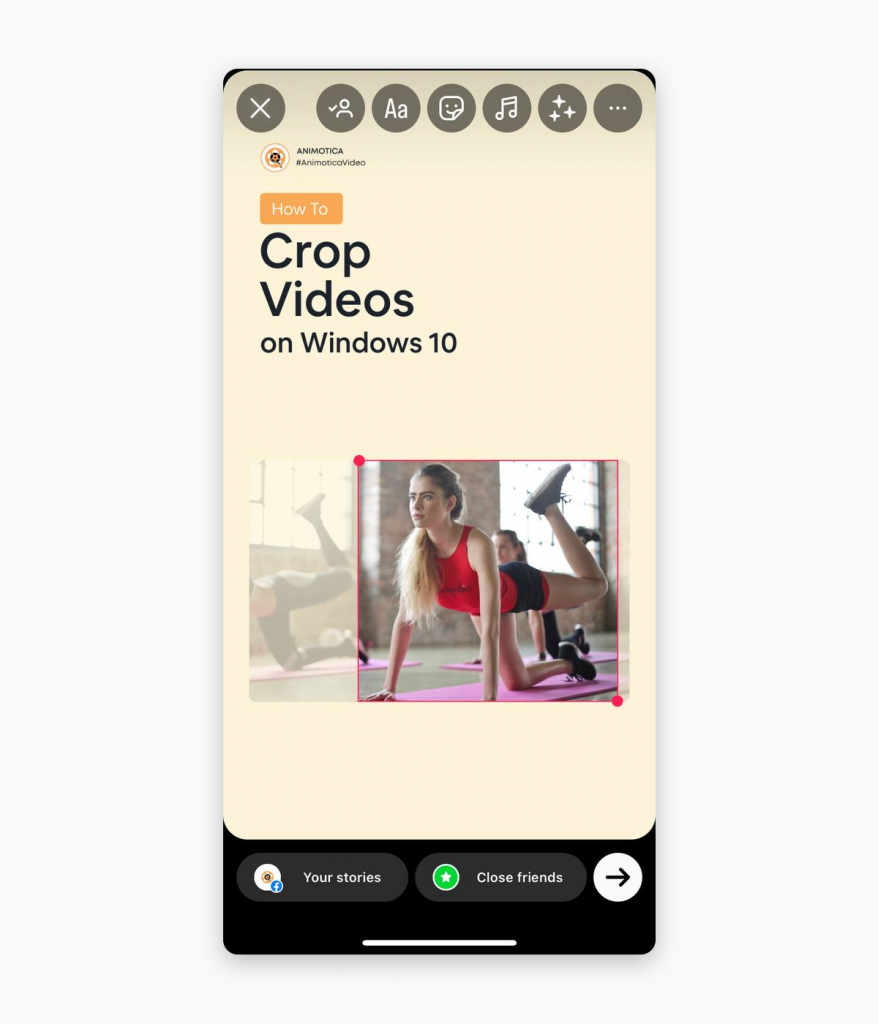
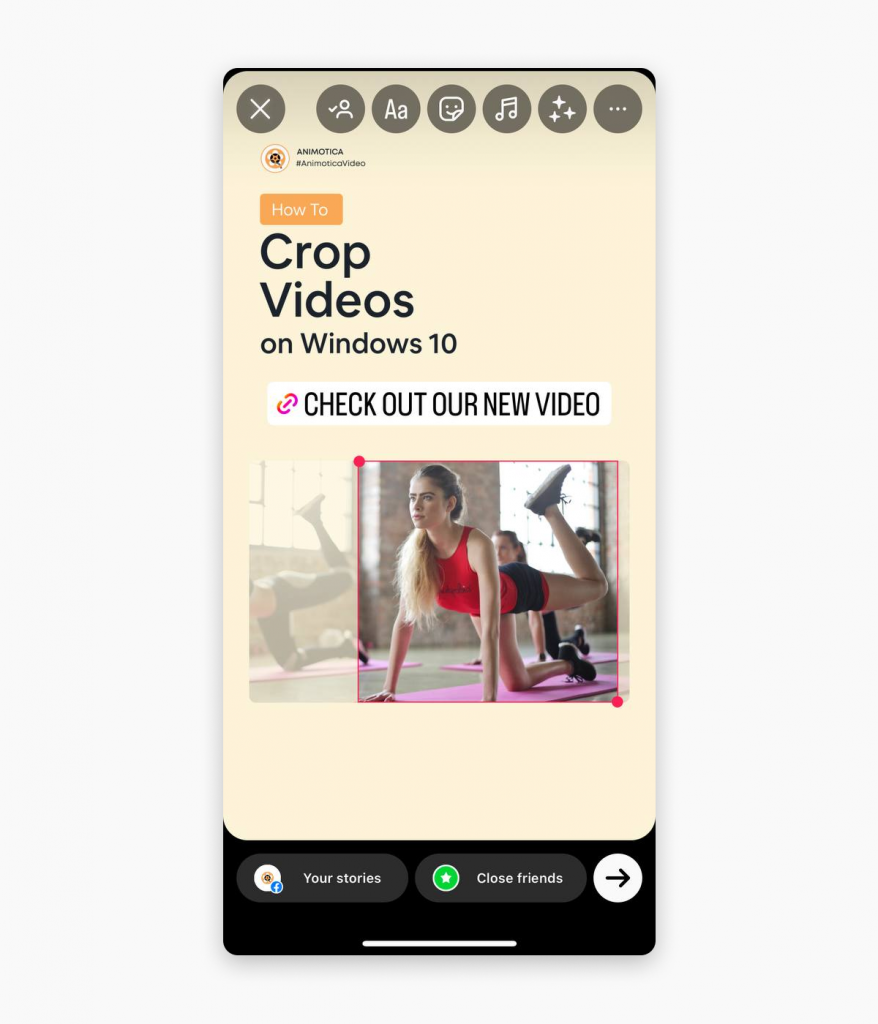
Step 3: Add a Photo, Video, or Sticker to Your Story
You can create a captivating visual accompaniment to your YouTube video link. Choose a relevant photo or short video, or use a sticker to garner attention.
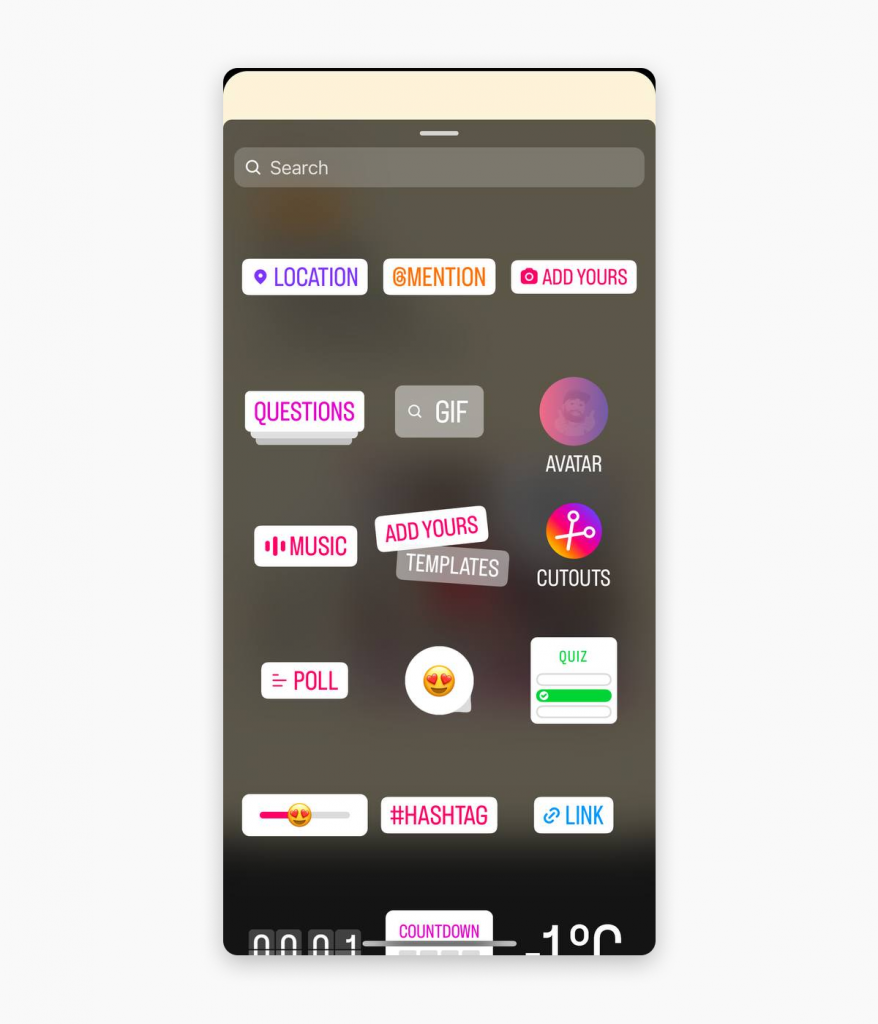
Step 4: Add the Video Link Sticker to Your Story
Now, swipe up to see Instagram Stories editing tools, such as locations, GIFs, music, and link stickers – that’s what we need!
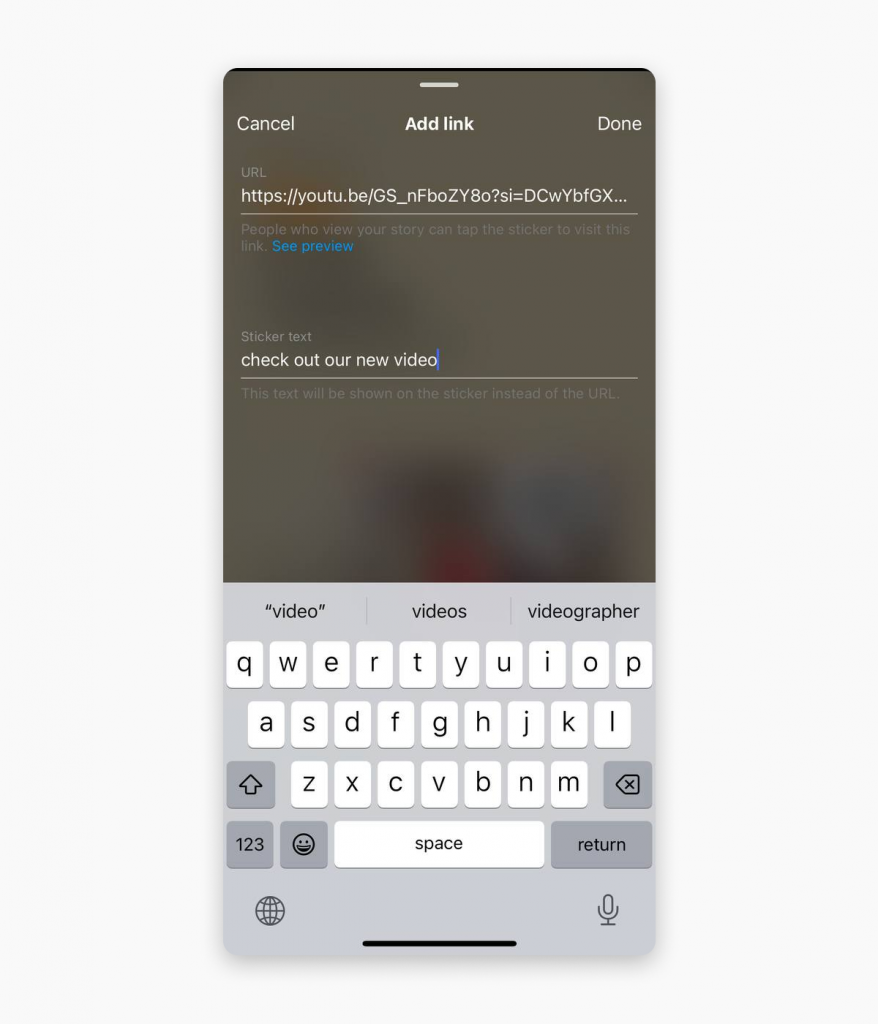
This is where you insert the copied YouTube URL. After pasting the link, tap ‘Done.’ That’s it! Your YouTube video link is now part of your Instagram story.
Step 5: Share Your YouTube as a Link Sticker
Hit ‘Your Story’ at the bottom of the screen, and your story with a link sticker that leads to your YouTube video is now seamlessly shared as an Instagram Story. Sharing quality content is easy with Animotica.
5 Tips for Seamless Cross-Platform Sharing of YouTube Videos on Instagram
Seamless video sharing between YouTube and Instagram is a significant need for creators, influencers, and businesses. To add value to your content distribution strategy, let’s review some essential tips using Animotica for smooth cross-platform sharing.
- Pay attention to the Video Format: Instagram has specific video format requirements. Aim for an optimum aspect ratio to ensure your YouTube content displays well on Instagram. Animotica allows you to adjust the aspect ratio of your video to Instagram-friendly settings like 1:1 (for square posts), 4:5 (for vertical posts), and 9:16 (for stories and Reels).
- Keep It Short and Crisp: Instagram is popular for its brief, captivating material. With Animotica’s easy-to-use and intuitive editing tools, you can effortlessly modify your YouTube videos to suit Instagram’s video format rules. Shorten your videos to 60 seconds for Instagram Reels, or trim them to a quick 15 seconds for Instagram Stories. By making short and engaging content, you can notably increase engagement levels and widen your audience reach.
- Edit for Engagement: Make your videos more attractive and engaging by leveraging Animotica’s editing features. You have several options, from adding text and overlays to fine-tuning color and applying filters. Remember, the aim is to make your YouTube content Instagram-worthy, driving higher engagement and broader reach.
- Don’t Ignore the Thumbnails: Attractive thumbnails can significantly increase your video click-through rate. A good thumbnail acts as a preview of what your audience can expect from the video, alluring them to watch.
- Properly Export the Video: After editing, ensure you correctly export your video with Animotica, selecting the best quality settings for Instagram. This step links to Instagram’s platform-specific video upload rules and helps avoid unnecessary video compression.
These tips aim to make your video-sharing process from YouTube to Instagram a breeze. Remember, successful Instagram content often requires tweaking and editing of your YouTube content, and a reliable tool like Animotica plays a crucial role in this. So why wait? Start creating, editing, and sharing your YouTube content on Instagram today!
Conclusion
Sharing your vibrant YouTube content on Instagram should be a seamless process, not an exercise of frustration. Traditional methods have proven limited, requiring content creators and businesses to make inconvenient compromises. But with Animotica, you can convert, edit, and optimize your YouTube videos for Instagram effortlessly, overcoming any obstacles in video format and aspect ratio.
An optimized Instagram video promises improved engagement from followers and potentially attracts a broader audience. Weighing the significant benefits of this smart, user-friendly tool against the hardships of not using it makes a clear case: Animotica is an essential component in your video marketing toolset.
By following the steps outlined in this guide, you can easily transition from struggling to navigate Instagram’s limitations to effortlessly sharing your YouTube content in a way that truly resonates with Instagram’s user base. It’s not just about sharing – it’s about reshaping your content to match the Instagram environment better, ultimately leading to more views, likes, and shares. Isn’t it time your content got the exposure it deserves?
Isn’t it time you downloaded Animotica and experienced the unrivaled perks of effortless YouTube to Instagram video sharing? Experience it today and step into a realm of unlimited video-sharing possibilities. Download Animotica and unlock the full potential of your content. We can’t wait to see what you share next.