
In this article, you will learn how to make Hollywood-Style movie filters with 3D LUT effects in a few easy steps.
Let’s take a look at the collage below. How do you take your shots from A to B?
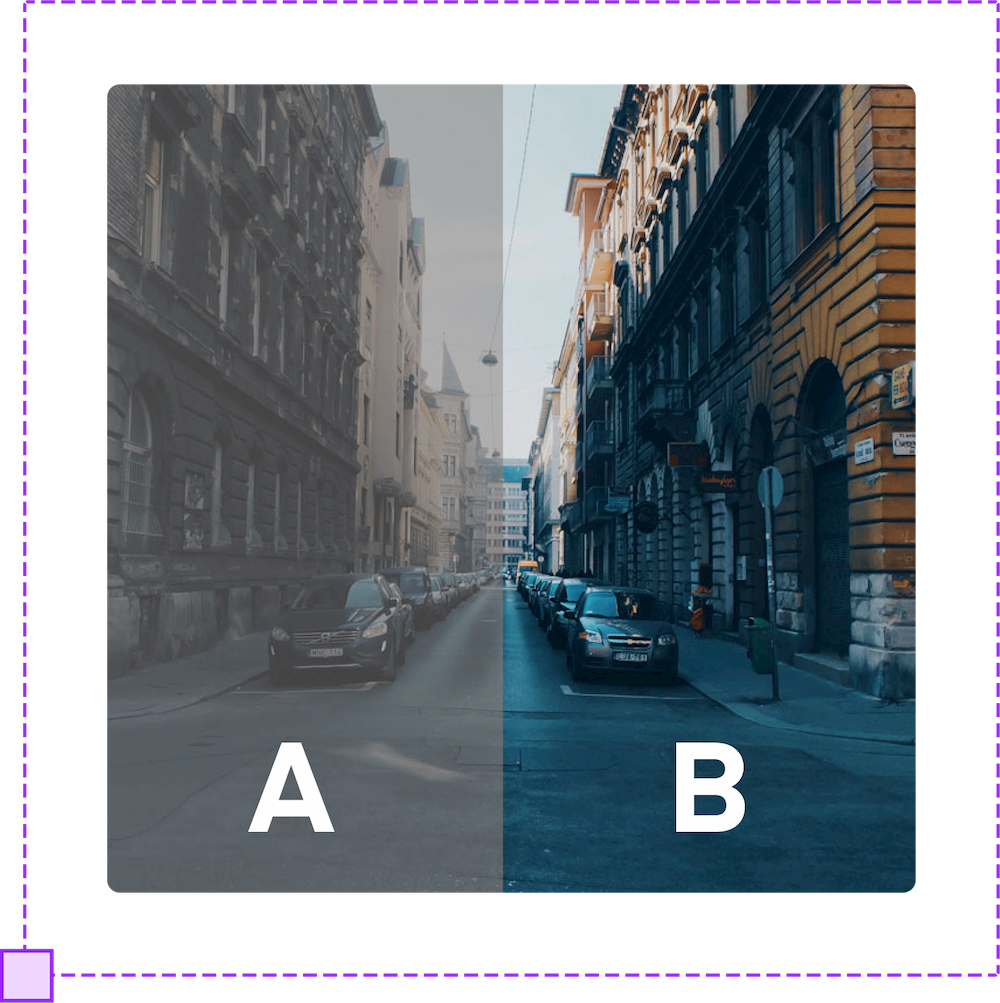
Perhaps, the common way to do that is through color correction and color grading. But over the years, better and faster techniques of doing this have emerged. One such technique is the use of Look Up Tables—simply known as LUTs.
In this article, we’ll be walking you through the fundamentals of 3D LUT effects, where you can get them for free and how to use them in your favorite video editor, Animotica!
Let’s dive into it.
Contents
What is a LUT?
As already stated above, LUT is short for Look Up Table. In the simplest terms possible, a video LUT is a tool that contains a specific set of filters/color grading presets that can be applied across all kinds of video editing software.
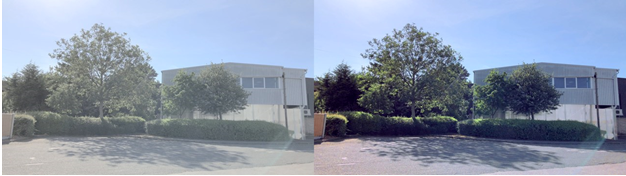
Again, let’s take the picture above as an example. To transform frame A to frame B, instead of manually adjusting the saturation, exposure, white balance, contrast, etc., we can simply do that with one click by selecting a LUT filter.
This technique can be used to achieve spectacular results because it saves time and energy.
Credit: Affinity Spotlight
There are two popular types of LUTs. They are 1D and 3D LUTs.
Let’s see how they stack up against each other.
1D vs. 3D LUTs
A 1D LUT is a simple table that comprises just three data mappings. These data mappings are for Red, Green, and Blue colors. Each of these colors is treated separately. Thus, making a change to a blue mapping will only affect the blue value and not the green or red one.
In general, 1D LUTs are simple and only efficient for changing basic parameters such as contrast, brightness, and black and white levels.
For more complex adjustments, we turn to 3D LUTs.
A 3D LUT adopts a three-dimensional cube structure containing all the possible outcomes of mapping input color values against output color values. It has a .CUBE extension.
3D LUTs give you a far better adjustment capability, and that’s why they’re used quite a lot by filmmakers.
How to do Color Grading with 3D LUT Filters on Windows 10
While the definition and technical terms may sound complicated, using LUT filters is actually very simple.
Right here, we’ll be showing you how to do that in Windows 10/11.
Animotica just recently launched an update, which includes a bunch of new transitions, special effects, and a LUT effect tool!

The best part about this is that you can choose to apply this filter all over your clip or use them at specific points within the clip. You’ll see all that in a sec.
Excited yet? Let’s jump into it.
How to Add LUT filters to Your Video
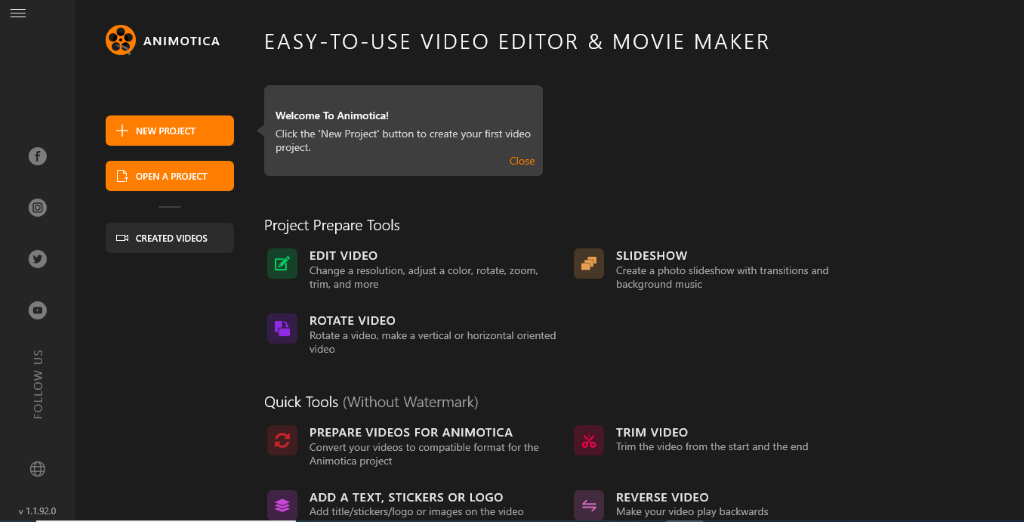
Step 1: Download and Launch Animotica
If you don’t have Animotica yet, you can download it here for free. Next, launch the app and hit New Project.
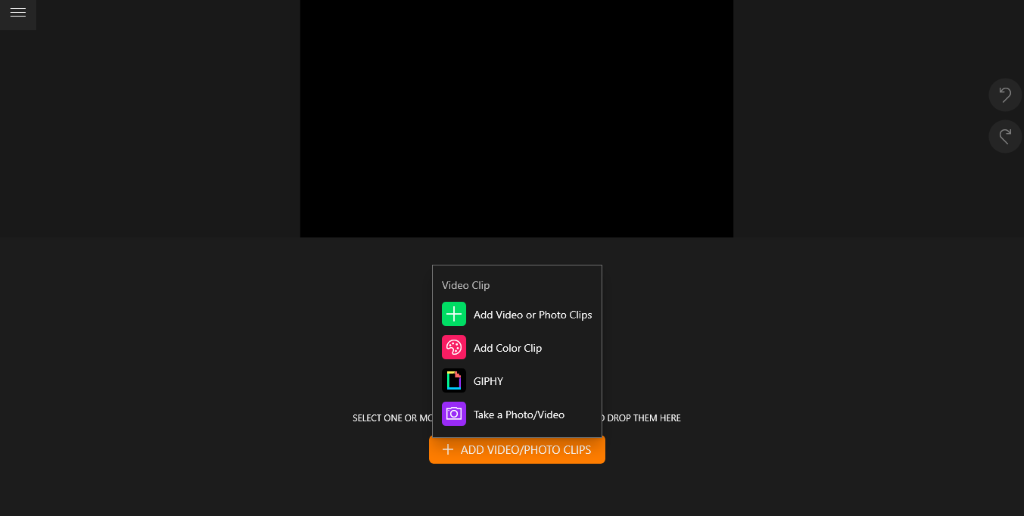
Step 2: Upload your Project Files
After clicking on New Project, you’ll be taken to your project window where you’ll upload your files. To do this, click on Add Video/Photo Clips. Select Add Video or Photo Clips. From here, you can navigate to wherever you’ve stored your files, select them and hit Open.
You should, afterward, should see a page like the one below.

Now it’s time to add the LUT effect to your clip.
Step 3: Add the LUT Effect
First, tap on Overlays. Then, hit on either the orange + sign or Add Overlay. Next, click on Filter Layer. From the popup, select 3D LUT Layer.
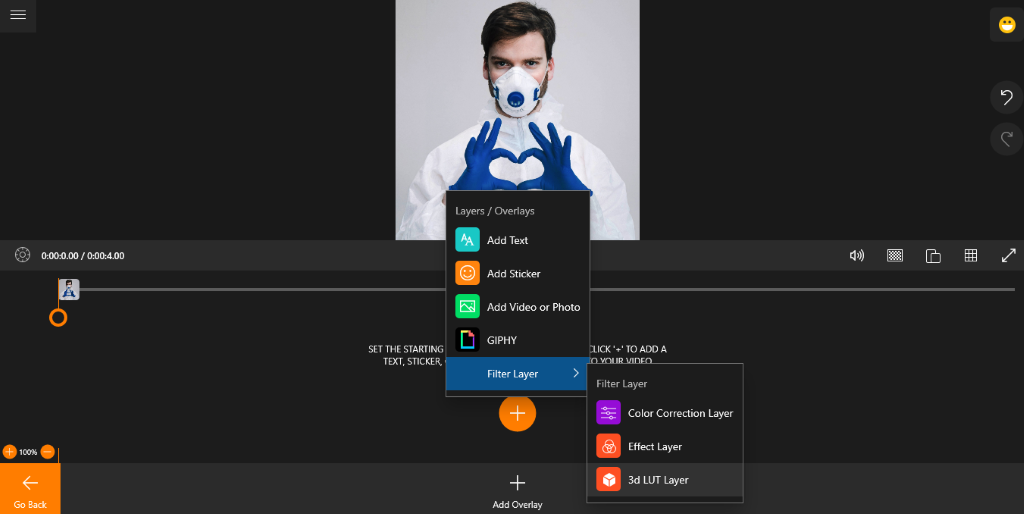
You will get to a new tab where you can add your desired 3D LUT filters.
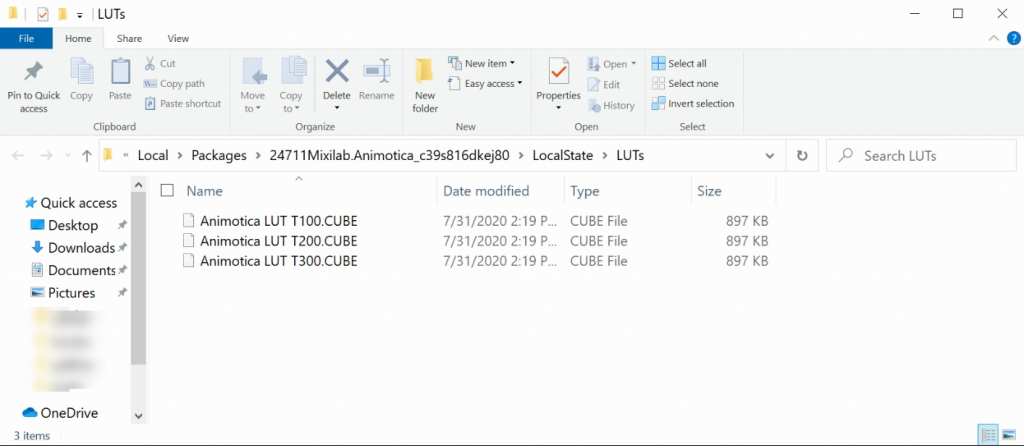
By default, Animotica comes with three 3D LUT filters, which you can access by clicking on Select a 3D LUT Filter.
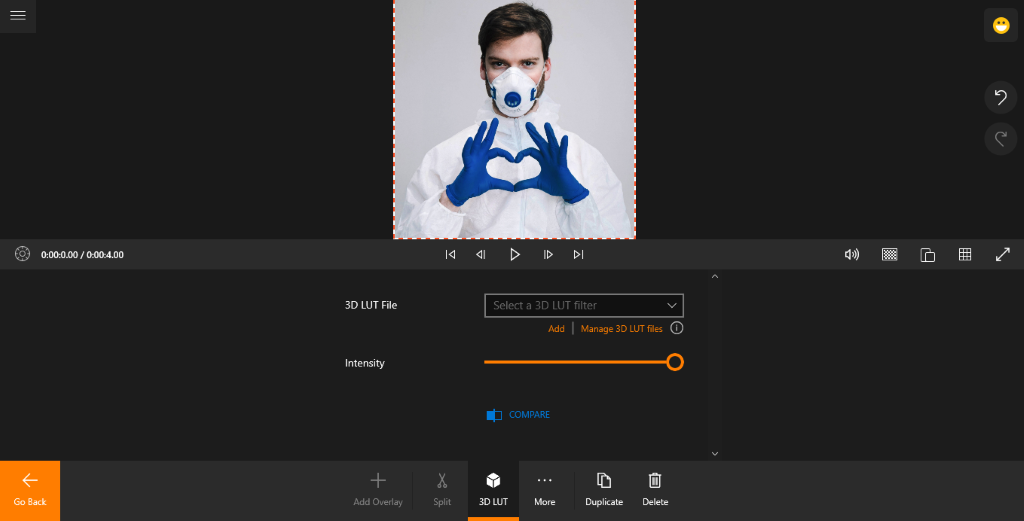
After making your selection, you can also increase or decrease the intensity of the LUT effect by moving the Intensity slider.
You can also download 3D LUT filters from the internet and use them in Animotica by simply clicking on Add, just under the Select a 3D LUT menu (more on that soon!)
Once you’re done selecting your LUT filter, you can tap on either Go Back or 3D LUT to move back to the previous window.
Step 4: Adjust the Position of the LUT Filter
This is one interesting feature you might like. You can apply the LUT filter at specific parts of your clip or use it all through the clip.

You can do this by simply adjusting the length and position of the bar in the Overlays Window.
Step 5: Save your Work
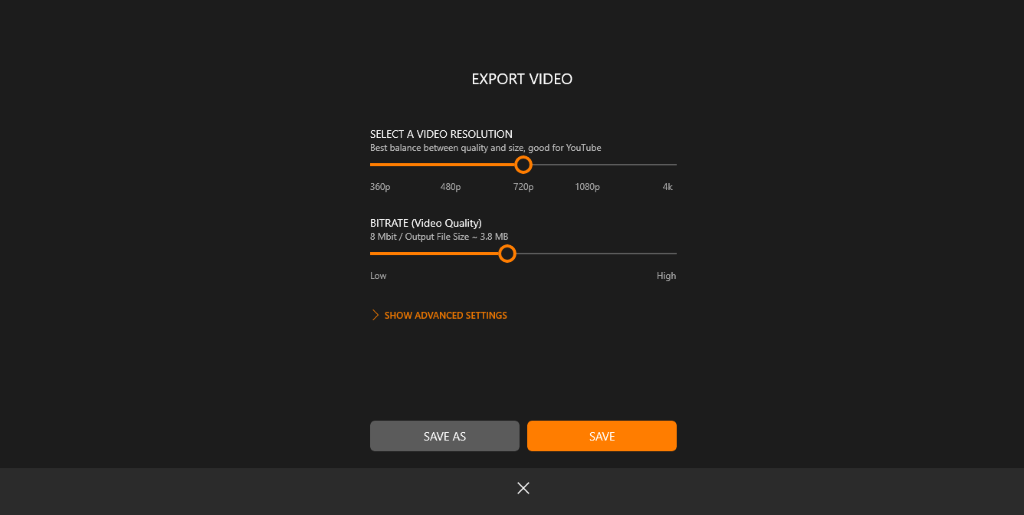
Once you’re done, you can proceed with exporting your project by clicking on Save Video.

On the next window, it is recommended you leave everything else at the default setting since Animotica chooses the best balance for your videos in terms of quality and size.
Click on Save As. Input a file name and hit save.
At this point, you’re pretty much done. Just let Animotica finish off the rest!
How to Add Your Own LUT Filters to Aimotica
There are two ways to add LUT files with .CUBE format to Animotica once you’ve got to the LUT menu.
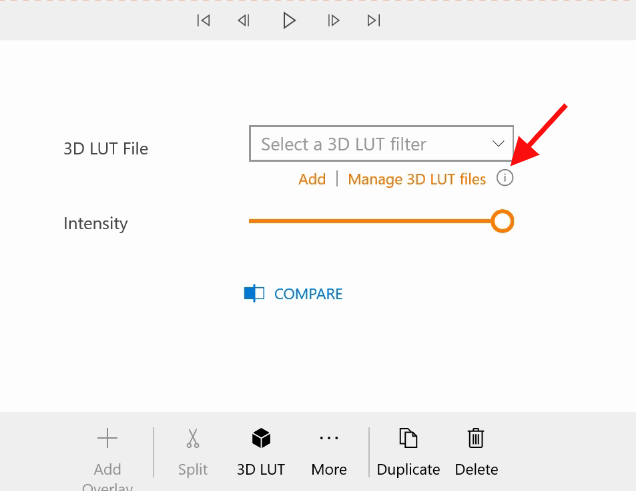
- Click Add and select the LUT files, which you want to add to your video. This way, files will be copied into the Animotica folder and added to your LUT filters list in the software.
- Click Manage 3D LUT files and drag files or a folder with .CUBE files. Relaunch the app.
If you’d like to remove or rename LUT filters, use Manage 3D LUT files button and relaunch Animtoica.
Top 10 Websites for Free LUT Downloads
LUTs are fantastic because you can use them anywhere! Thus, generous video makers allow their color grading presets to be used by other video editors. Animotica provides you with a few LUT filters. If that’s not enough for you, you can upload LUT from other websites and add it to Animotica. These free LUTs are available on a few websites, and we’ll be showing them to you right away.
- Ground Control Color
- Juan Melara
- Color Grading Central
- SmallHD
- DeLUTs
- Frank Glencairn
- RocketStock
- PremiumBeat
- Lutify.me
- LPTguy
Download free LUTs from the above websites and use them in Animotica, as already described in the 5th paragraph of Step 3.
Bottom Line
Please note that while LUTs are so convenient to use, they shouldn’t diminish your knack for artistry. Ensure you shoot your videos with the right camera, apply adequate lighting, and keep improving your craft.
Be sure to drop any questions and suggestions, and we’ll be taking note of them!
Thanks a LUT! ?


2 Comments
This is SUPER cool!!! ?
All the appreciation and many thanks for what you offer and more success.