
As a beginner video editor, one of the first things you should know is how to delete unwanted parts from a video in Windows 10/11 or Mac, or any other OS at all.
Most times, when you film a clip, you could get some speech errors or even get interrupted while filming. The standard way of handling this situation is to keep filming and trim off the unwanted parts afterward.
In this blog, we will show you everything you need to know on how to cut out a part of the video easily if you own Windows 10/11 OS. We will consider two ways – using Windows Movie Maker (a built-in free video editor) and the best available movie maker in Microsoft Store, Animotica. If you own iOS or Android, you may want to use Videoleap, for macOS you can use iMovie.
Contents
How to Trim a Video in Windows Movie Maker
Everyone knows Windows Movie Maker (WMM) as the free video editor found on Windows PCs. But this has been replaced by Microsoft Photos, and not everyone knows how to cut a clip from a video using this new software.
Microsoft Photos can be a little intimidating, but we’ll show you how to cut out a part of the video using this tool right away.
Step 1: Launch the Photos App and Select Video Editor
You can simply search for Photos from your search bar. Once it opens, select Video Editor and hit New Project.

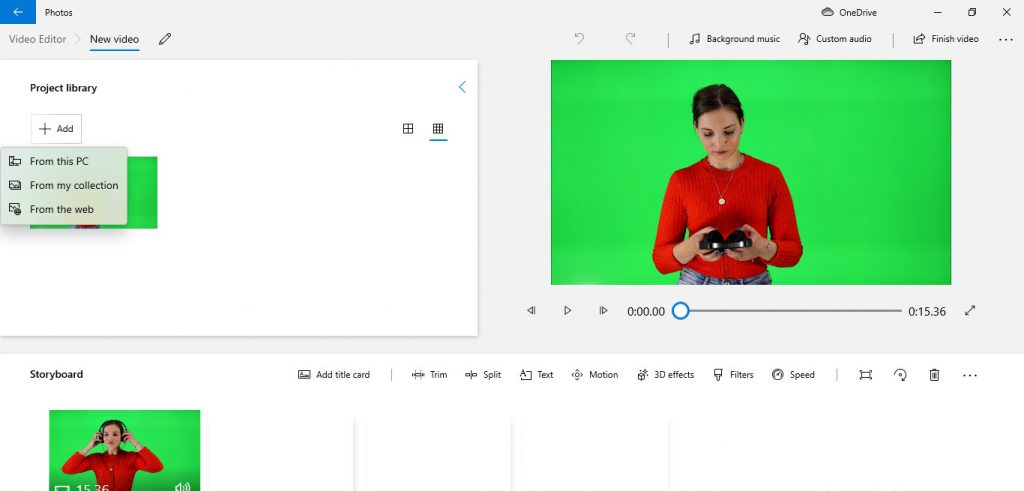
Step 2: Upload your Video File
Select Add to upload your video files to your project library. Next, drag the video down to the storyboard.
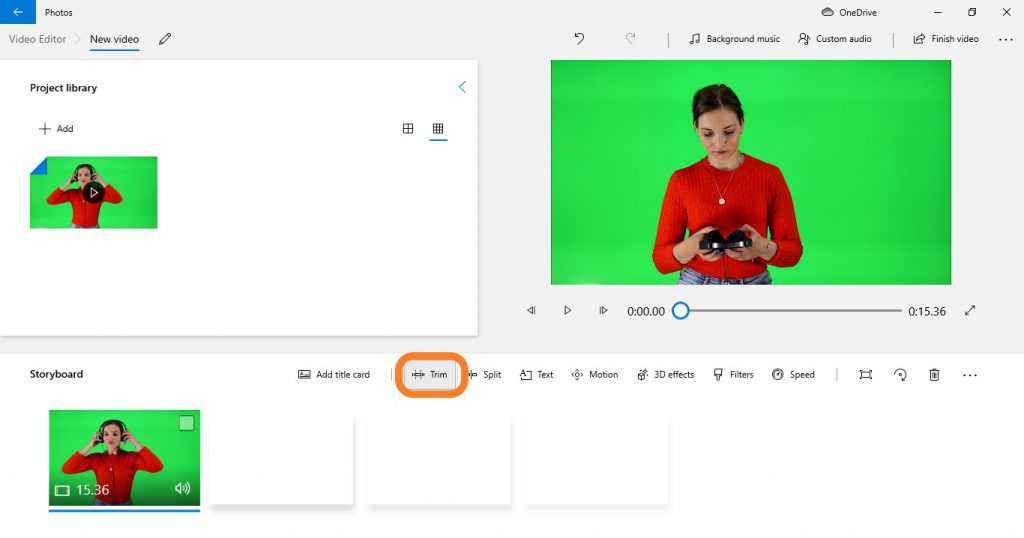
Step 3: Trim your Video
Select Trim. On the new window, you can trim from the start or the end. Once you’ve trimmed it, hit Done.
Step 4: Save your Video
Now that you’ve successfully trimmed your video, select Finish Editing to save your video. On the next window, select export, add a file name, and that’s all!
Now that you’ve seen how it’s done on WMM, would you like to know a better way of trimming your video? I bet you would! So let’s show you right away.
Best Way to Get Rid of Unwanted Parts of your Video in Windows 10/11
If you’re a Windows 10/11 user, we strongly recommend you use Animotica video editor. Animotica is a rich, easy-to-use video editor perfect for beginners like you!
Not only this is the best-selling video editing software in Microsoft Store, according to the app review score, but Animotica also lets users trim a video for absolutely free, and without a watermark. So, in case if you’d like to take clips from a video or simply get rid of the unwanted parts, this tool is the easy solution for you!?
Unlike WMM, Animotica has a very beginner-friendly interface and gives you access to more features to help you make top-notch videos in an instant!
Moreover, it takes less than five minutes to trim a video in Animotica.
Let’s show you how!
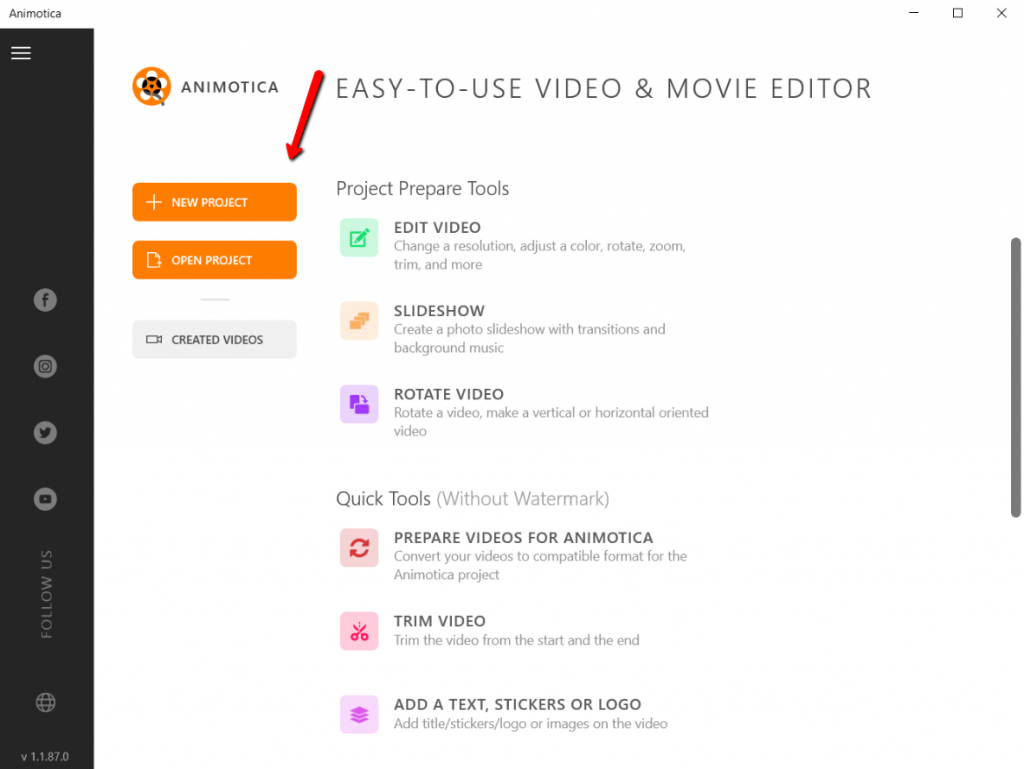
Step 1. Download and Launch Animotica
You can download Animotica video editor for free here.

(Please be aware of a watermark that would be on your video, which you can rid off forever for around $7)
Once downloaded, launch the app to start trimming. You can go two ways here – first is navigate to the Quick Tools section and click Trim Video; second, click the New Project button and find the trim feature there – this way is recommended if you’re planning to do some other changes to your video, such as adding transitions, effects, audio, etc.
Step 2. Upload your Video Clip
After you’ll hit on New Project, select Add Video/Photo Clips to upload your video files.
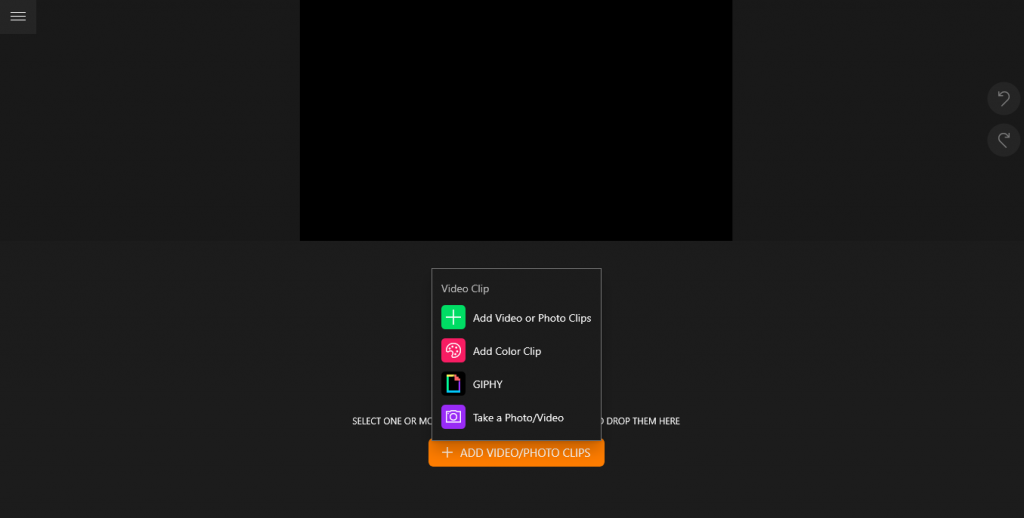
Once you upload your video, you’ll be ready to get rid of any unnecessary parts!
Step 3: Remove Unwanted Parts of your Video
You can do this by using either the trim or split feature, depending on different scenarios, which we will analyze below:
How to Remove Unwanted Parts at the Beginning or End
Did you make some mistakes at the beginning of your video, or did you include some unnecessary parts at the end? It’s not a problem at all! Here’s how to remove them.
- Click on the video thumbnail to reveal its editing tools.
- Select Trim and choose Trim Slider.
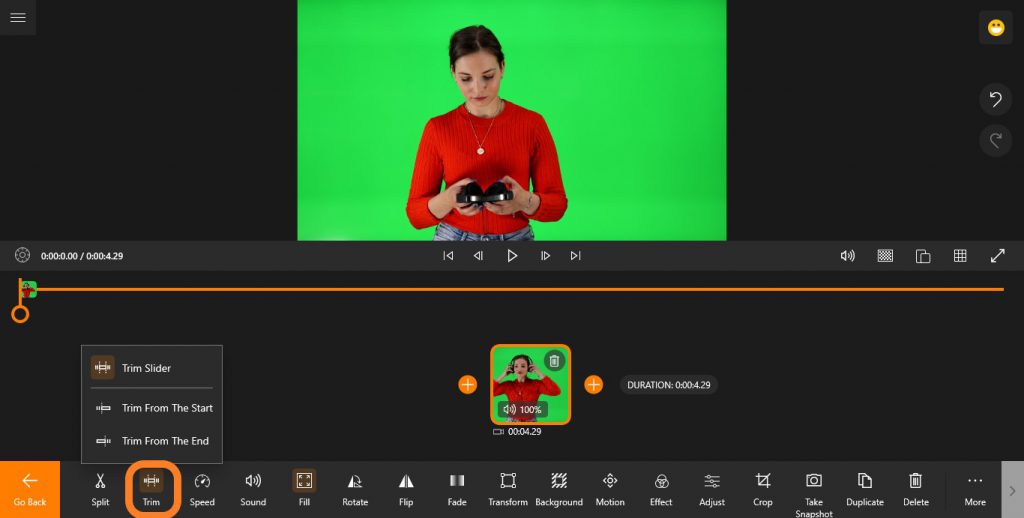
- Adjust the beginning or the end of the slider to remove unwanted scenes.

How to Cut a Clip from a Video
Did someone interrupt you in the middle of your filming or did you make mistakes halfway into the filming project? There is no need to start all over. You just need to delete a part of your video from the middle using two features. Here’s how you can cut that part off in a few simple steps.
- Drag the time slider to the specific part you want to cut off.
- Select Split to break the video into two parts. The unwanted part will now become the starting point of the second clip.
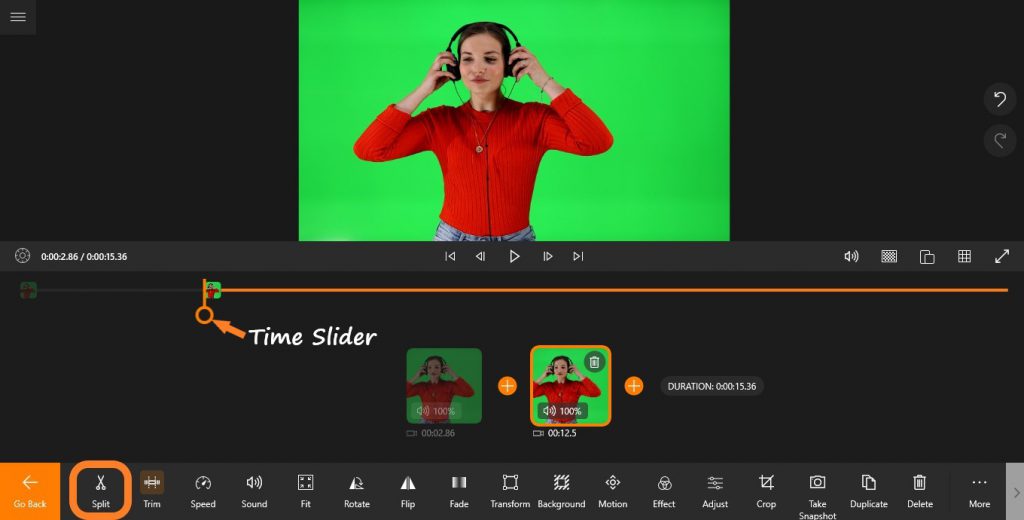
- Again, drag the time slider until you’ve gone past the unwanted part. To be extremely accurate, you can use Animotica’s Twist Control feature.
- Hit Trim and select Trim from Start. This will remove the part behind the slider (the unwanted side).
Step 4: Save your Video
Once you’re done trimming or cutting your video, you can now hit Save to export the file. On the new window, feel free to leave the parameters as they are and hit Save As. Next, add a filename for your video and hit Save again.
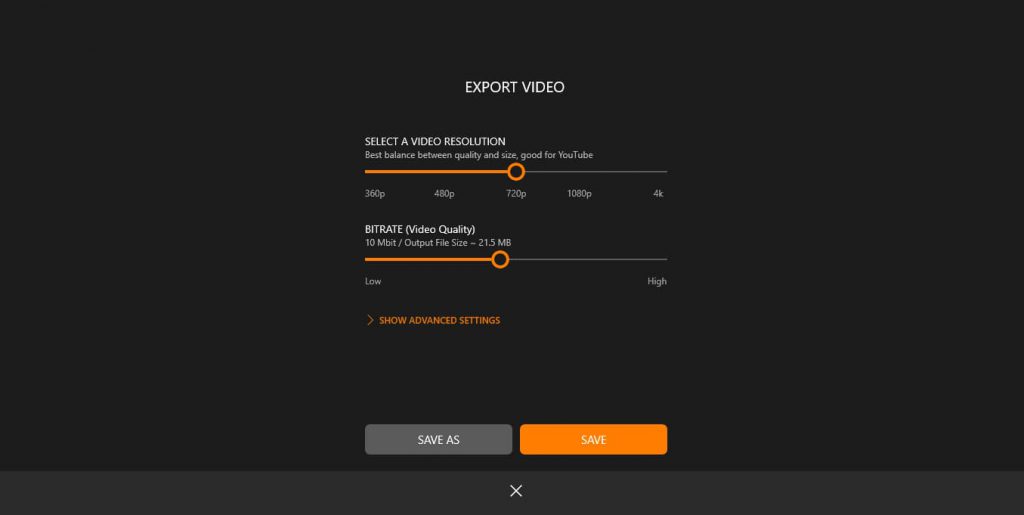
That’s all! You can now wait while Animotica takes it from there..
How to Trim Video for Free on Windows PC? (Video Tutorial)
Conclusion
We hope that this guide was helpful to you. Of course, there some other ways to get rid of unwanted parts of a video using Animotica. It all depends on your creativity. So feel free to let us know if you know of any other methods for trimming, cutting, or splitting videos.
Cheers!
Cheers!


