We’ve all heard the popular adage that says, “a picture is worth a thousand words.”
This is a generally accepted philosophy, and if you subscribe to it, you invariable agree that your profile picture has a lot to say about you.
According to a study by Psychological Science, it takes around 40 milliseconds to make a first impression with your picture. This means that people only need to see your photograph for 40 milliseconds to make a judgment about you. That’s over 10 times faster than a heartbeat.
In a bid to strike a lasting first impression online, you need to nail your first step: have a captivating profile picture.
It doesn’t matter if you’re on Twitter, LinkedIn, Facebook, or Instagram; if you don’t put enough thought into setting a great profile picture, you will struggle to attract your ideal audience.
Understandably, choosing the ideal profile picture can be a hassle sometimes.
Today’s guide will show you how to create a stunning profile picture with zero tech skills. All you need is an internet browser, a picture, and a couple of minutes to spare.
Let’s get down to it!
Contents
5 Tips for Creating the Best Profile Picture
According to LinkedIn, having a profile picture makes your profile 14 times more visible to others across the platform.
A profile picture gives you added visibility. But more than just being seen, you need to captivate those that come across your profile.
Here are five tips that will help you create the best profile pictures.
Good Lighting

While taking a snapshot, always try to do so in a well-lit area. Good lighting gives you a great tone and makes your picture several times better.
Focus Area
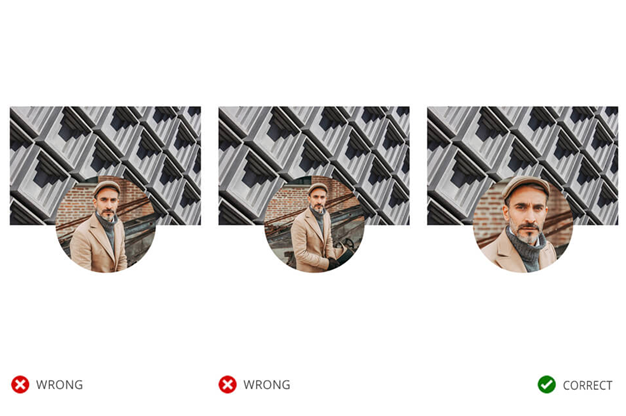
While taking a profile picture, your face should always be more prominent. Your face should take at least 60% of the entire frame. This is more important if you’re using the picture on professional platforms.
Smile
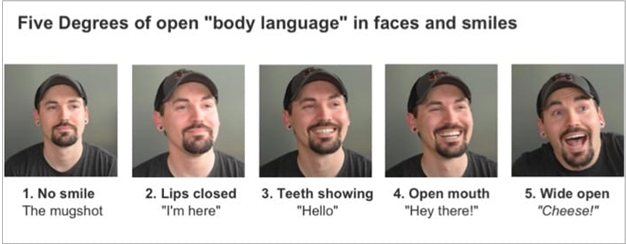
A smile can never go wrong in a picture. It makes you look approachable and overshadows your blemishes. Moreover, keeping a straight face will make your image look more like a mug shot.
Use a Simple Background
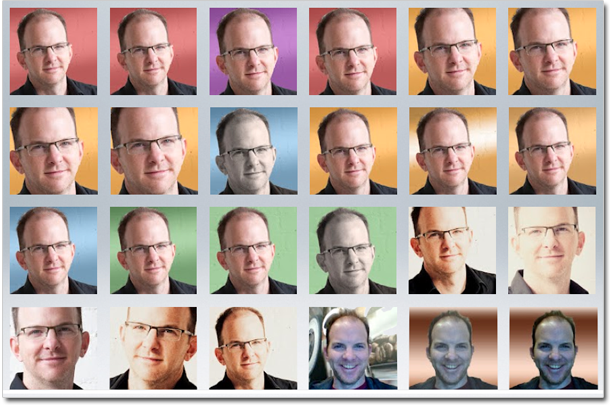
With profile pictures, you need to make sure that the focus is 100% on you. Thus, you don’t want to have too many things going on in your background.
A Google+ profile picture experiment by Cyrus Shepard showed that warm-colored backgrounds have the highest click-through rates. He experimented with all the pictures in the collage above and found that the one in the top-left corner performed the best.
How to Create a Stunning Profile Picture
Several tech-savvy folks are able to transform boring pictures into masterpieces with the help of high-end photo-editing tools. But what happens when you have neither the skills nor the means to pull that off?
In this section, we will show you how you can create profile pictures that will compete with the best using our simple, AI-powered profile picture maker: Picofme.io

Picofme.io is a free online profile picture maker that enables you to create stunning profile pictures in a few clicks with zero editing skills.
The tool uses Artificial Intelligence to detect and crop out a picture’s background while replacing it with a wide variety of cool background options. It also gives you extra functionalities that allow you to add filters, adjust outlines, change the picture’s canvas, and more.
Let’s show you how it’s done in 5 easy steps.
Step 1: Visit Picofme.io
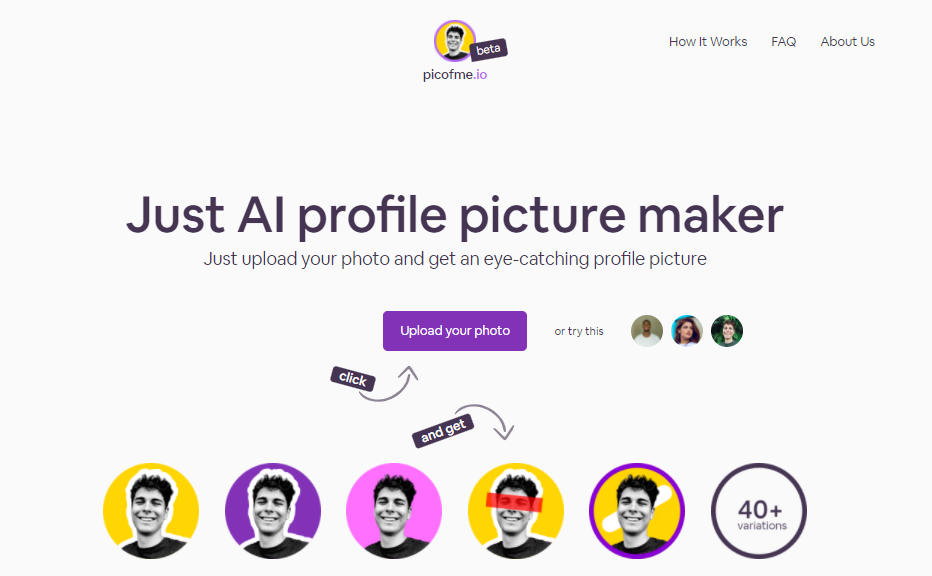
Go to Picofme.io using your mobile or desktop internet browser. Next, click on Upload Your Photo, as shown in the screenshot above.
Step 2: Select a Photo
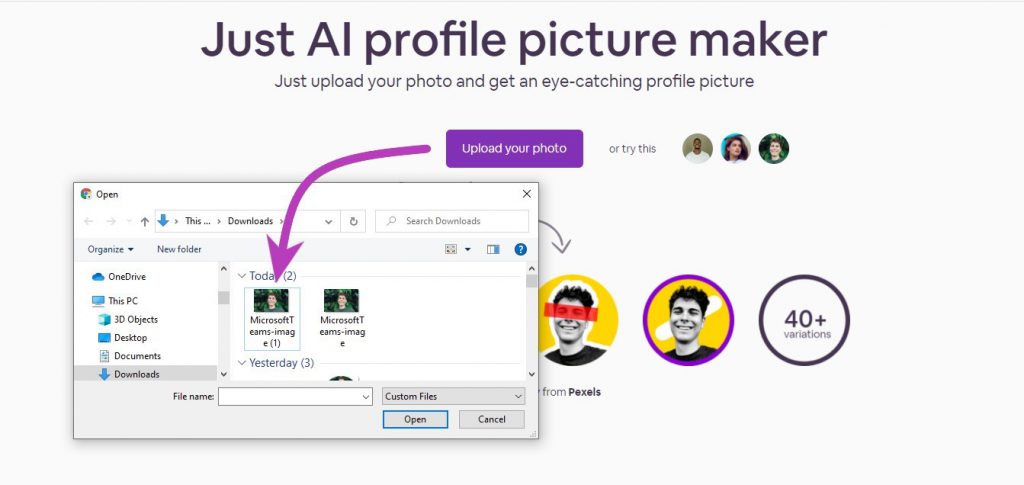
Picofme.io will open your device’s storage area. Find the picture you want to transform, select it, hit Open, and allow it to upload.
The tool supports all popular image formats, including .jpeg, .jpg, .png, .jfif, .pjp, .gif, .bmp, .webp, .tif, and .tiff.
Tip: For best results, choose high-quality images with excellent lighting and a contrasting background. Also, Picofme.io can only recognize humans. So, only upload a picture of an actual person.

Step 3: Adjust Your Photo
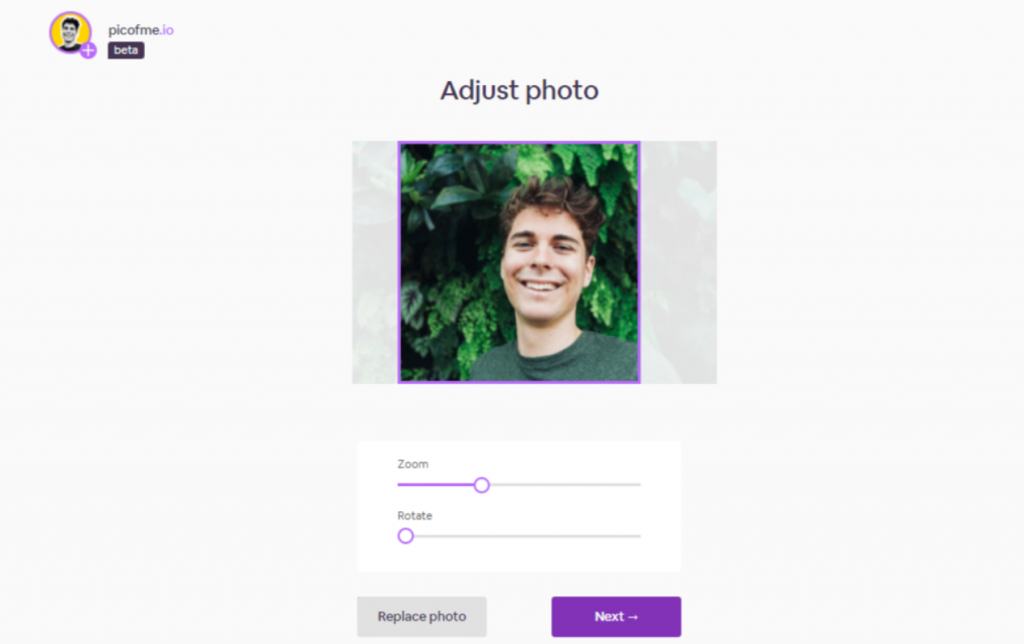
You can adjust the image’s position by dragging it in any direction. The Zoom slider allows you to choose your picture’s focus area by zooming in and out as you please. The rotate slider lets you rotate the image in any direction.
For mobile devices, you can zoom in and out by pinching and releasing. And you can adjust the picture’s position by dragging it in any direction.
Once you’re done, hit Next and wait a bit for the system to do some magic.
Tip: If the Zoom and Rotate sliders aren’t visible on your desktop browser window, simply zoom out to 90% using your PC’s shortcut keys. For Windows, you can zoom out by pressing the CTRL and Minus sign. For Mac, you need to press Option, Command, and Minus sign together.
Step 4: Choose A Style
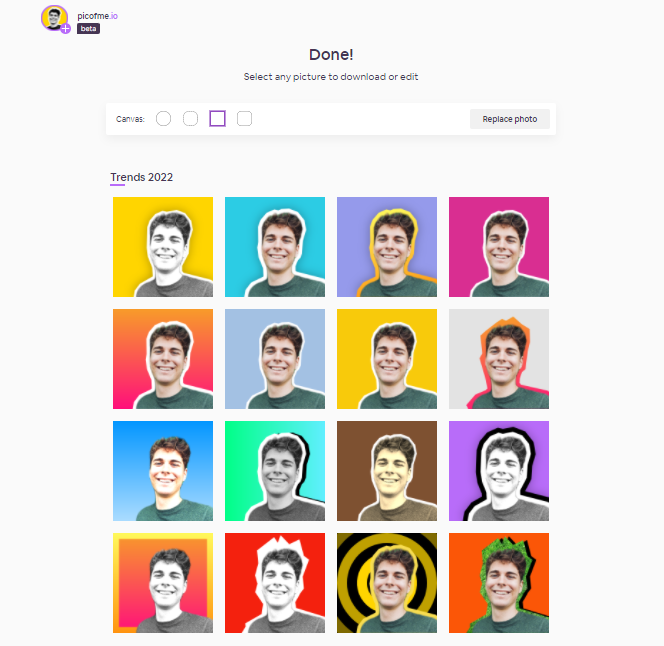
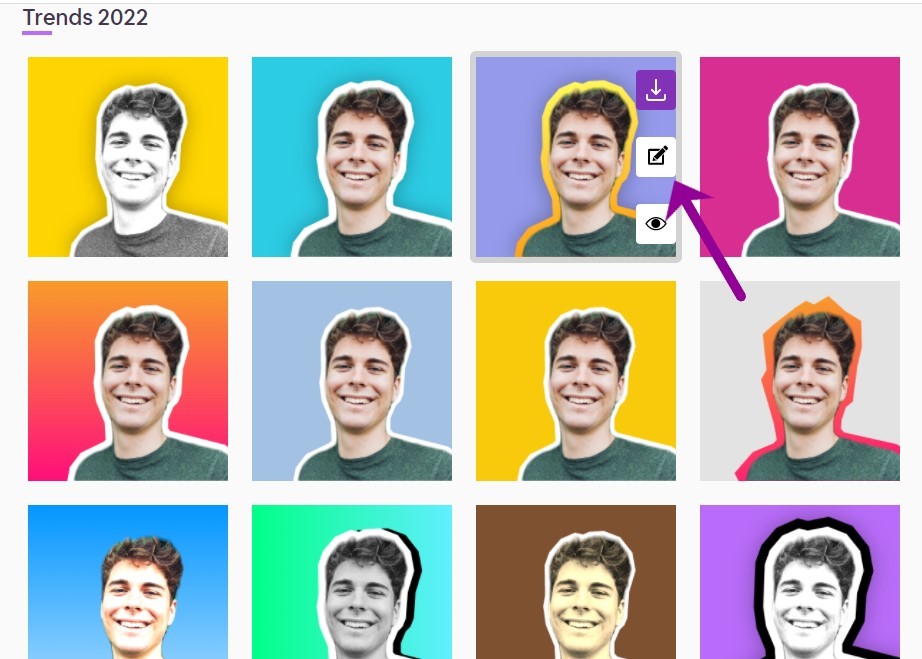
Picofme.io will generate multiple outputs, each with a unique background color and filter. Feel free to scroll through the results and choose the one that most appeals to you.
There are several things you can do to give your picture an extra personal touch.
First, you can select a different canvas for the outputs by clicking one of the four shapes close to the arrow, as shown below.
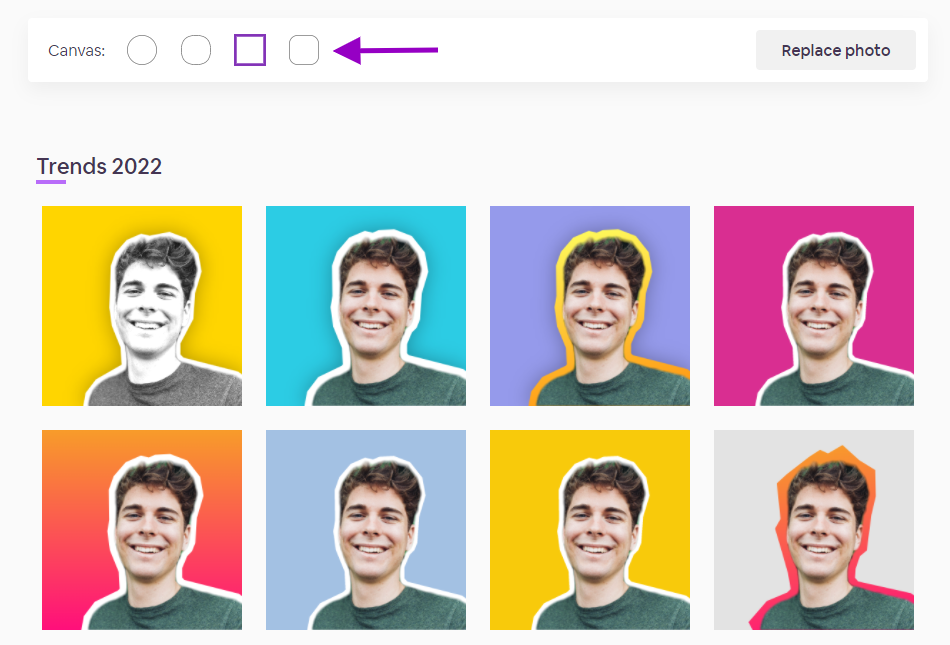
Also, you can edit the image for a personalized result. To do this, simply hover over any image and hit on the pencil icon.
The edit function gives you direct access to every tool you’ll need to transform the picture manually. These include:
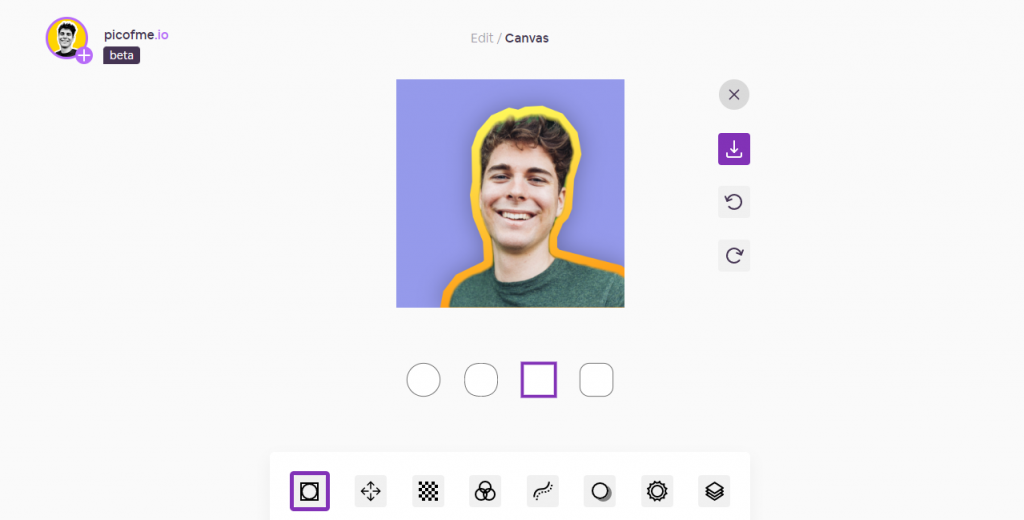
Canvas: For modifying the picture’s frame
Transform: For zooming in and out, adjusting the position, and rotating the image
Background: For changing the picture’s background color. You can select a solid color, palette, gradient, and more
Filter: Offers visual effects options for the image. Picofme.io currently offers 17 filters to help you get started
Outline: For modifying the outline on your picture. You can turn it on or off, and modify its color, style, and thickness.
Shadow: For adding shadows to images
Border: For modifying the color and thickness of the picture’s border. You’re also allowed to turn it off and on.
Layers: For overlaying images on top of each other
Step 5: Download Your Image
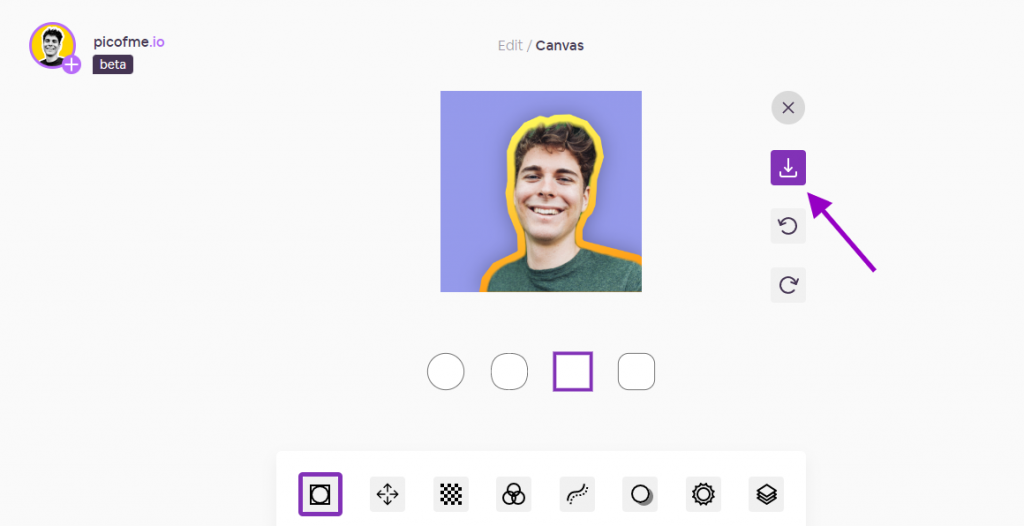
Once you’re pleased with your final result, the next and final step will be to download it. Simply click the arrow down icon shown in the screenshot above to proceed.
Allow a couple of seconds for the new picture to be downloaded into your local storage.
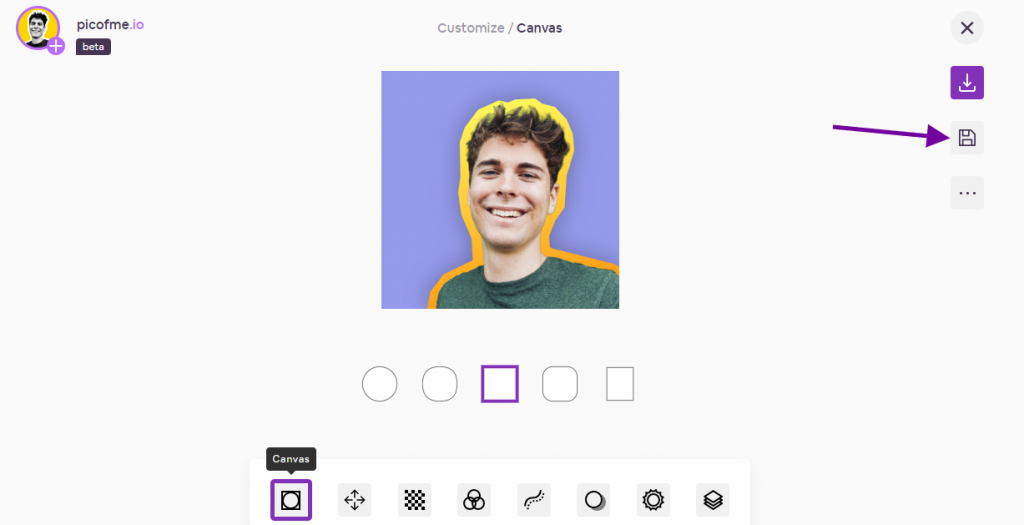
Picofme.io also allows you to save your profile picture design as a template you can either share with others or use for future profile picture creation tasks.
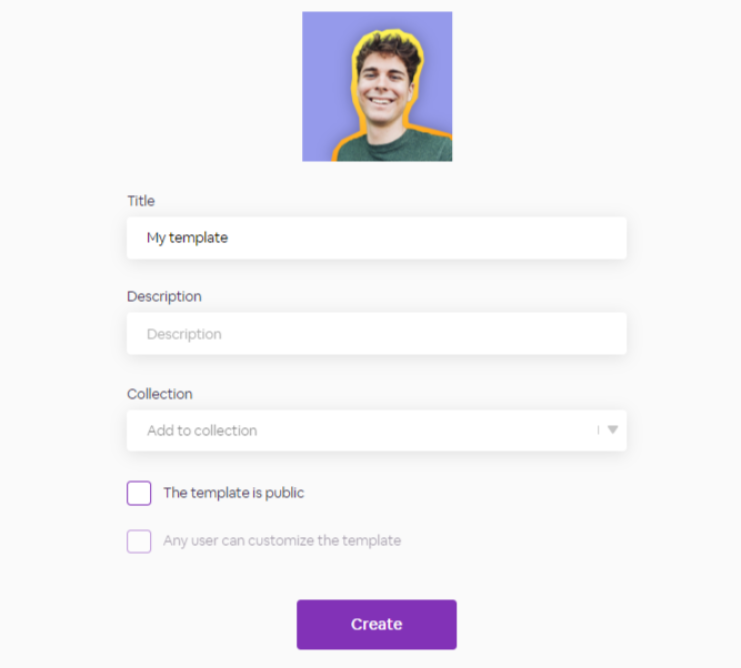
To save your profile picture as a template, click on the Save as a Template icon.
You will be required to log in or sign up. Please do so, as it allows you to save your templates on our server. After this, you will need to provide a name for your template, add a description, save it to a collection and make it public.
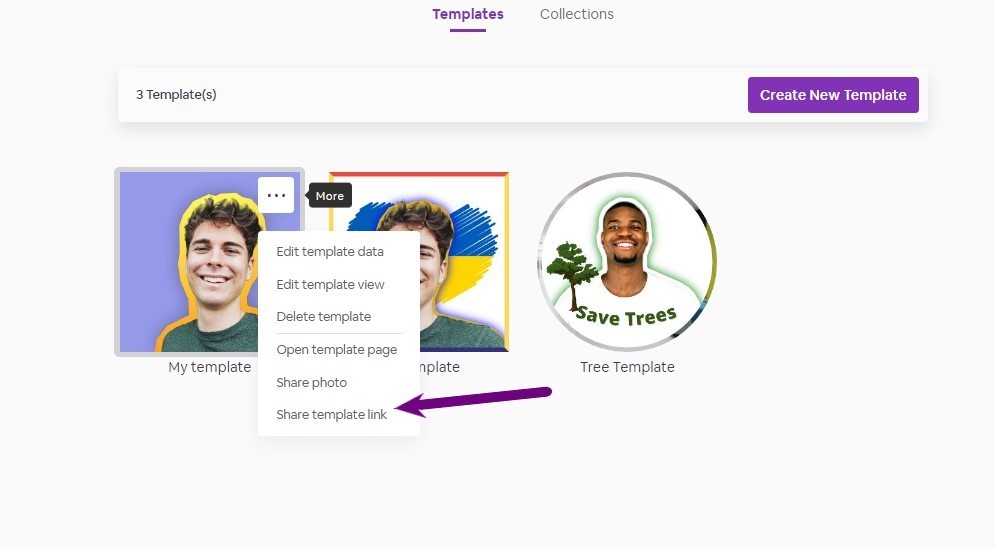
To share the template, click on the three dots on your template and select Share Template Link. Picofme.io will generate a link for you.
Conclusion
Nobody enjoys seeing a boring profile picture. Having such on your profile will impact your ability to attract and interact with your target audience.
Thankfully, we’ve been able to leverage Artificial Intelligence in transforming our pictures into masterpieces. We hope that this guide helped you to do the same.
If you enjoyed using Picofme.io, feel free to let your friends know!
We’ve written several short guides, covering specific profile picture tasks and use cases. Feel free to check them out below!
- How to Create a Profile Picture like Will Smith
- What does PFP mean?
- How to Create a Custom Profile Picture Template
- How to Create an Amazing PFP for Your YouTube Channel
- Top 5 Free Profile Picture Makers
- How to Point Out a Social Issue with a Profile Picture
- How to Support Your Country with a Profile Picture
- Branded Profile Pictures for Corporate Chats
- How to Make a Professional LinkedIn Profile Photo
- Spooktacular PFPs: How to Make a Halloween Profile Picture
- How to Make a Captivating Valentine’s Day Profile Picture
- How to Make TikTok PFP