
Hello, winter! The time when family is getting all together. Guess what they all expect to get? Presents! And what can be easier than a Christmas video card? 😉
In this guide we will explain you how to make professionally looking video greeting card for your guests, friends, and family using spark effects as you can see on the video below.
We will be showing all process in Animotica, easy-to-use video editing software.
Easier than it sounds. If you don’t have Animotica, you can download it for free here.

All you will need is some nice Spark effects, video or photos you want to use to make a card and 10 minutes of your time. No worries, if you don’t have it we will tell where to get!
Contents
1. Prepare your video or photo files
1.1 Files.
Make sure you know how to access the video or photos you want to use for the card.
In case if you don’t have any videos taken by your own, but you need to create a Christmas card ASAP, you can download some videos for free here.
In case if you want to create slideshow from photos, this guide will be helpful.
1.2 File format.
Animotica accepts “.mp4”, “.wmv,” “.avi,” “.3gp”, “.3gpp”, “.m4v”, “.mov”, “.mkv”, “.mts”, “.m2ts”, “.ts”, or “.webm”. In case if you use some other format, you can easily convert it to the right format using one of these trusted tools.
2. Download ‘Spark Overlay’
Search in Google.com ‘Spark Video Overlay Animotica’ and pick one of the effects.
Here are some sources that might be helpful:
‘Spark overlay’ on videeezy.com.
‘Spark video overlays’ on YouTube.
Long story short, that is more than easy to find a proper spar overlay with a huge variety available on the web. Or you can download the one we use in our video example.
* Make sure you always give reference to the owner of the video in case if you’re using free samples.
3. Create a new project and add Your Video
Once you launch Animotica, click ‘New project’ on the main screen, and then follow the steps, Pick the name and project location folder, select aspect ratio and upload the files you want to be a base of your video card.
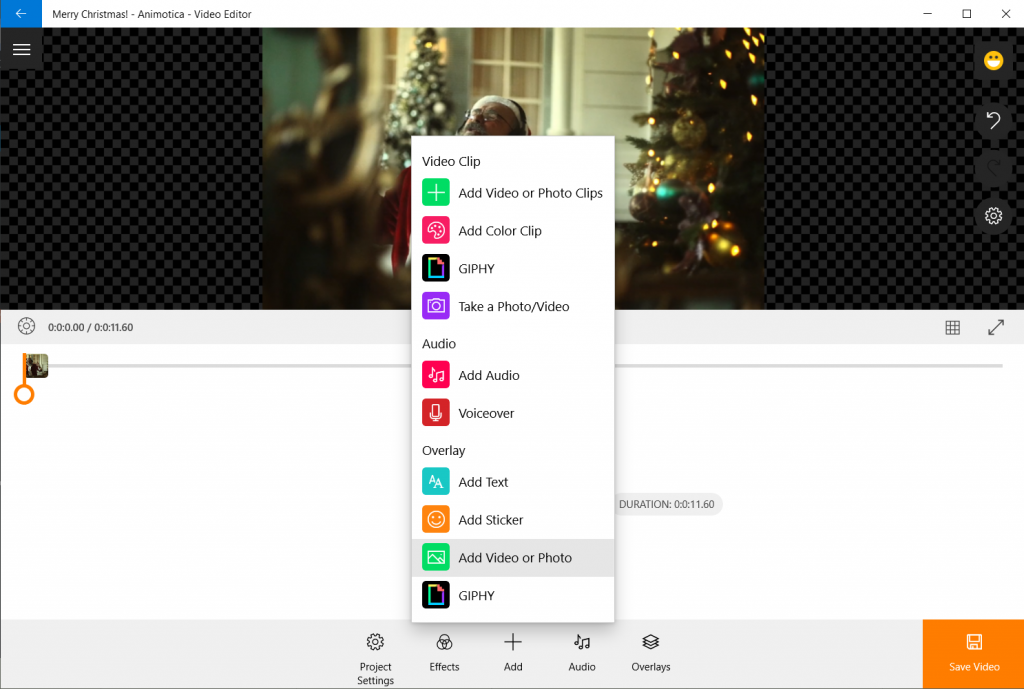
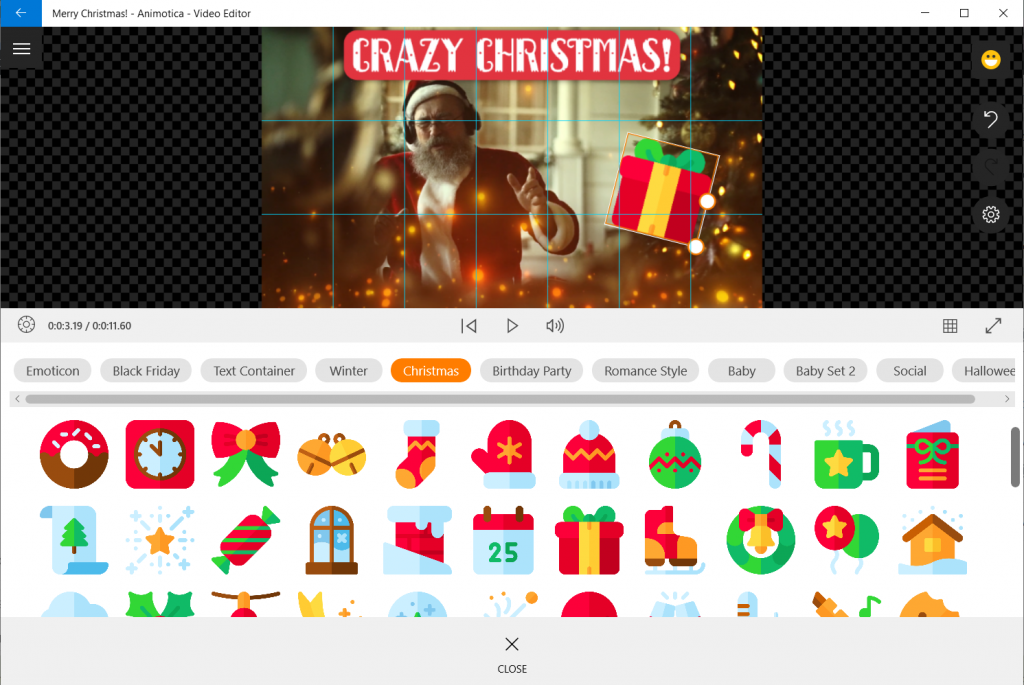
4. Add Spark overlay
Click ‘Overlays’ -> ‘Add Video or Photo’ -> Select the overlay you downloaded.
5. Adjust position of the overlay
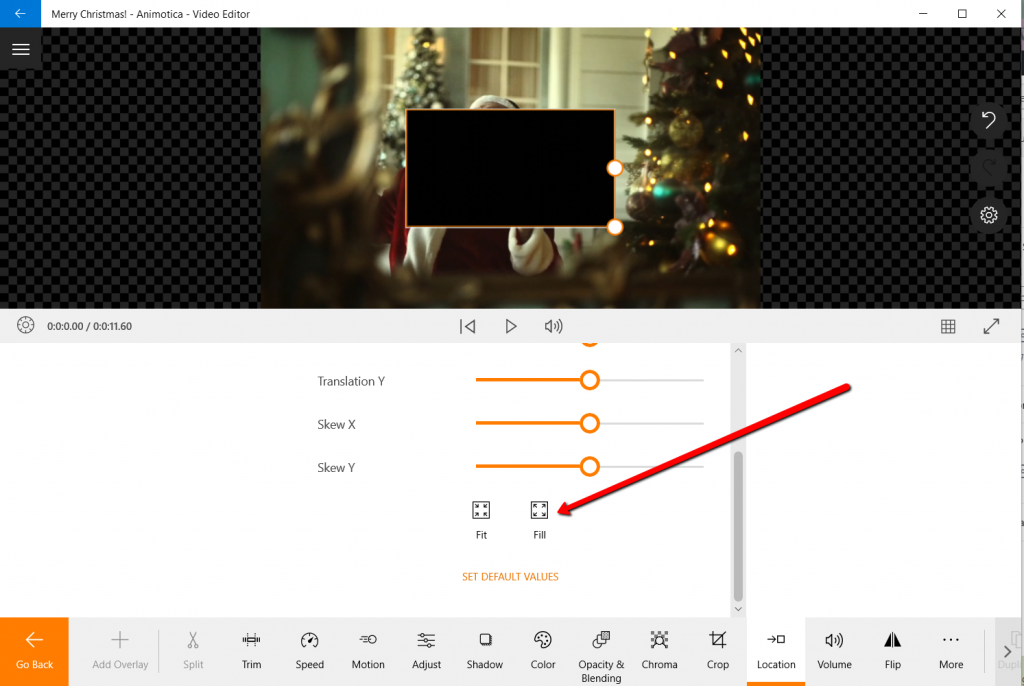
On the screenshot above you can see how it would look at the beginning. No worries, all you need now is to adjust the placement and color.
So let’s start with placement. Select the video overlay and navigate to Location. Now you need to decide whether choose Fill or Fit. The right option would depend on the aspect ratios of your main clip and video overlay. In our case we will use Fill.
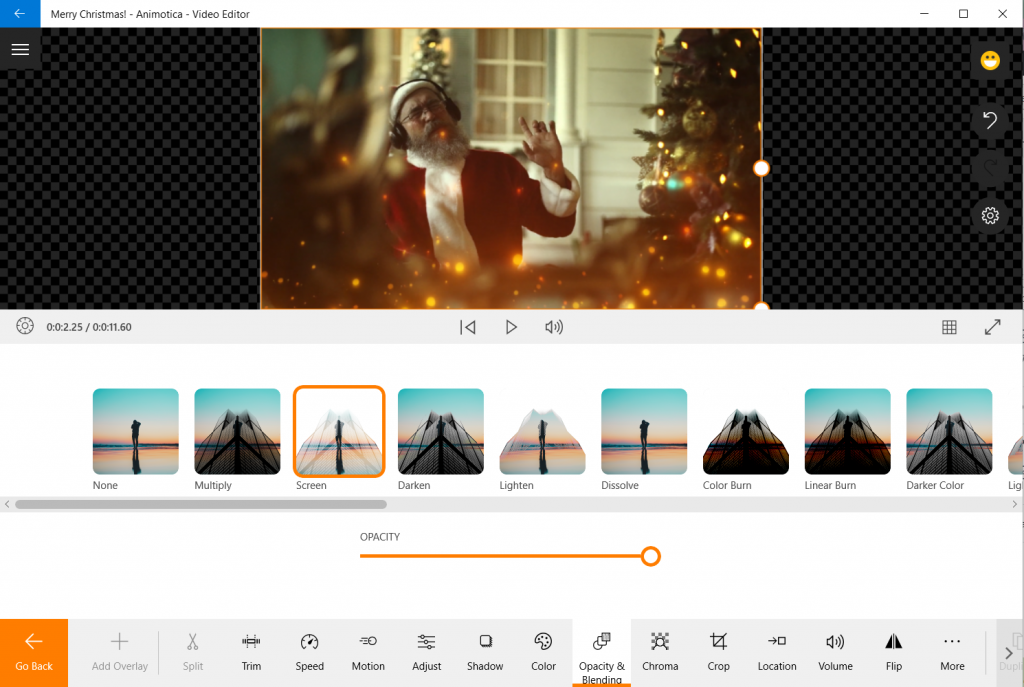
6. Adjust the color of the video overlay
Select the overlay, click on ‘Opacity and blending‘ and choose ‘Screen’ . The magic color blending will make your overlay smoothly fit your Christmas card video.
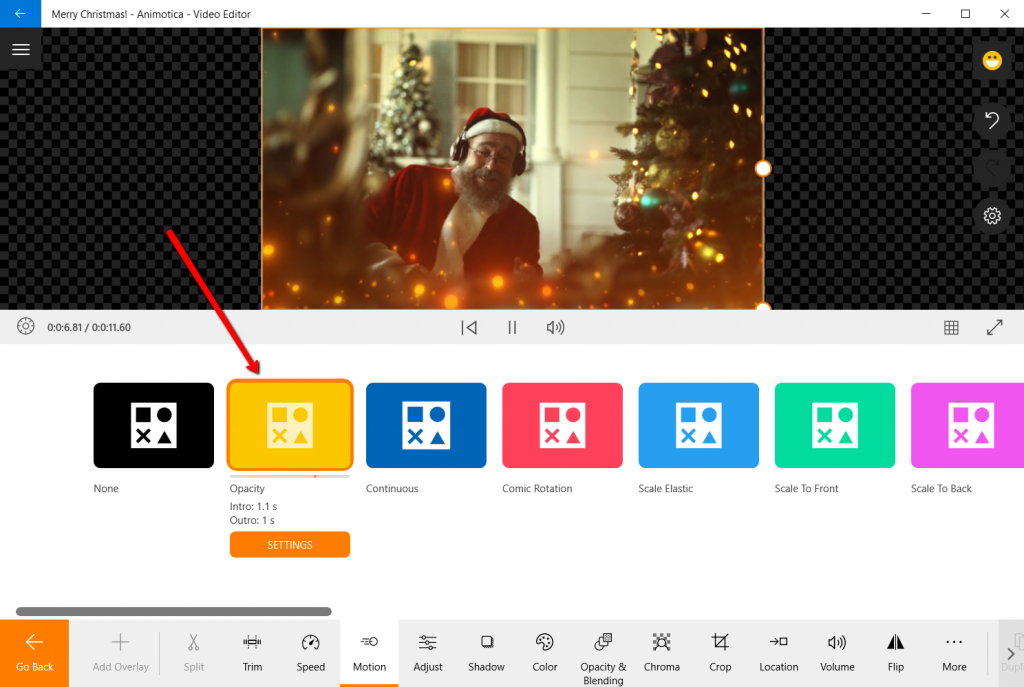
7. Make the appearance smooth
If you want your spark to appear smoothly, you should apply Motion effect to it. Select the overlay, click ‘Motion’ and select ‘Opacity’, though you’re free to pick any other option.
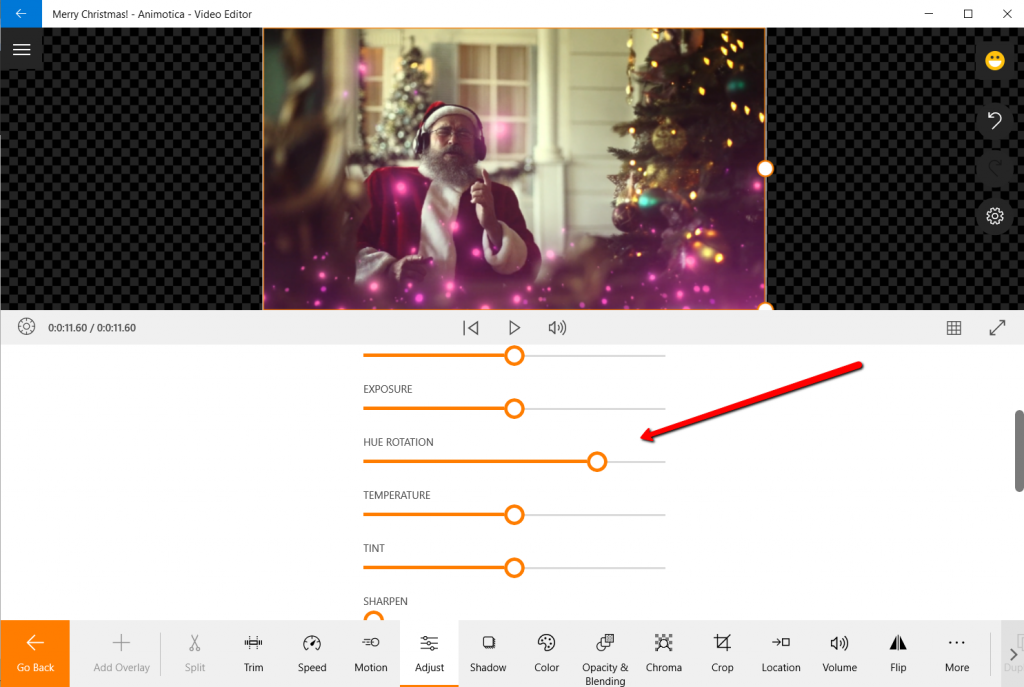
PRO tip!
To change the color of your video overlay (sparks):
Select the overlay and click ‘Adjust’, set ‘HUE rotation’ slider at the perfect color.
8. Add Text Overlay to your eCard
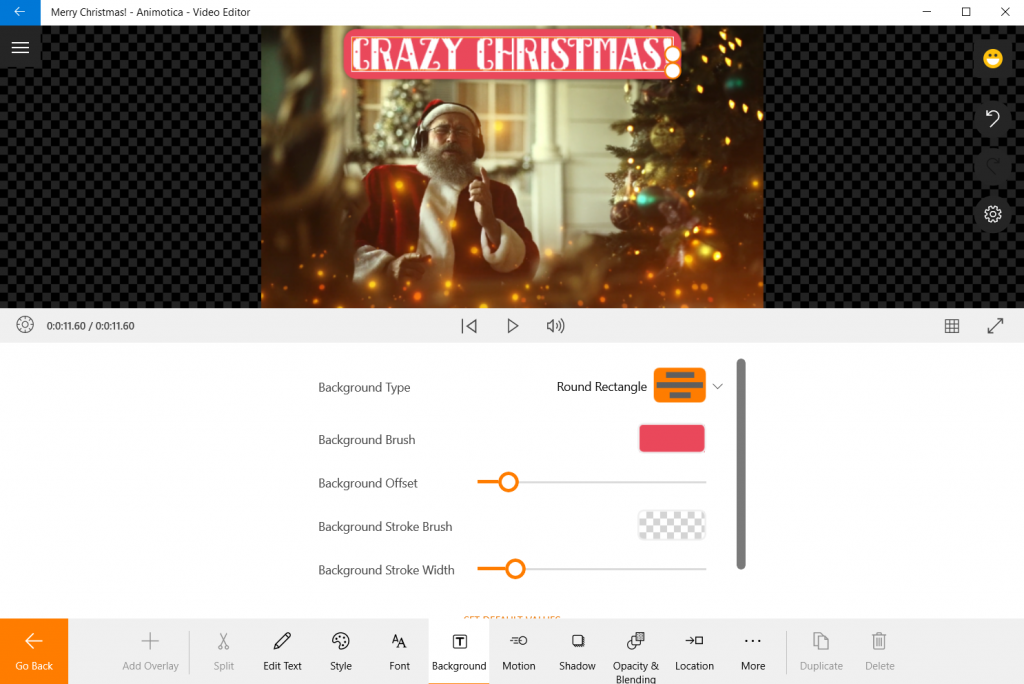
Click on ‘Overlays’ and select ‘Add text’. Type the text of your greeting card. Learn how to animate it.
You can use one of the available styles of create your own style of the text.
9. Add Music to your eCard
You can pick one of the audio files from Animotica library, or use any audio file from your computer.
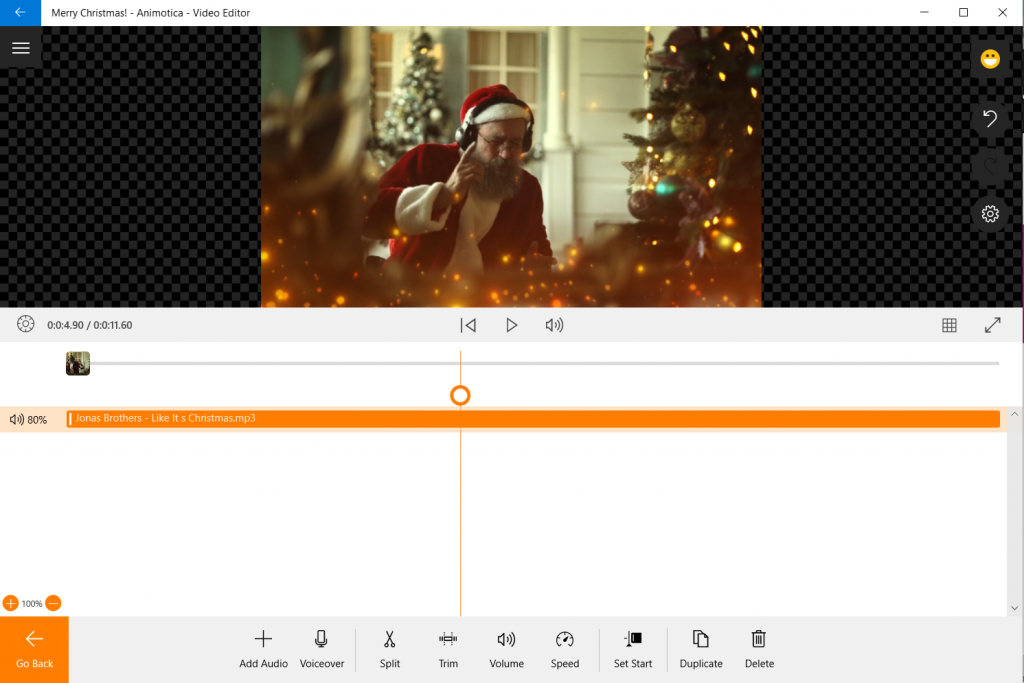
Here is the list of trending Christmas songs. Many of which you can download from here.
In case if the lengths of your video and audio files are not even and you want to apply Fade out to your audio file to make it sound smooth at the end, you need this additional step.
10. Fade Out Your Audio
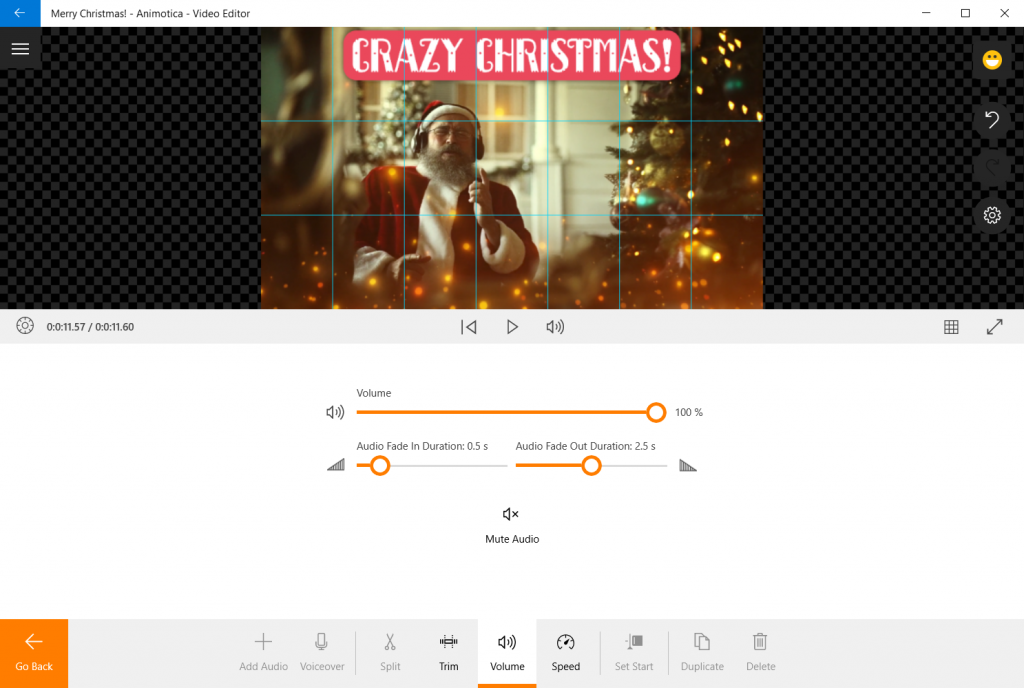
Select your audio overlay and click ‘Trim’. Trim your audio file from the end the way its length is the same as the one of your video clip.
11. Finishing up
If you’re done with editing, you can Save your project and upload it directly to YouTube.
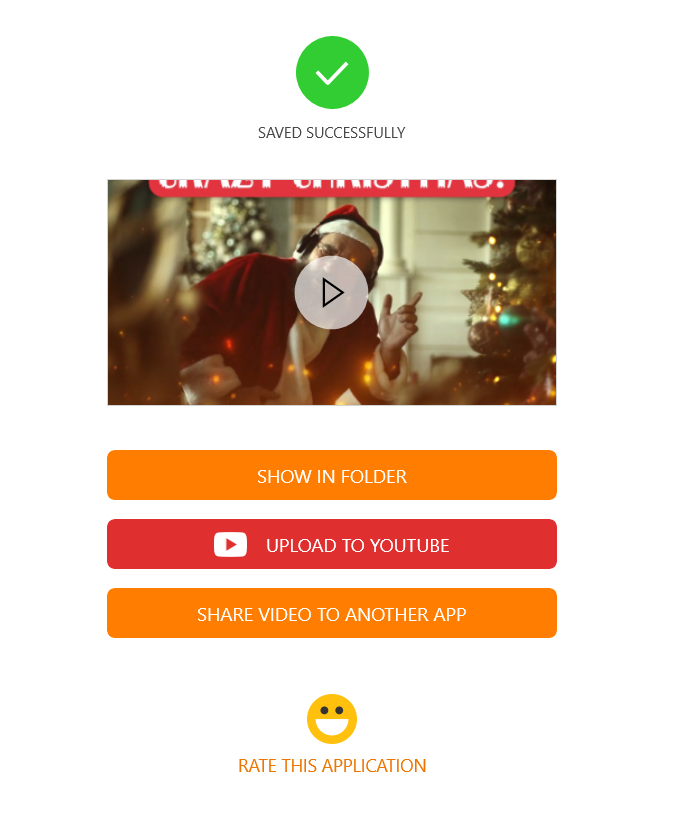
You will get something like this at the end.
If you feel some energy to create miracle, you can add some Stickers overlays or learn more from our Video tutorials section.
12. Add Christmas overlays to your video
Happy Holidays! Ho-ho-ho! ?


6 Comments
Pingback: Here’s How You Add Jaw-Dropping Animated Overlays Into Your Videos - ANIMOTICA Blog
Pingback: Ultimate Guide To Instagram Videos for Beginners [2019] + Free Content Plan - ANIMOTICA Blog
Pingback: 7 Signs of A Perfect Video Editing Platform - ANIMOTICA Blog
Pingback: Holiday 2020 Pack From Animotica - ANIMOTICA Blog
Pingback: How to add animated snow to your videos - ANIMOTICA Blog
Wow!!! Nice one.
you really gave the information in details. making Christmas cards have never been easier