
The camera shake effect (also called the screen shake effect or earthquake video effect) can help make your videos a tad more dramatic when used in the right places. For example, you can use it to cover a car chase, an earthquake, an alien invasion, or even a horror scene. It simply works best in scenarios where dramatic movement is emphasized.
Some filmmakers prefer to create this effect straight from their camera. But it is more convenient to shoot perfectly still footage and then juice up the right scene with the shake effect using a video editor.
In this guide, we’ll show you how to add shake effects to video clips without using a complex or expensive video editor.
Contents
Animotica: The Best Camera Shake Effect Tool
Animotica is an easy-to-use, feature-rich video editor that makes it possible for regular folks to perform important video editing tasks without complications.
It allows you to add incredible special effects like Ken Burns, Green Screen, and shake effects, among others.
Speaking of shake effects, Animotica has 10 different shake effects that you can use for any type of video, and we’ll show you how it’s done. We’ll also show you how to apply the effect to only a specific scene without the need to cut out the scene at all. Let’s get to it!
What Shake Effects are Available in Animotica
In this section, we’ll briefly describe all the shake effects available in Animotica. That way, you can get a clear view of how they work. Let’s get to it!
Shaker
The Shaker effect gives the illusion of rapid left-to-right movements and can be used to create chaotic scenes.
Quake L
This effect is a little similar to Shaker, but it moves rapidly in all directions. It can be seen as a low-intensity earthquake video effect.
Wiggle
The Wiggle video effect is a little more artistic in nature. It just spins your scene halfway and then reverses it rapidly. It can be used in music videos or any scene that has an element of artistic energy.
Quake M
This is another variation of the Quake effect, but its vibration is more vigorous. If you want to illustrate a mid-range earthquake scenario, you can achieve that with this effect.
Quake H
This effect represents the highest variation of the Quake effect. Its vibration is extremely vigorous and can be used to illustrate a scene with a high-magnitude earthquake.
Convulsion
You can use Convulsion to give the illusion of a vehicle speeding along a rough road.
Camera Shake L
This is a low-intensity camera shake effect. You can use this effect to represent a dreamy, thoughtful, or even a ship sail scene.
Camera Shake M
You can consider this a mid-intensity camera shake effect. It works great when you want to give the illusion of a ship sailing in a mild storm.
Camera Shake H
The Camera Shake H effect is the highest variant of the camera shake effect. You can use this to represent a ship sailing through a massive storm.
Camera Shake M-R
The Camera Shake M-R effect can be seen as a slower version of the Shake effect already described above.
How to Add Shake Effects to your Video
If you don’t have Animotica already, please hit the button below to download and try it for free.

Done? Awesome! Now, let’s get to the steps.
Step 1: Upload your Files
Once you’ve installed Animotica, launch the app and hit New Project. On the next window, select Add Video/Photo Clips.
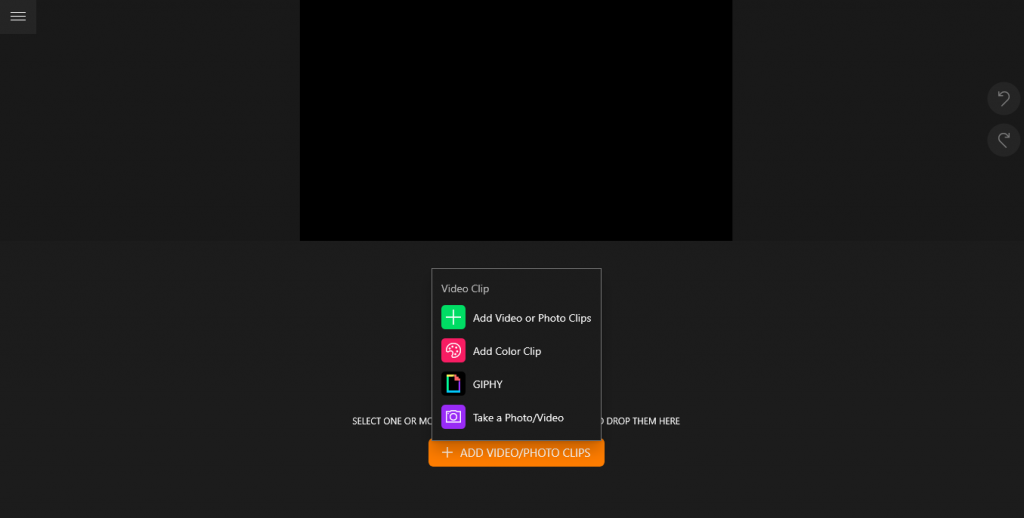
Again, select Video or Photo Clips. Now, you can navigate to your storage area to find and upload your video clip.
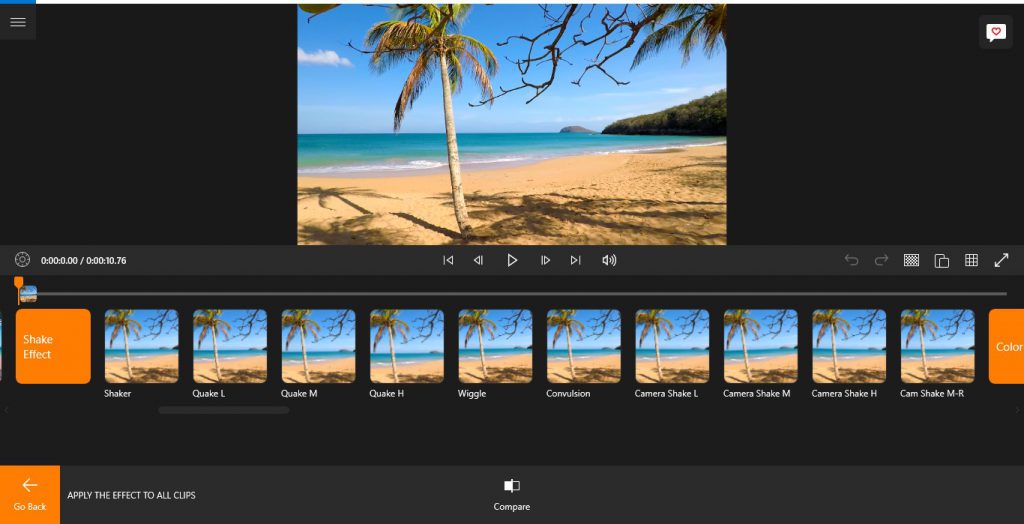
Step 2: Add your Shake Effect
Tap on the Effects button to reveal Animotica’s effects library.
Afterward, navigate to the Shake Effect section. There are 10 different variations of the shake effect you can choose. Just select the one that suits your taste, and you’ll have yourself a nice effect!
Step 3: Save your Video
After you’ve added your chosen shake effect, hit Go Back and select Save Video. This will take you to the export window. You can also hit Ctrl+E to go straight to export.
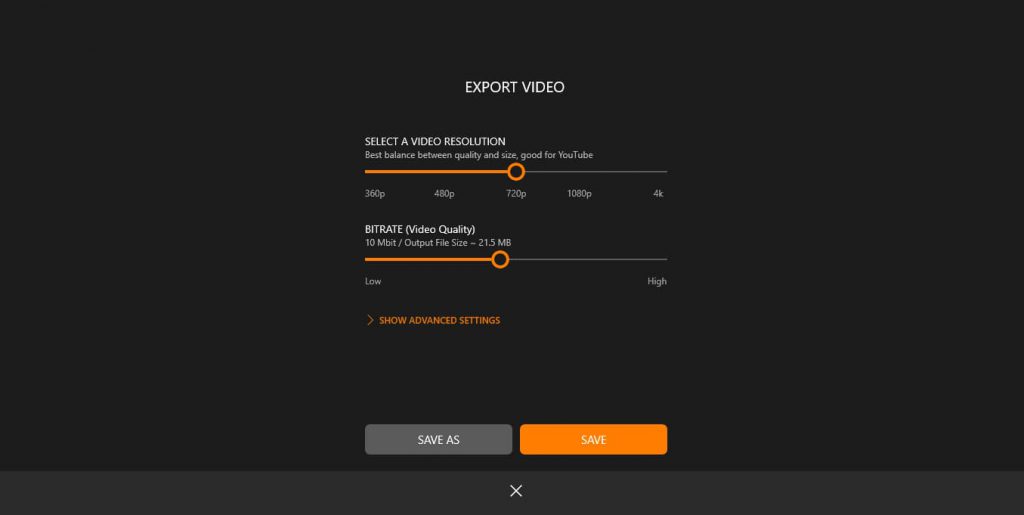
Feel free to leave the parameters as they are and select Save As. Next, input your desired file name and hit Save.
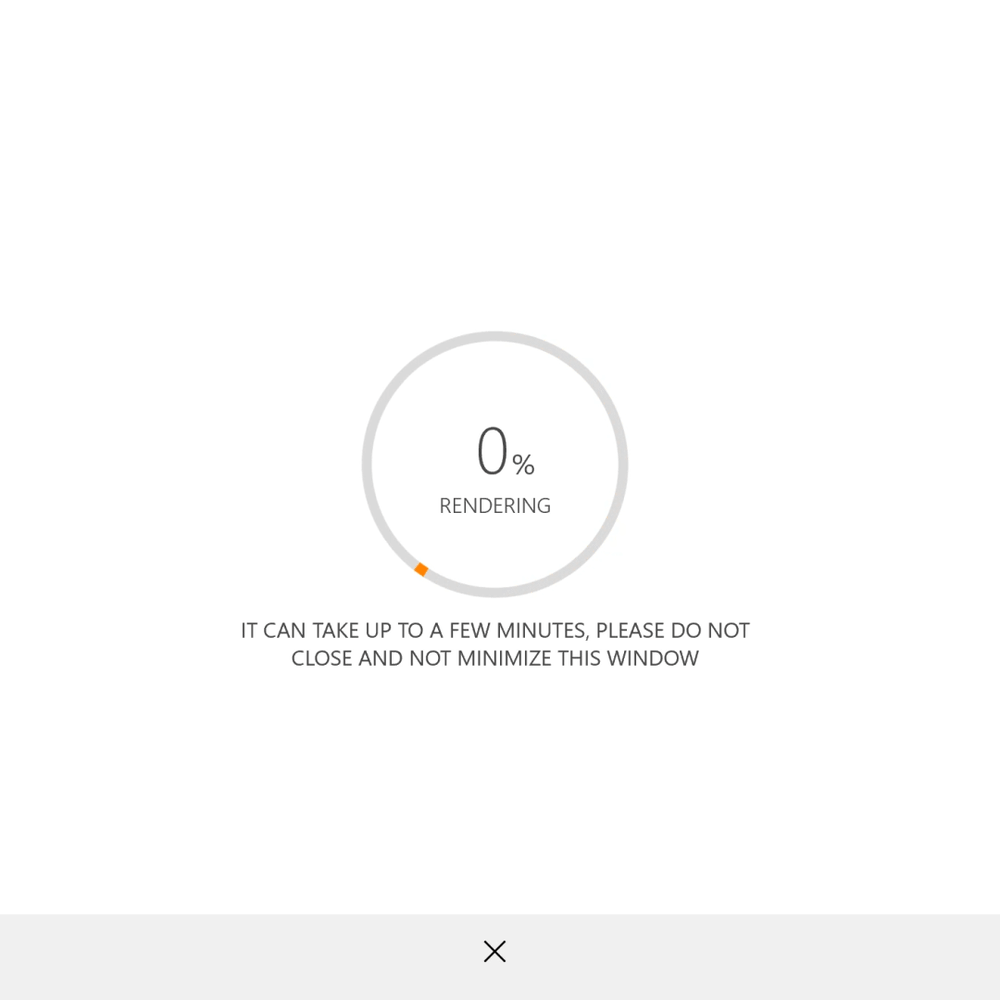
You can now chill and let Animotica run the rest of the show!
How to Add the Camera Shake Effect to a Specific Part of a Video
The previous section showed you how to apply a camera shake effect to an entire video. But here, you’ll learn how to apply it to a specific part of your video without the need to split the scene from the clip at all.
You can follow the guide in step 1 from the previous section to upload your clip. When you’ve done that, follow the steps below.
Step 1: Select the Effect Layer
First, drag the timer to the beginning of the specific scene you’d like to apply the effect to. Click on Add, scroll down to Overlays Section, and select Filter Layer. Next, tap on Effect Layer.
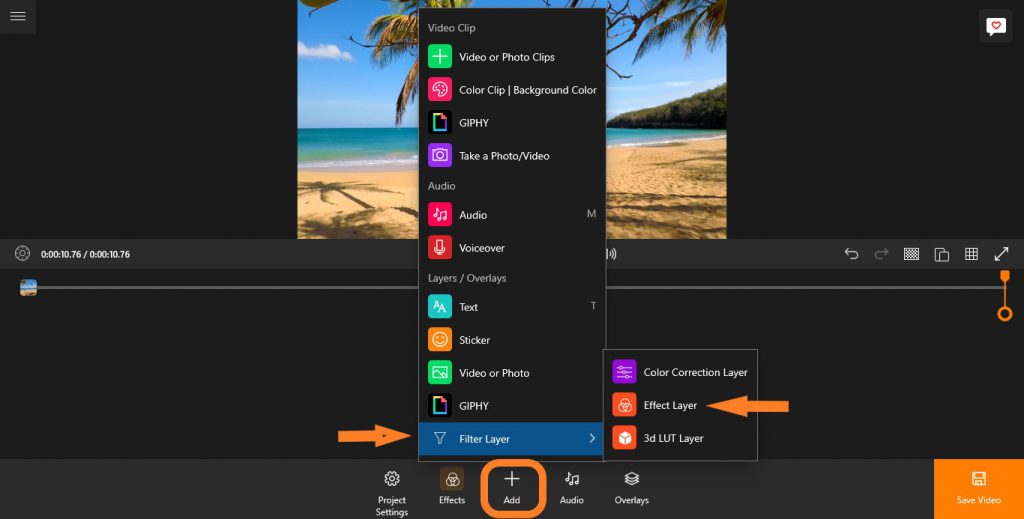
You will get a list of effects to choose from, select the one you like, and that will be all!
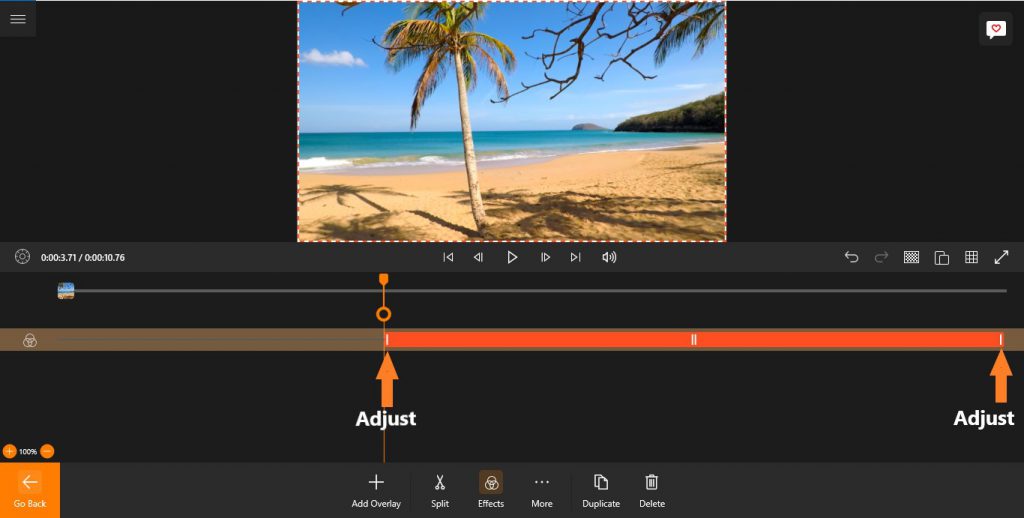
You can adjust both ends of your effects bar to set the starting and ending points of your shake effect.
After this, proceed to save your video just as described above.
How to Add the Shake Effect to an Overlay
Just as you can add the shake effect to a regular clip, you can apply it to a video overlay as well.
It’s actually pretty simple, and in this section, we’ll show you how to add the earthquake video effect to your overlays.
Upload your base clip as already described in the previous section. After that, follow the next steps immediately.
Step 1: Add Overlay
Drag the time slider to the point you want your overlay to appear. Click on Add, scroll down to the Layers/Overlays section, and select Video or Photo.
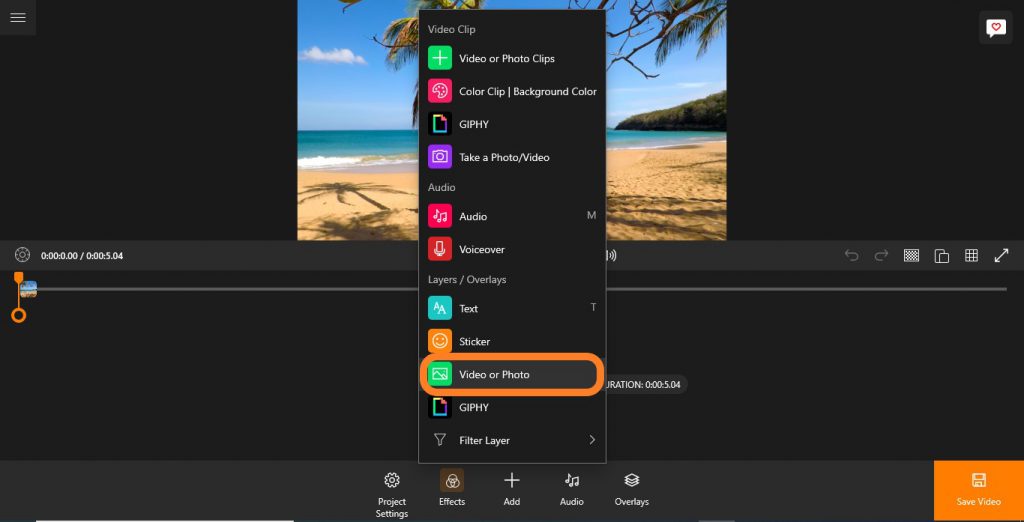
You’ll be taken to your storage area, where you can find and upload your video overlay.
You can adjust the size or the positioning of your overlay as you want. You can also adjust your overlay bar to set the overlay’s starting point.
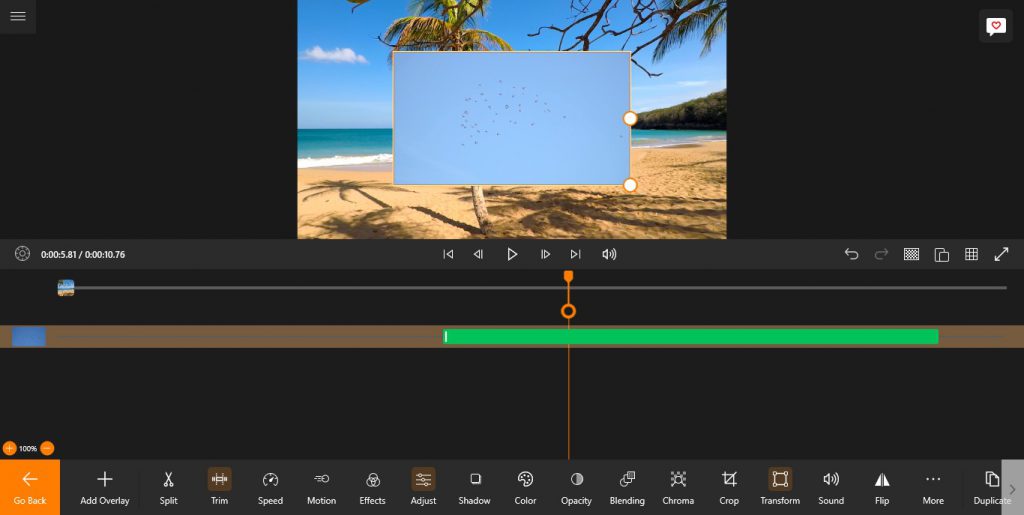
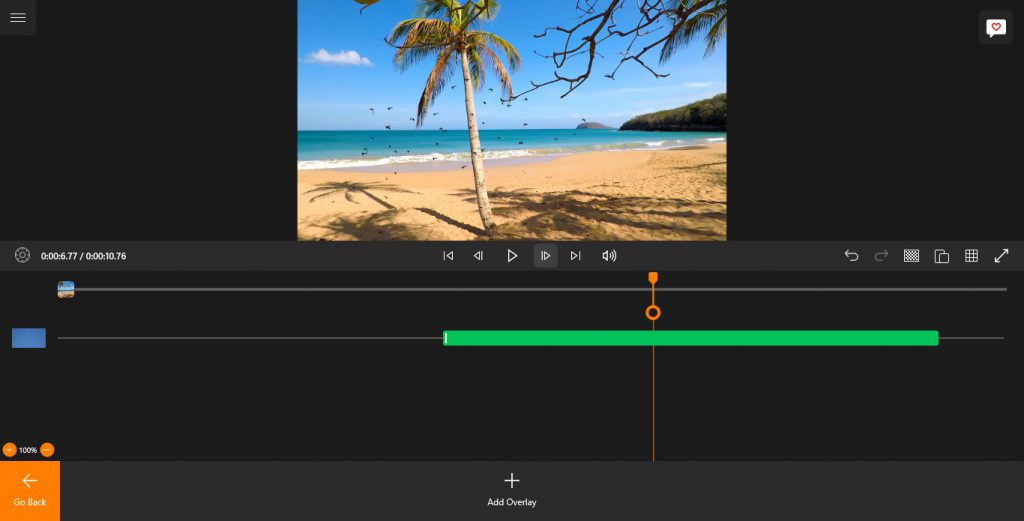
Step 2: Remove the Background (Optional)
If your overlay is covering the base clip (as you can see in the screenshot above,) you might want to get rid of the background. To do this, tap on the overlay to reveal its editing options. Select Chroma and toggle on the Chroma Key Effect switch.
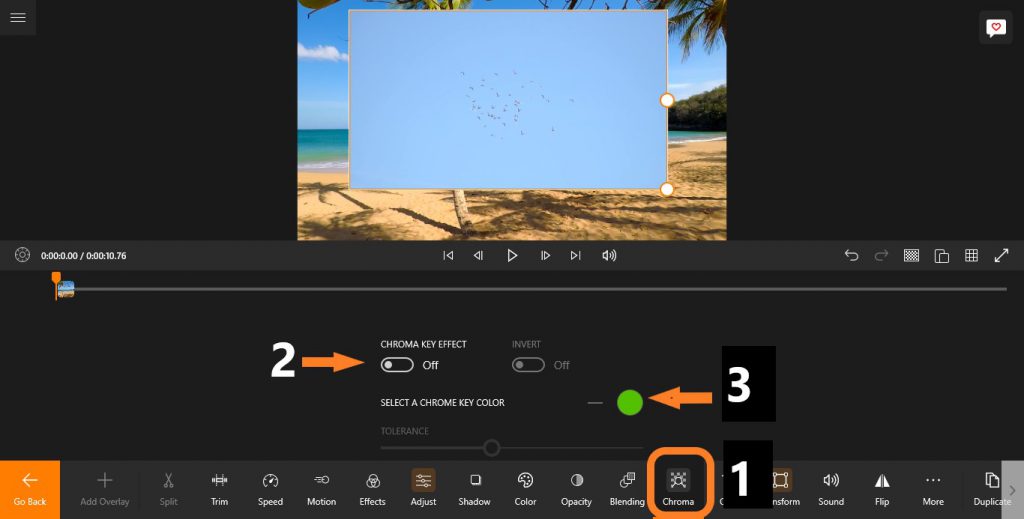
Next, tap on the green circle and hit on your overlay’s background to select the Chroma Key color. Once you do that, hit X. Now, your overlay’s background will disappear!
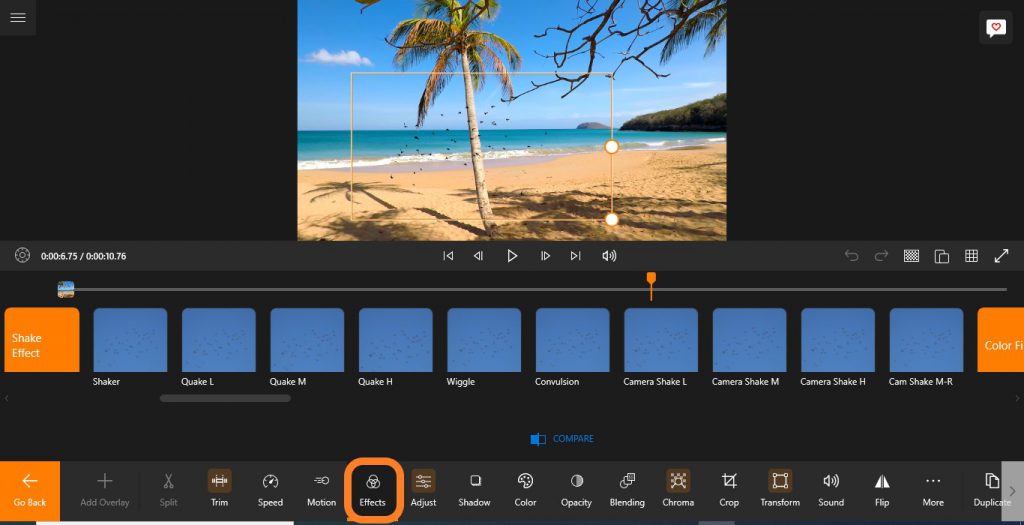
Step 2: Add Shake Effect
Tap on the overlay to reveal all the editing options available—select Effects. Navigate to the Shake Effect section and select any shake effect you want.
That’s all! You can now proceed with saving your video as described above.
Conclusion
The camera shake effect is pretty easy to achieve. With Animotica, it can’t be any easier! We hope that this guide is enough to help you create your first amazing shake effect. Don’t hesitate to hit the comments section with your suggestions and questions. Cheers!


