
In today’s guide, we’ll show you how to edit Zoom recordings, the easiest way possible! Zoom’s recording features allow you to record and store your sessions on the cloud and on your local storage. But most times, your recorded sessions can contain bloopers and unnecessary statements, which you’d prefer to get rid of. So, in light of this, many users keep asking: “Can you edit a recorded Zoom meeting?”
The answer is “Yes!”
Let’s show you how! To do this, you might also consider using some high-quality video editing and screen recording software like the ones mentioned in this guide.
Contents
Best Software to Edit Zoom Recording
You can easily find a video editor for Zoom recordings with a simple search on Google.
But we’ll help you save time by suggesting the best way to edit Zoom videos. It is by using our favorite video editor, Animotica!
Animotica is an easy-to-use editor with great features that can help you take your Zoom recordings to another level. You don’t have to be an expert, and you don’t need an expensive video editor to turn your Zoom recording into a masterpiece.
Hit the button below to get started for free!

How to Edit Zoom Recording like a Pro
Editing a Zoom recording on Animotica is easy. Let’s show you how it’s done!
If you haven’t downloaded Animotica yet, please hit the download button, it only takes a couple of minutes.
Step 1: Launch Animotica and Upload your Zoom Recording
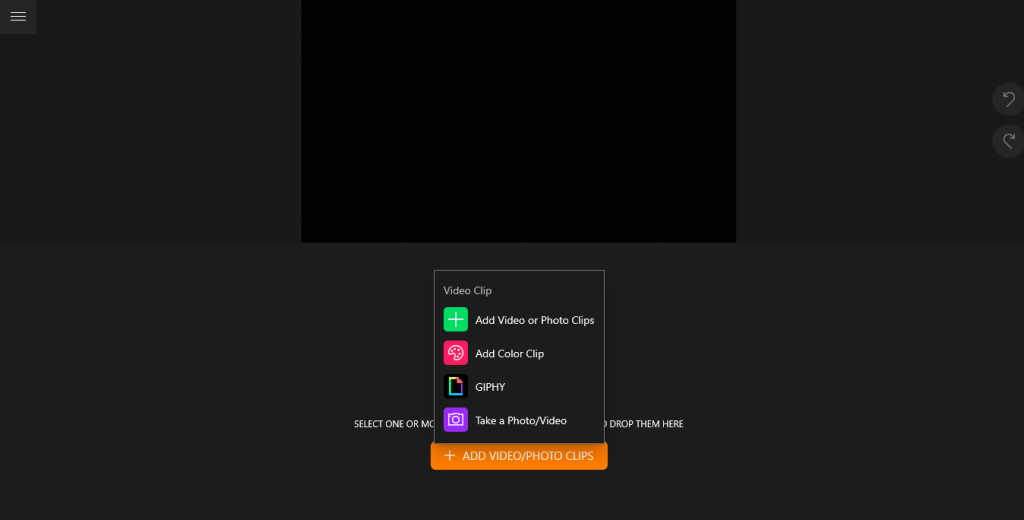
Launch Animotica and select New Project. Next, hit Add Video/Photo Clips and select Video or Photo Clips. This will move you to your storage area.
To access your Zoom recording from your storage area, tap on Documents and locate the Zoom folder.
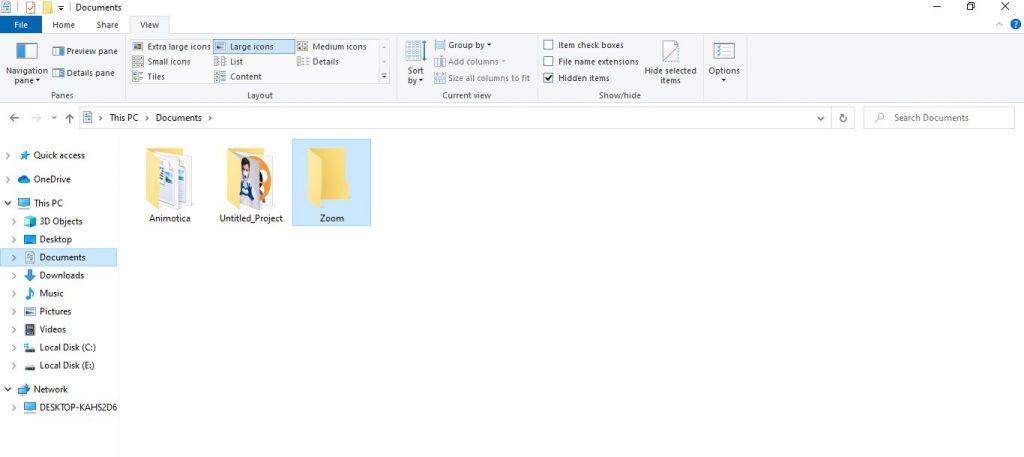
The default path for Windows PC is stipulated as follows: C:Users[Username]DocumentsZoom
Once you’ve found your recording, select it and hit Open to upload it to your project.
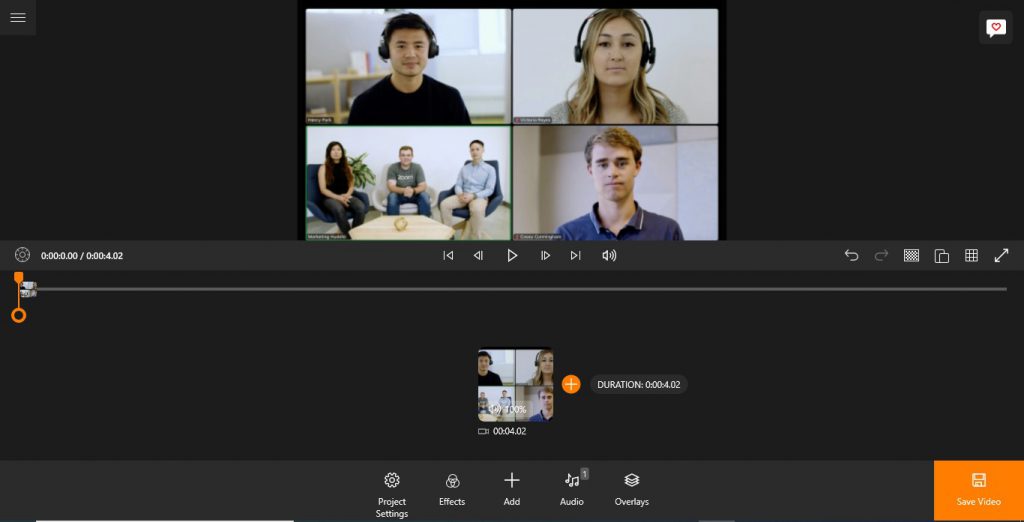
Step 2: Edit your Zoom Recording
From trimming to adding captions, there’s a bunch of things you can do to make your Zoom recordings ‘pop’. Let’s take a look!
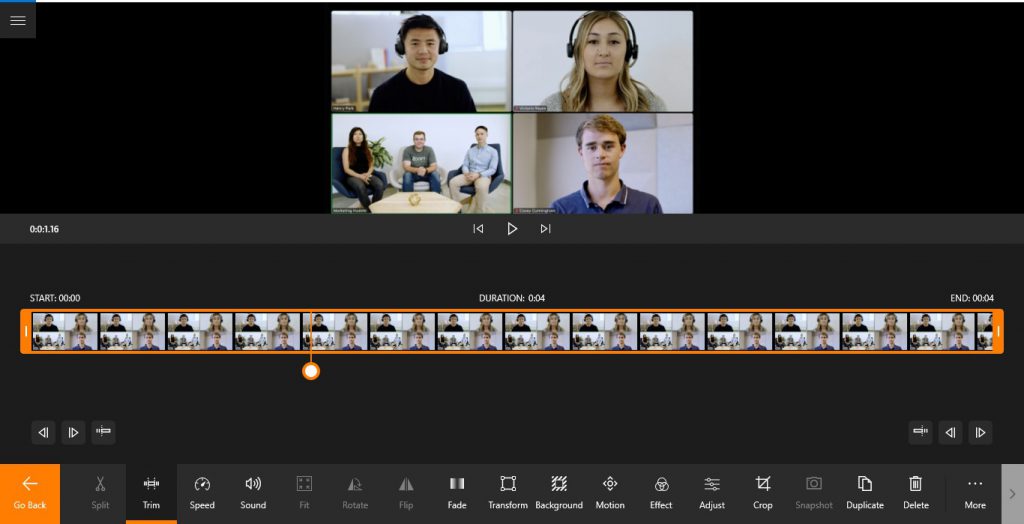
How to Trim Zoom Recording
Hit on the clip’s thumbnail to reveal its editing options. Select Trim as shown below. There are three options: Trim Slider, Trim from the Start, and Trim from the End.
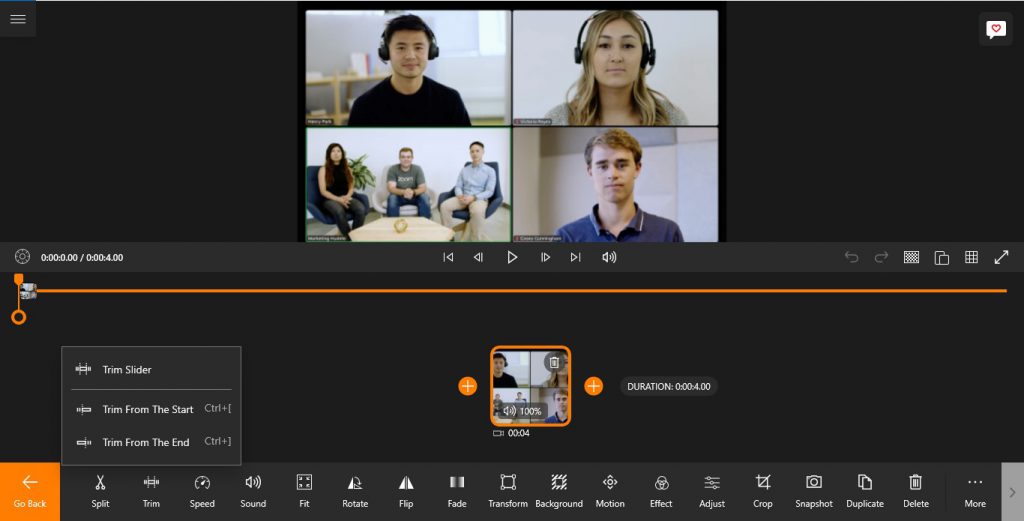
The Trim Slider allows you to manually trim the start and end points of your video.
To trim your video from the start, drag your slider to the point you’d like to trim and select Trim from the Start. Every frame behind the slider will be removed. If you’d like to access this feature with a hotkey, hit CTRL+[.
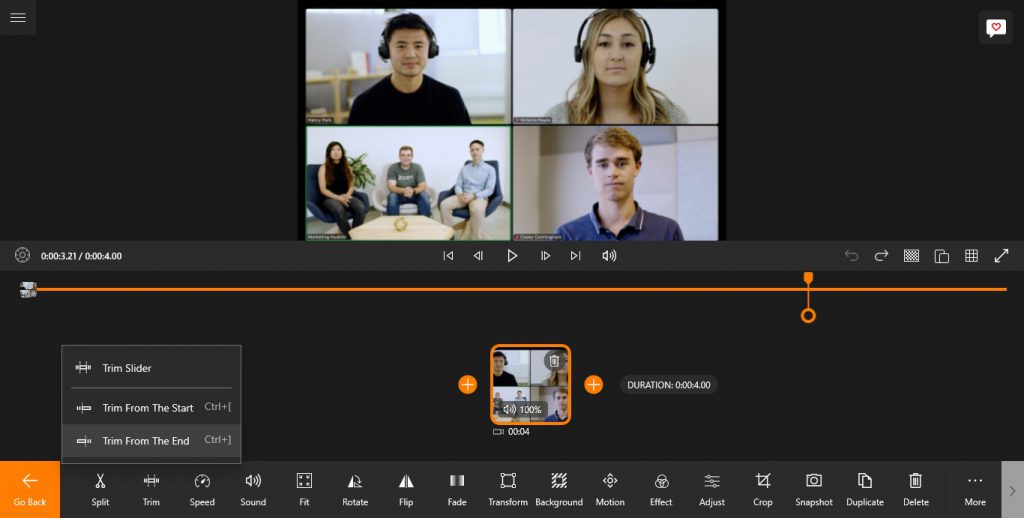
To trim your video from the end, drag your slider to your desired spot and select Trim from the End. Every frame coming in front of the slider will be removed! If you’d like to access this feature with a hotkey, hit CTRL+].
Feel free to check this post for an in-depth guide on how to remove unwanted parts from your video.
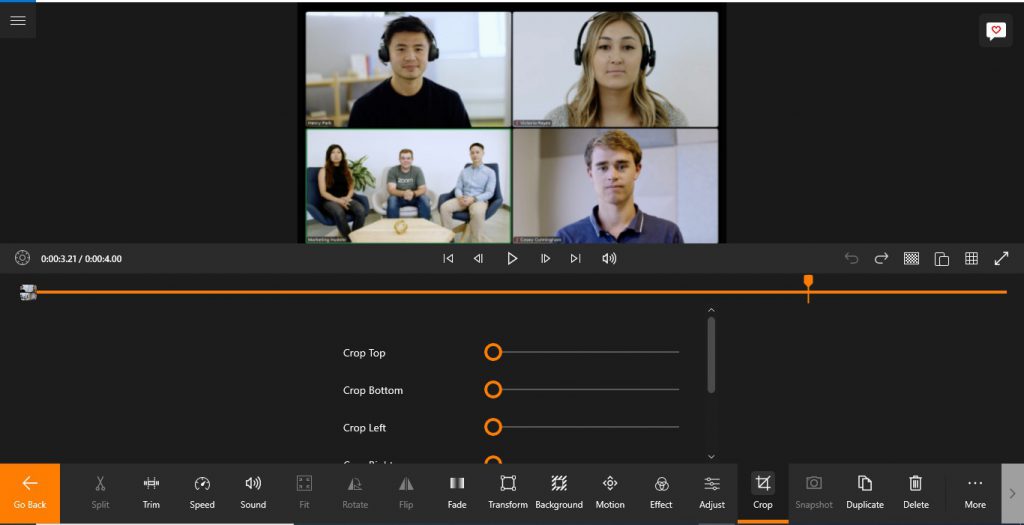
How to Crop a Zoom Recording
Cropping a video helps you remove unwanted portions of the video frame. To crop a Zoom recording, hit the video thumbnail to reveal your editing options.
Select Crop. Now you can adjust any of the sliders to adjust from the top, bottom, left, or right! There is also a rounding radius feature that rounds the edges of the frame.
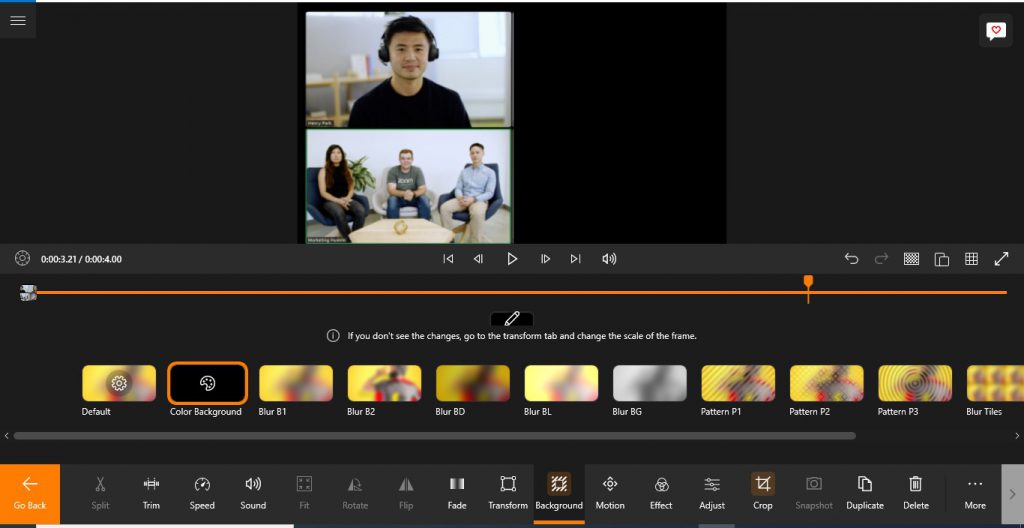
You’ll notice that a blurred background automatically replaces the cropped area. You can change this to a colored background or a different blur pattern by hitting Background and selecting any available option.
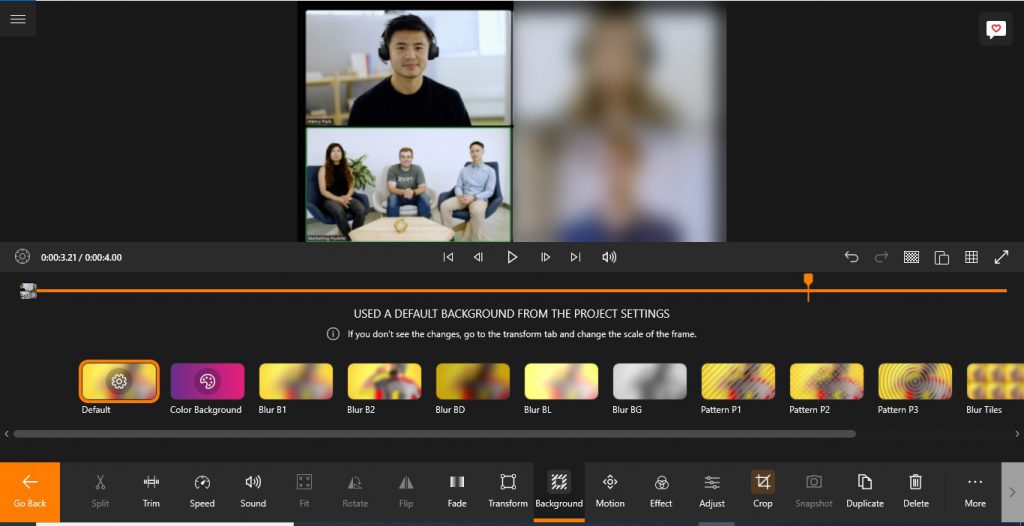
For this example, we’re changing it to black!
Next, you might want to adjust your frame’s position to make it look more natural after cropping.
To do this, select Transform. You’ll most likely use options such as Scale (for increasing or decreasing the frame’s size), Horizontal Offset (for moving the frame horizontally), Vertical Offset (for moving the frame vertically), Fit (for making the frame fit into the aspect ratio), and Fill (for filling the aspect ratio with the frame).
For this example, we’ll use the Horizontal Offset to bring the frame to the center of the box.
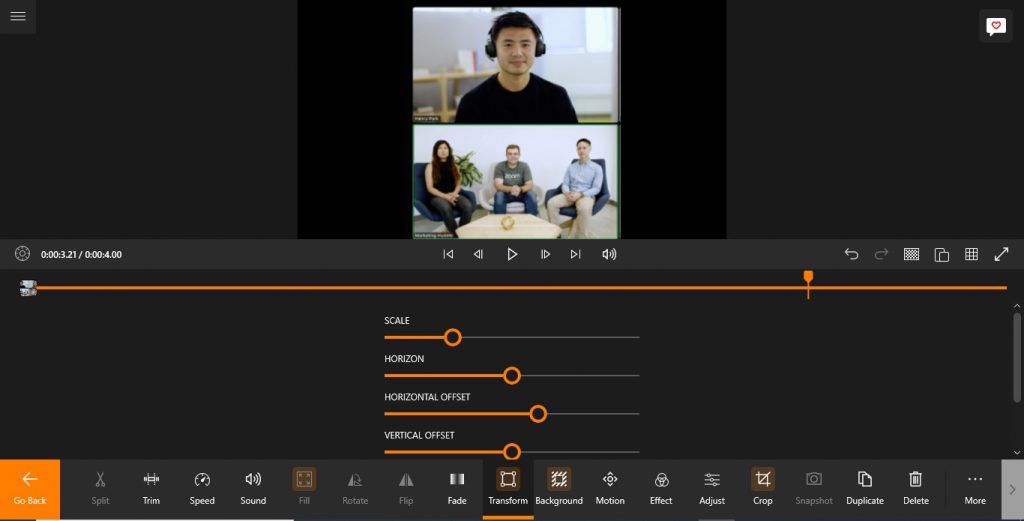
Feel free to play with the options until you get what you want!
How to Add Logo to your Zoom Video
A logo is a great way of making your brand known even without saying a word!
To add your logo to your Zoom video, hit on Add. Next, scroll down to the Layers/Overlays section and select Video or Photo. You can access the overlays with the hotkeys CTRL+O.
Navigate to your storage location, fetch your logo, and upload it to the project.
You can adjust your logo’s size by dragging the first ring, and you rotate it by dragging the second ring. You can also move it around by dragging it to your desired spot.
How to Edit Audio in your Zoom Recording
As far as audio, there are a couple of things you can do to the sound from your Zoom recording.
You can add a Fade In and a Fade Out to make it a little bit more dramatic. You can also add some subtle background music to ease the flow of the entire session.
To add the Fade In/Fade Out, tap on the thumbnail to reveal the editing options. Select Sound. From the popup, adjust the sliders to set your desired fade-in and fade-out durations.
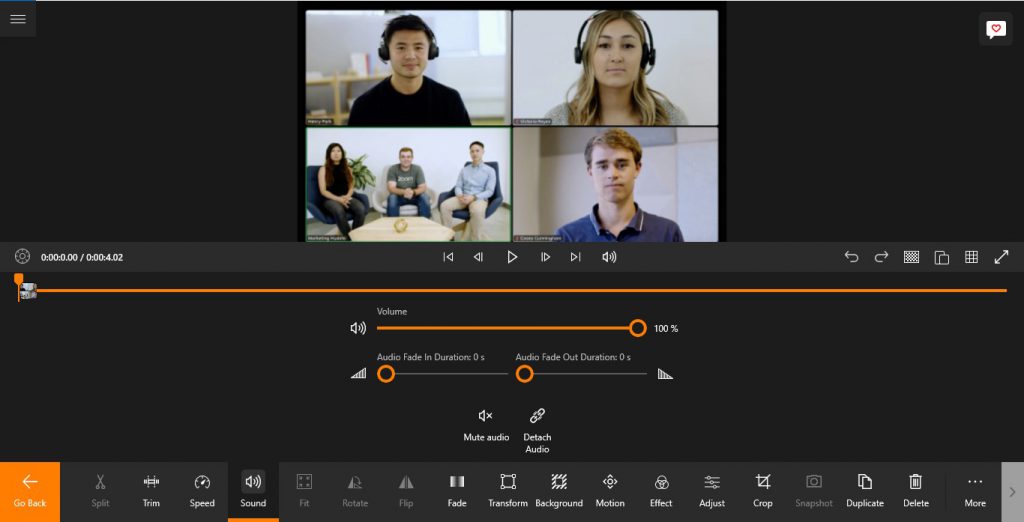
When you’re done, hit Go Back.
To add subtle background music, hit Add. Next, select Audio. You’ll appear in Animotica’s library of royalty-free music. The Audio section also allows you to add voiceover to your Zoom video. You can also access this feature by hitting M.
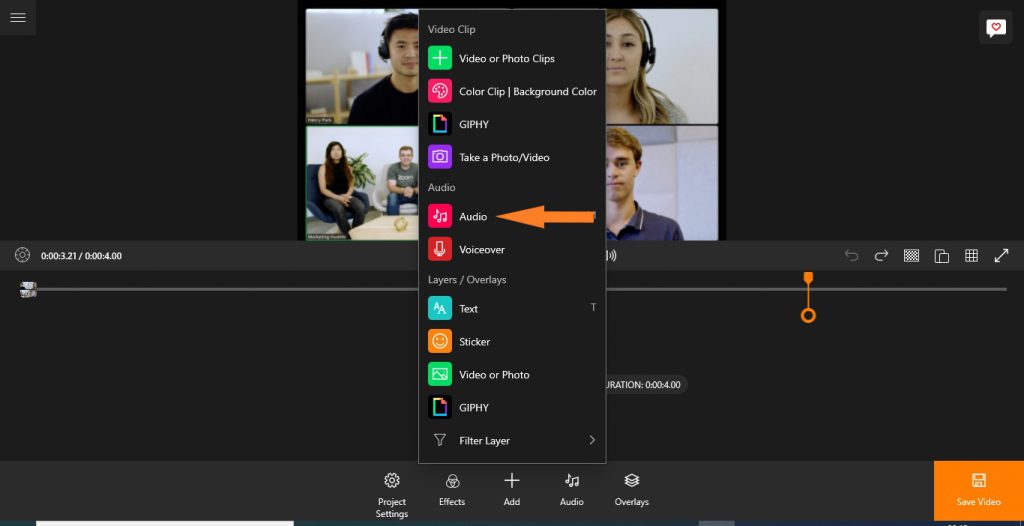
Preview and hit Add to upload the one you like. Otherwise, you can choose Select File to upload an audio file from your local storage.
Next, tap on the audio bar to reveal its editing options.
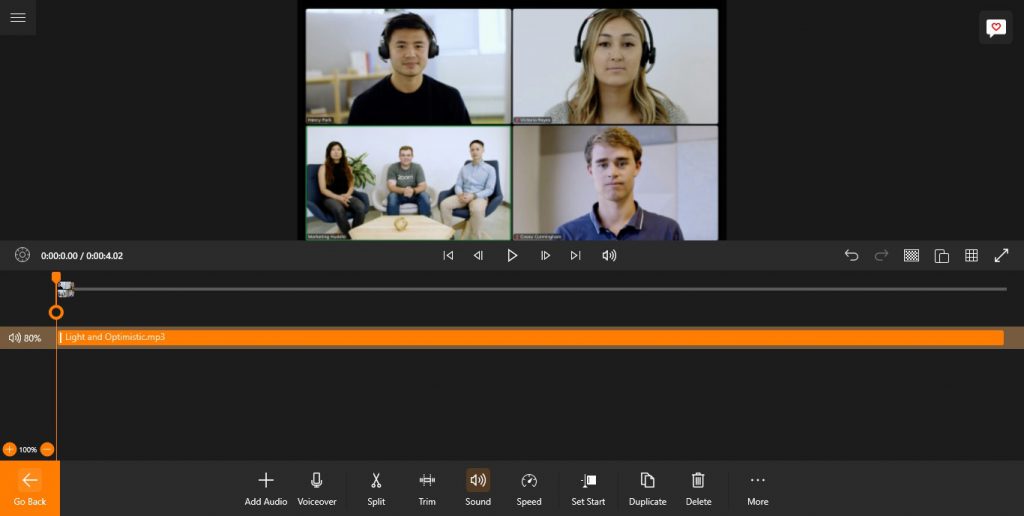
Select Sound and drag the Volume slider backward to reduce the volume. This is to make the background music as subtle as it needs to be.
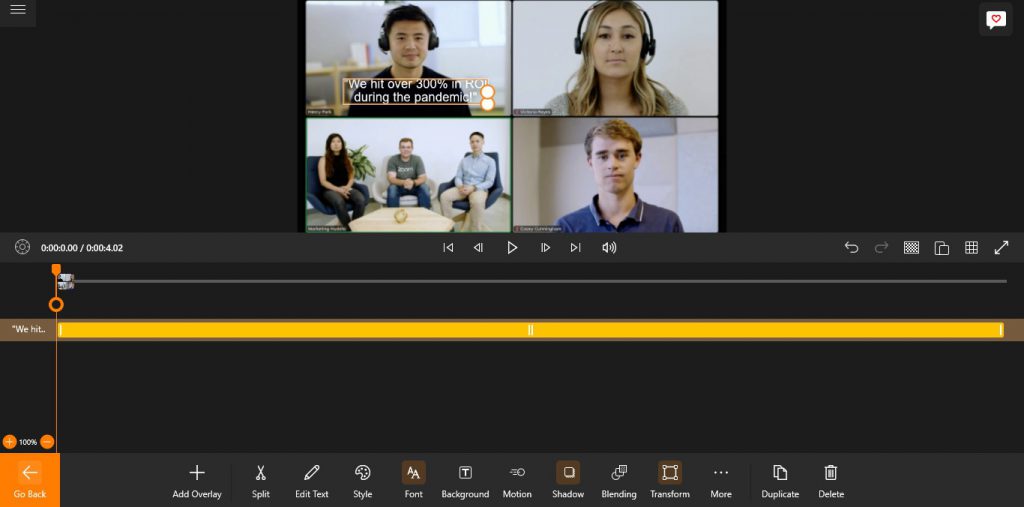
How to Add Captions to your Zoom Recording
Sometimes, you might want to buttress a few points throughout the video, and what better way to do this than adding captions at the specific spots within the video?!
To add captions to your Zoom recording, hit Add, scroll down to the Layer/Overlays section, and select Text. You’ll get a text window to type whatever you want. Hit X when you’re done. To quickly open the text box with a hotkey, press T.
You can drag the text around or reduce the size. Also, you can select any of the editing options to improve the text’s style, font, background, etc.
Here’s an in-depth guide on how to work with captions.
Step 3: Save your Video
Once you’ve implemented any of the editing options we discussed above, you’ll need to save your videos to make your changes a little more permanent!
Hit on Save Video to begin. You can also hit the hotkey CTRL+E to access the export window. On the export window, select Save As, input the filename you want for your new video and hit Save.
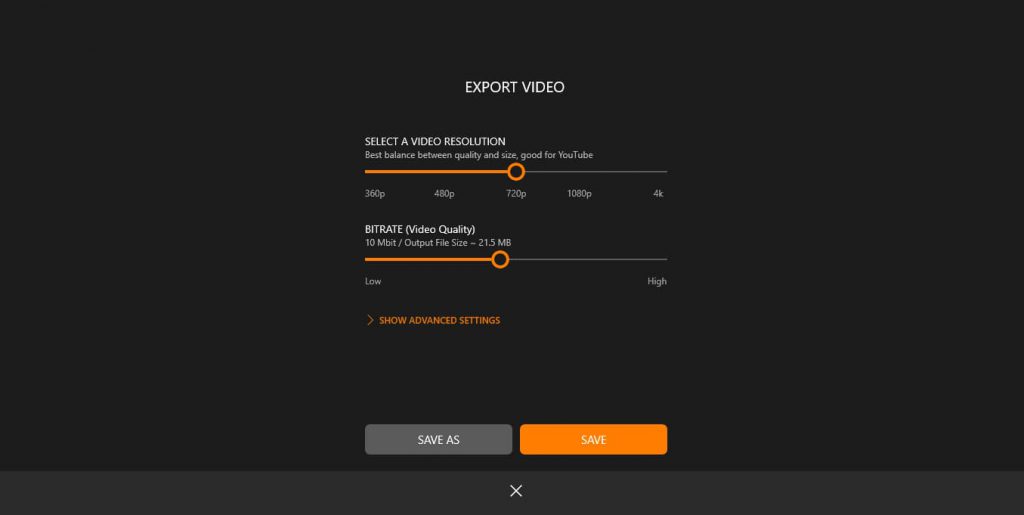
That’s all! You can now wait a bit for Animotica to finish things up for you!
Conclusion
Let’s round up by emphasizing that after editing your Zoom video with Animotica, your original video will not be affected.
With that said, we hope that this guide gave you the information you’ve been looking for! Be sure to throw in your suggestions and questions, and we’ll be here to handle them.
If you also run webcam sessions outside Zoom, you might want to record and edit the entire stuff with a powerful and convenient tool. Feel free to check out Screen Recorder By Animotica.
Cheers!
Zoom has taken the world by storm, especially in the realm of remote work and educational meetings. But once the meeting is over, you’re often left with a lengthy recording that may need some polishing up. If you’ve found yourself in this boat, don’t fret—we’ve got you covered. Let’s dive straight into the ‘how-to’ of editing your Zoom recordings to give them that professional touch. Not only this, but we’ll also learn how to keep this process stress-free. Thus, you can focus more on the content rather than battling with the technology!
As we walk through these steps, bear in mind that Zoom is just a starting point. You can utilize these tips and techniques for any kind of video, including the ultra-compelling explainer videos that are sweeping the digital landscape these days. Essentially, once you master this process, your video editing skillset will be a force to be reckoned with—irrespective of the original footage source.
We truly believe that the fusion of the right know-how and tools can turn even the most seemingly complex tasks into a breeze. So, let’s get started!
Remember: The quality of your video is only as good as the effort you put into editing it. So, take your time, follow our steps, and don’t be afraid to explore the software we recommend. Happy editing!
Cheers!


