If you’re a creative who routinely shares their art on Instagram Reels but are frustrated by the limited editing options on the mobile app, we have the perfect solution. Welcome to a comprehensive guide on editing your Instagram Reels using Animotica’s powerful video editing tools on your PC. No longer are you constrained by the small screen of a mobile device? With Animotica, you can utilize all the exciting features of professional-grade video editing software on your large-screen PC interface. From adding text and transitions to incorporating cool effects and filters, everything is now at your fingertips. So sit back, relax, and let us show you all the incredible things you can do to polish your Reels, making them even more impactful and visually engaging.
Contents
Why are Reels Dominating Instagram Nowadays?
It’s a statistical fact that Instagram Reels have skyrocketed in popularity in 2023. As a dynamic, engaging form of content, Reels have reshaped the Instagram landscape, and user data provides the proof.
Consider this: Reels are intentionally designed to be quick and captivating. They embrace brevity, offering a compelling narrative in a mere matter of seconds. Given that research shows the average human attention span has shrunk to just 8 seconds, Reels have tapped into this prevailing trend of short, punchy content.
Next, consider the opportunities for creativity that Reels afford. With the ability to compile multi-clip videos, incorporate music, and overlay various effects, Reels allows tremendous creative freedom. In fact, a survey by Digital Marketing Community found that nearly 67% of Instagram users agree that Reels fosters a higher level of creativity than standard photo or video posts.
The bias of Instagram’s algorithm cannot be overlooked either. Data shows that Reels are often served to audiences more prevalently than regular posts. Instagram Reels content is 58% more likely to appear on users’ Explore pages, creating more considerable organic reach potential.
In short, the surge in popularity of Instagram Reels in 2023 can be statistically tied to their digestible format, creative freedom, and algorithmic advantage. This shift – underscored by data – signals the evolution in content consumption towards more interactive formats resonating with today’s social media audience.
The Pros and Cons of Editing Outside of Instagram
Before venturing into the world of external editing for Instagram Reels, examining the advantages and disadvantages accompanying this process is vital. Editing outside Instagram means using an external software such as Animotica to refine your videos. Will it be more time-consuming or rewarding? Let’s weigh the pros and cons in the table below to help you make an informed decision.
| Pros ✅ | Cons ⛔ |
|---|---|
| Access to a broader range of editing features and tools that Instagram does not offer. | It might be slightly time-consuming as you import and export the video between different platforms. |
| There is a greater possibility for enhancing video quality and overall aesthetics with advanced editing techniques. | A learning curve might be associated with using an entirely new editing platform like Animotica. |
| It can work on a larger screen, which offers enhanced visual clarity and ease of operation compared to a mobile device. | Requires access to a PC, which might not always be as convenient as using the readily available mobile app. |
| Capability of saving projects and edits for future revisions or refinements. |
How to Edit Instagram Reels on PC with Little or Zero Editing Skills
In the era of digital dominance, mastering the creation of video reels, trendy ones like Instagram Reels, is more critical than ever. Admittedly, it’s a daunting task for novices. But don’t fret! We’re committed to aiding your journey. This guide explains how you can effortlessly edit your Instagram Reels on your PC using Animotica’s user-friendly, intuitive software.
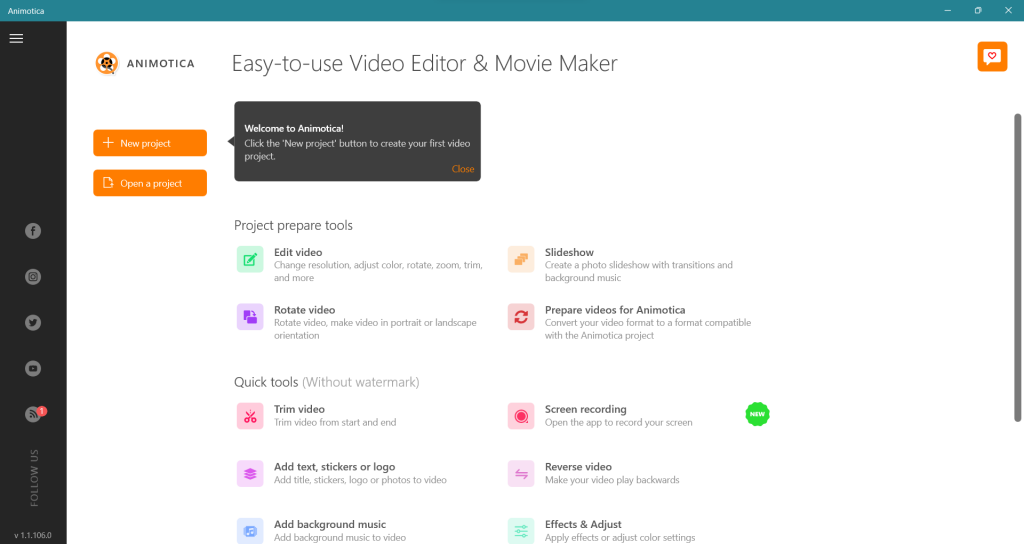
But first, a crucial initial step is downloading Animotica from the Microsoft Store. Once installed, you’re ready to get started. So, without further ado, let’s delve into the process!

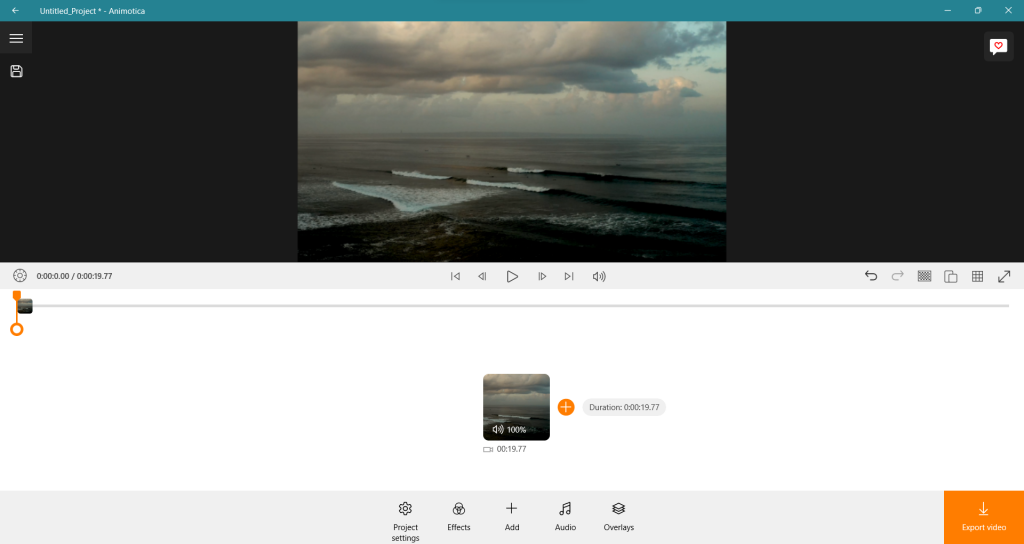
Step 1: Upload Your Files
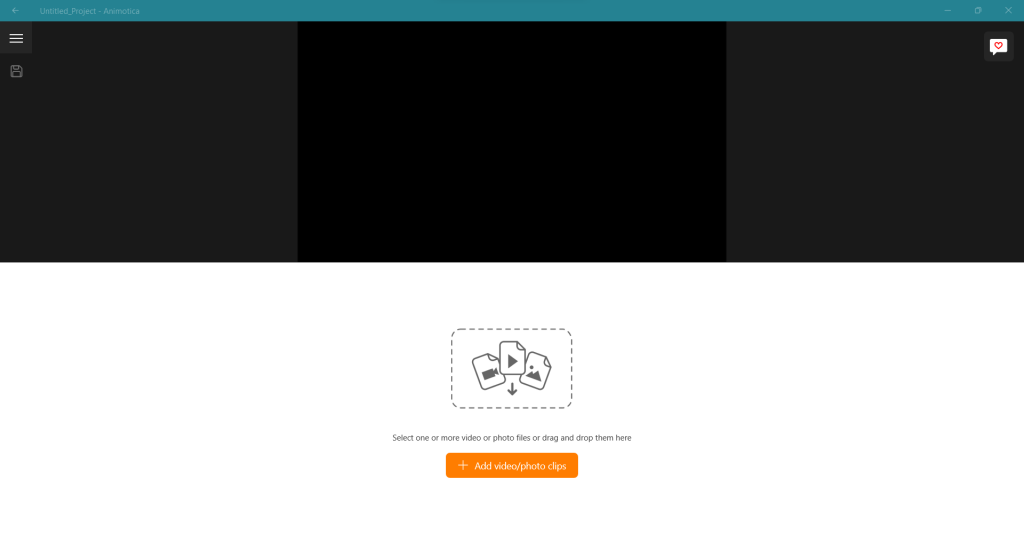
Firstly, launch the Animotica application on your computer. After familiarizing yourself with its user-friendly interface, click the “New Project” button to initiate your Instagram Reels editing journey.
Next, import your video files into the app. You can do so by selecting them individually or choosing all files in a folder using Ctrl + A on a Windows PC. Once completed, your video files will be ready for editing, allowing you to customize and enhance your Instagram Reels video.
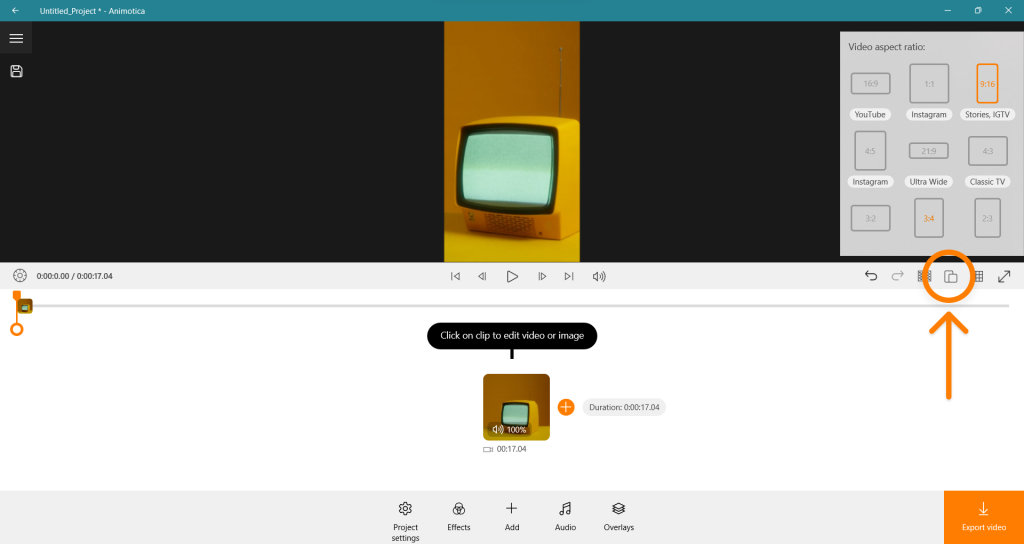
Step 2: Set the Aspect Ratio
Ready to format your video for Instagram Reels but filmed it in the incorrect ratio? No need to worry. With Animotica, you can easily adjust the aspect ratio. Just locate and click on the ‘Aspect Ratio’ button. You can select the ‘9:16 (Portrait)’ format from there to satisfy Instagram’s specific requirements. As you can see, adapting your video to a different format is effortless with Animotica.
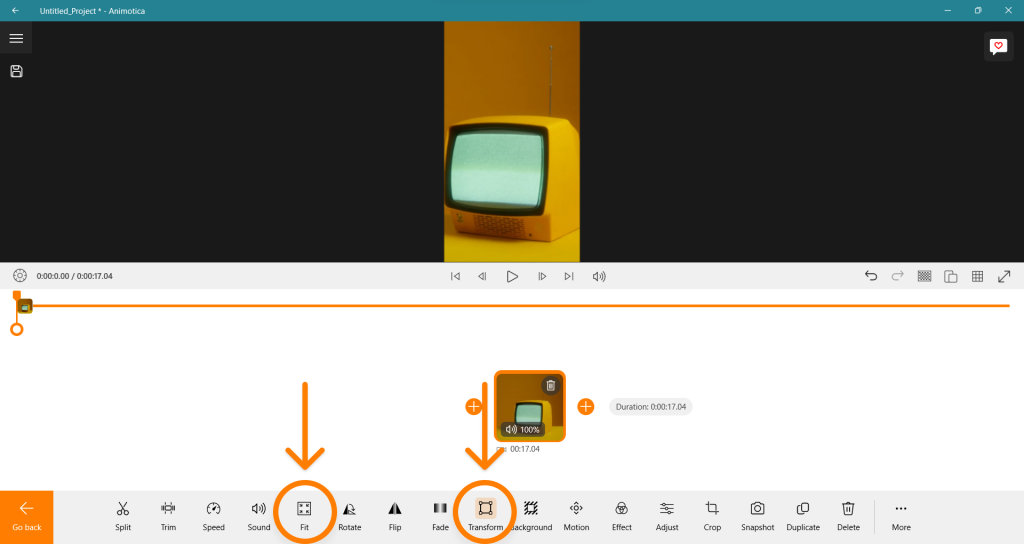
If your video appears trimmed or off-center, fear not. You can easily adjust it using these steps:
- Click on ‘Fit‘ to bring all elements back into the frame.
- Use the ‘Transform‘ function to resize and reposition your content.
Ready to add some audio to our project? Let’s dive right in!
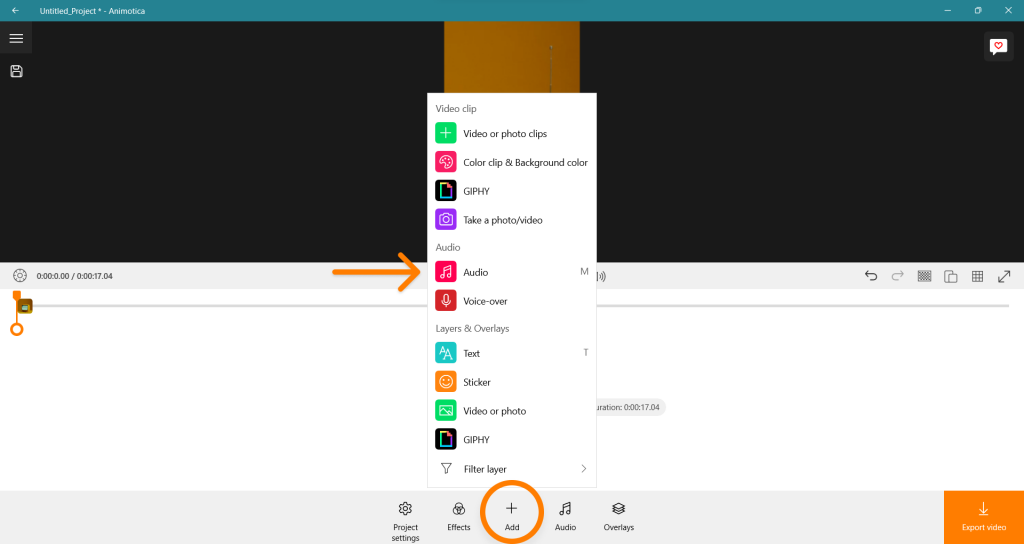
Step 3: Add Sound Clip
Ready to infuse your Reel with rich sound? It’s as simple as clicking the ‘Add audio‘ button, depicted by a speaker icon. Let’s dive right into it.
- Once you select the perfect sound clip, hit the ‘Add‘ button. Consider it as claiming the coveted last piece of pizza at the gathering.
- Feel free to fine-tune the clip to your liking. Balance the volume and trim the sound clip as needed. However, remember that harmony is critical—a gentle melody will always be more pleasing to your audience than a discordant noise.

- After nailing the audio like a virtuoso hitting the perfect high note, click ‘Go Back.’ Remember that you’re not merely creating visual content but a holistic audio-visual experience. So, maintain your composure and take your time.
Congratulations! You’ve mastered the art of adding sound to your Instagram Reels. Take a well-deserved break, refresh, and we’ll explore the next step in this editing journey when you’re recharged.
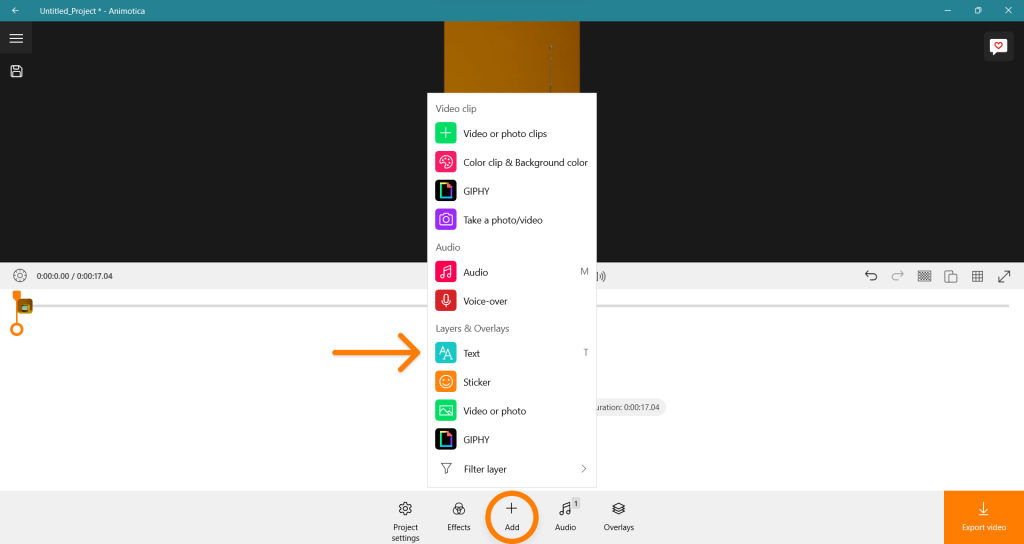
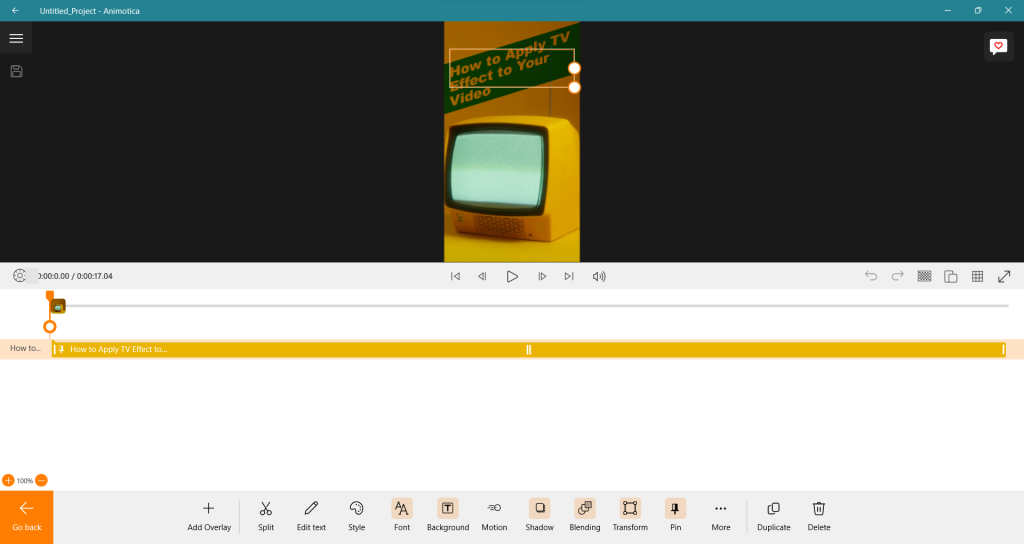
Step 4: Add Captions
Adding captions to your IG Reels can significantly enhance your content. To begin, hit the ‘Add‘ button or use the ‘T‘ shortcut to select ‘Add text.’ You can enter your desired caption here, then click on the ‘X’ to finalize.
With Animotica’s easy-to-use features, personalizing your videos is a breeze. You can tweak the size and position of your caption box as needed. Add a unique touch by changing the background and experimenting with different text formats and typographies. If you’re unsure where to start, our detailed guide on how to add text to videos can lead the way.
Step 5: Optional Steps
As you continue perfecting your Instagram Reel, don’t forget that some optional steps can go a long way in elevating your content. These include incorporating filters, transitions, and sequence arrangements. Filters can alter your video’s overall look and feel, setting the right mood for your content. Conversely, transitions can make your content more engaging by seamlessly joining different clips together. Lastly, do not underestimate the power of well-crafted sequence arrangements. By strategically organizing your video clips, you can create a captivating storyline or theme that retains viewer attention. In turn, tweaking these aspects can significantly enhance the overall impact of your Reel.
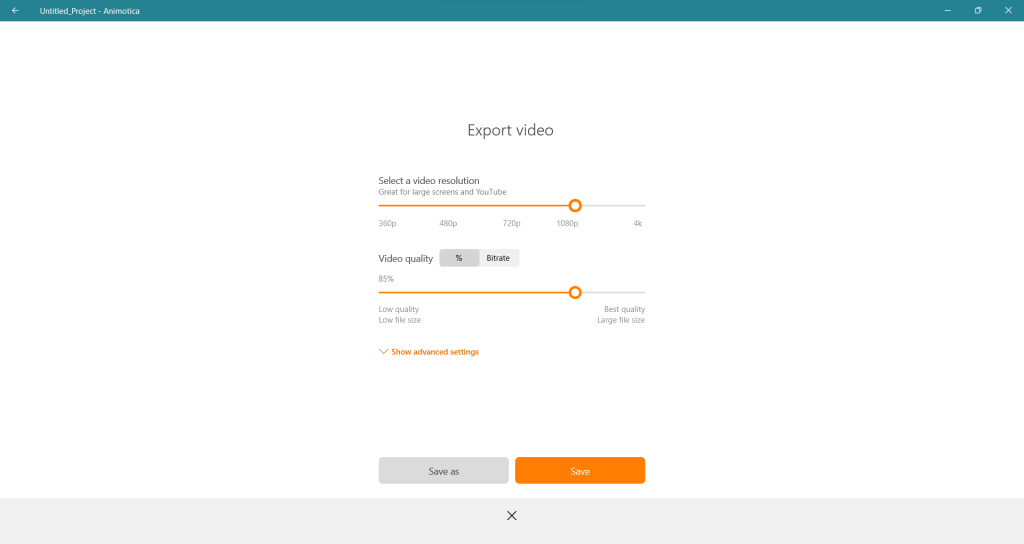
Step 6: Save
Now that you’ve finished creating your Instagram Reels in Animotica, it’s time to keep this masterpiece safe. Look towards the lower-right side of your screen, and you’ll spot the ‘Export Video‘ button. Clicking it will guide you to the ‘Export’ pop-up. This is the ultimate step in preserving your edited video.
How to Trim Instagram Reels on PC
As a creator, ensuring that all your Instagram Reels tell a concise, engaging story is essential. One crucial element to achieving this tight narrative arc in your Reels is the art of trimming. You can extract the most impactful parts of your content with the proper knowledge of how to trim your Reels. Let’s walk through how you can accomplish this task using a PC.
Step 1: Select a video clip that you want to trim
Click the video thumbnail to start trimming your Instagram Reels on your PC. This will open up a suite of editing options for you to explore. Among these, you’ll notice one that is labeled ‘Trim.’ This is the feature you’ll need for this step.
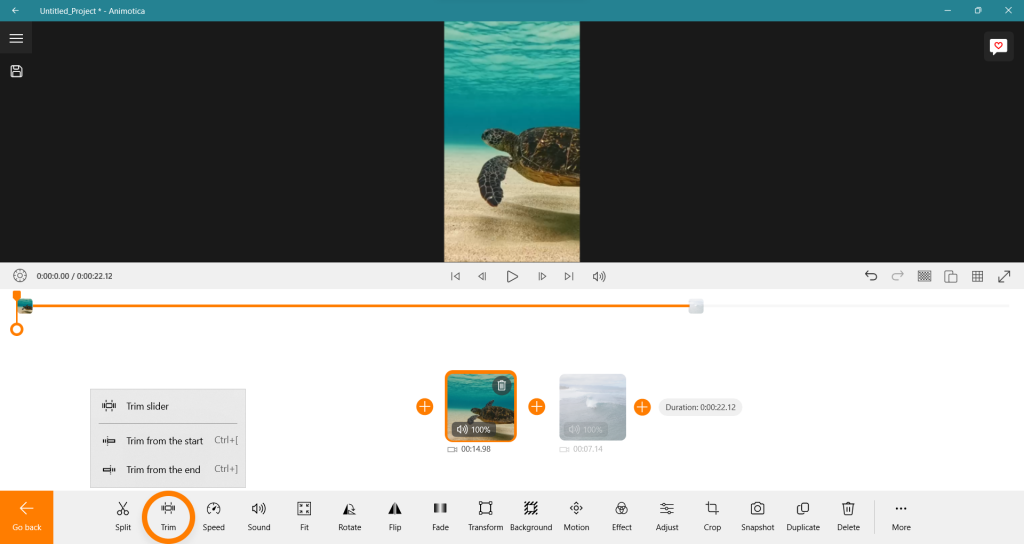
Step 2: Select Trim
As you explore the trimming feature, you’ll be delighted to find available options. Pinpoint precision is easily attained by choosing to ‘Trim from the start‘ or ‘Trim from the end,’ adapting to whatever your video requires. The trim slider is here for convenience if you decide to experiment a little or showcase your bold side. Feel free to skim through your video and cut the necessary sections with this handy tool.

Step 3: Save
When you have finished trimming your video to perfection, don’t forget to save your work. The process for saving a trimmed video for Instagram Reels is just as discussed in the previous section. Keeping your work safe ensures you can share your polished and engaging Reels with your audience.
How to Make Instagram Reels Slideshow on PC
Creating a slideshow for Instagram Reels from your PC not only paves the way for better control and versatility but also enhances your content’s overall look and feel. With tools like Animotica, transforming multiple photos into a cohesive, captivating slideshow is a breeze. In this section, we shall guide you step-by-step on how to accomplish this seamlessly.
Step 1: Launch Animotica and Select Slideshow
To embark upon this video editing adventure, start by launching the Animotica software on your computer. Once the platform is up and running, navigate its intuitive interface and locate the ‘Slideshow‘ button.
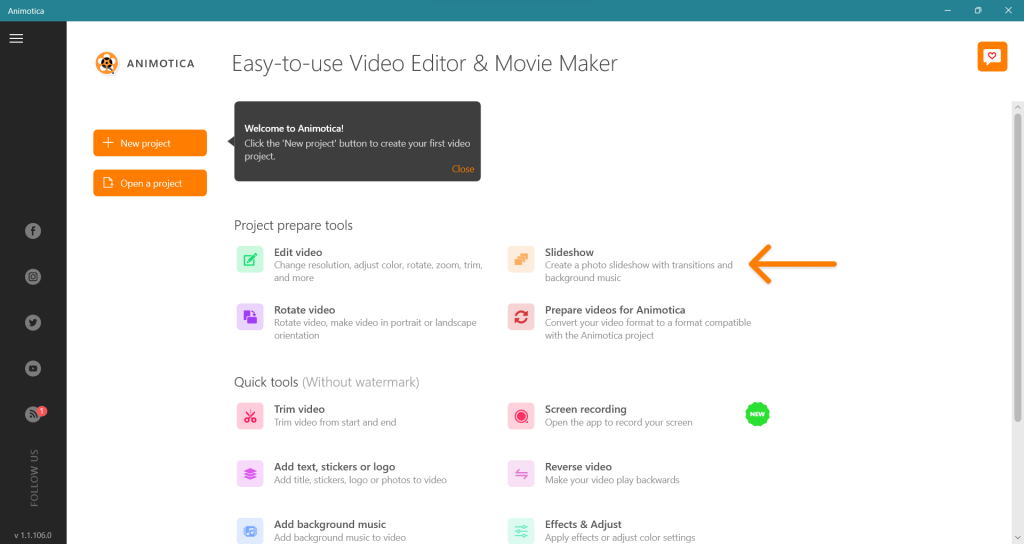
This button is nestled amongst a suite of diverse project preparation tools, each designed to elevate the quality of your Instagram Reels. Selecting ‘Slideshow‘ will initiate your journey towards creating engaging, vibrant, and polished Reels content.
Step 2: Add Your Photos
Just like that, your chosen photos are ready to be the stars of your Instagram Reel. It’s a no-brainer – feel free to add as many as you wish. After you’ve arranged the photos to your liking, press ‘Next’, and you’re already onto the next phase of your editing journey!
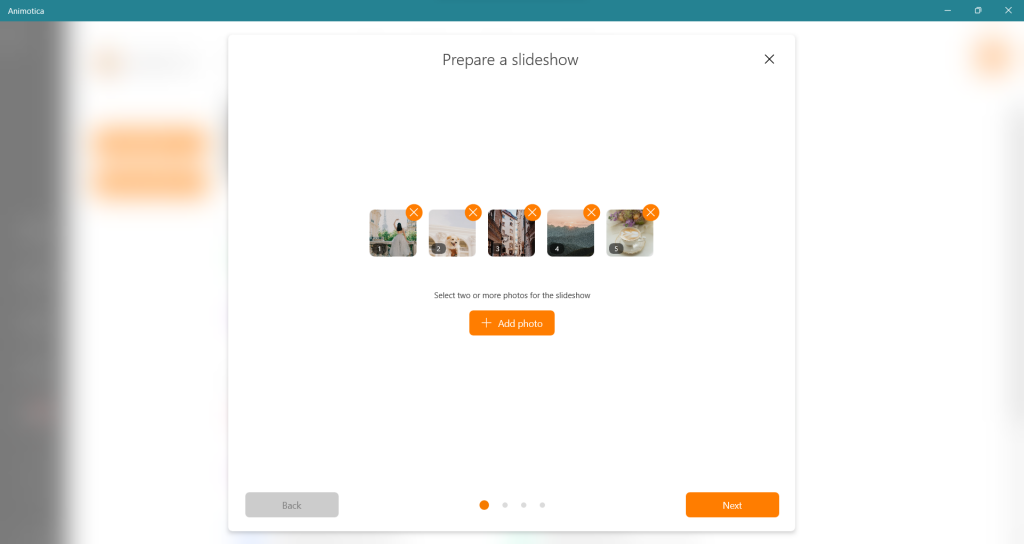
Quick tip: you don’t have to keep the order of the photos as is. Don’t be afraid to experiment by dragging and rearranging them to create the perfect sequence.
Step 3: Hit Add Music.
Want to add a captivating soundtrack to your Instagram Reels using Animotica? Follow these simple steps:
- Start by clicking ‘Add Music’. This command sets the stage for your auditory masterpiece.
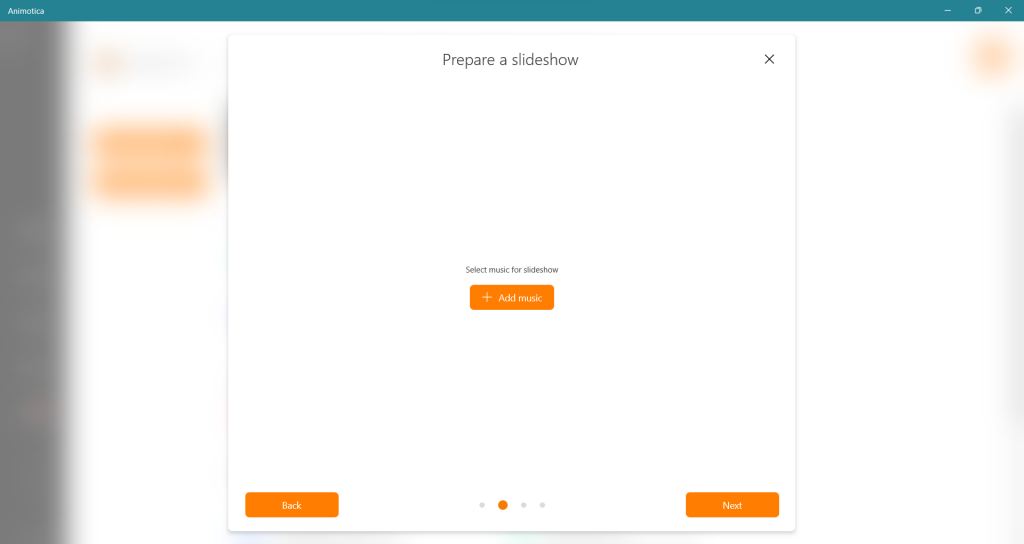
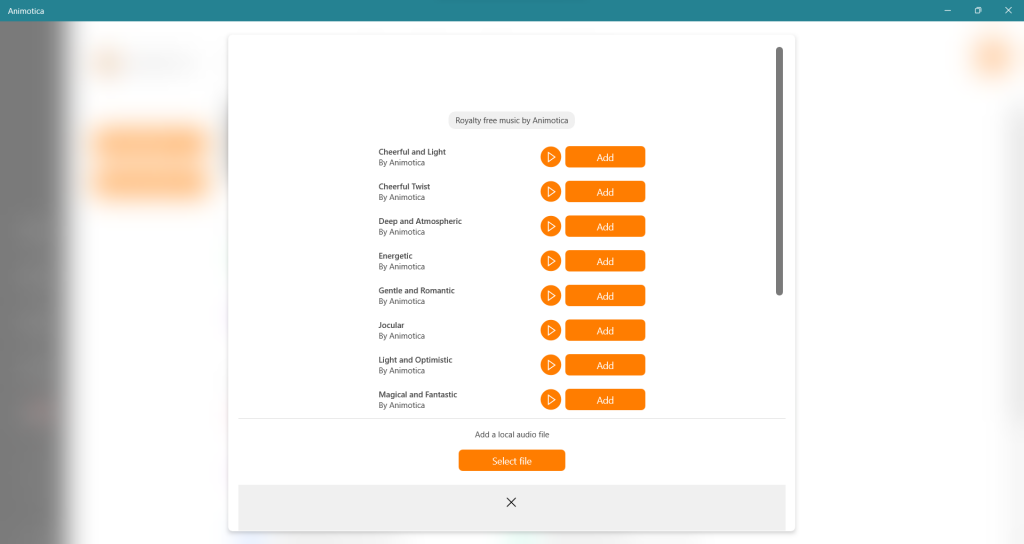
- Opt for ‘My Music’ if there’s a specific song you’d like to use and you’re conversant with copyright procedures. On the flip side, Animotica boasts a diverse, royalty-free music library ranging from classical to contemporary pop – there’s a tune for every scenario.
- Don’t forget to fine-tune the volume as needed. Remember, not all your viewers might appreciate a sudden burst of loud music. Let’s keep the experience pleasant for everyone!
And there you have it- your photo montage now has an impressive soundtrack. But why stop there? You can further amplify your Instagram Reels with striking video transitions. Let’s dive further into enhancing your Reels.
Step 4: Set video transition.
Adding transitions to your Instagram Reels can bring a new level of polish and a professional feel to your videos. In Animotica, it’s as simple as clicking on the ‘Transitions‘ tab and browsing through a diverse selection of cinematic transitions. You can find everything from sleek wipes to dynamic zooms.
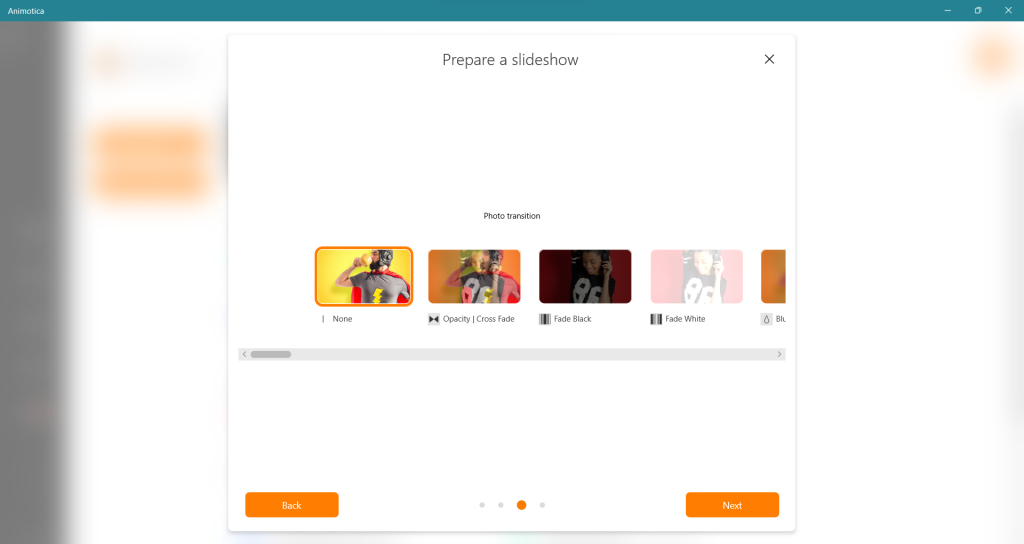
Once you’ve selected a transition that aligns with your Reel’s vibe, add it between your clips to provide a visually smooth hop between scenes. This feature allows you to create a seamless viewing experience and sustain viewer interest from one clip to the next. And remember, it’s your Reel, so don’t hesitate to experiment and find the transitions that suit your style best!
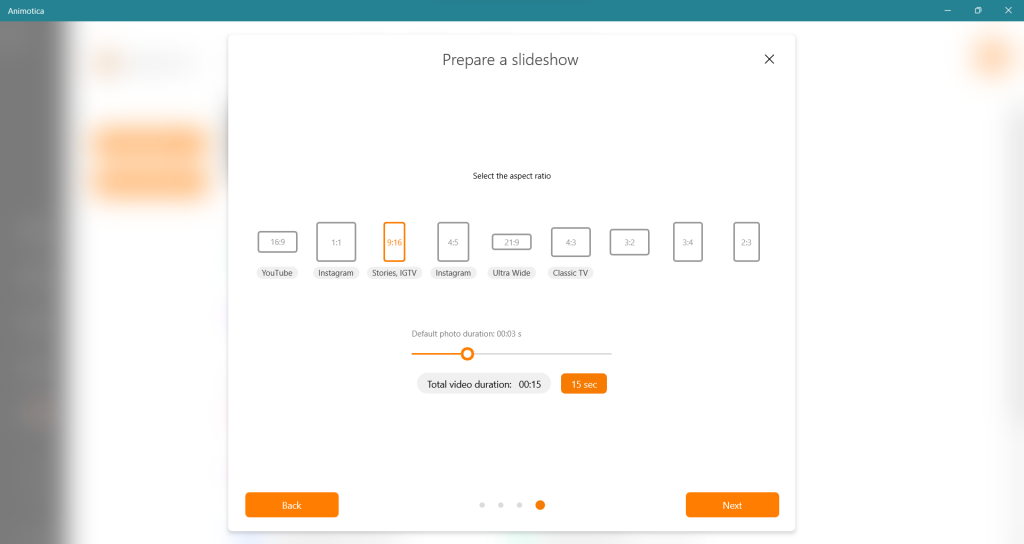
Step 5: Choose your preferred aspect ratio
Next, you’ll want to select the recommended 9:16 aspect ratio for IG Reels to fit the platform’s viewer window seamlessly. As you delve deeper into video editing with Animotica, you’ll be amazed by the range of cinematic features available. An example of this is the duration slider. This handy function gives you complete control over the individual slide exposure times, thereby empowering you to fine-tune the pacing of your Reel.
Step 6: Save as already described
As we conclude the editing process, remember that saving your content will follow the method described earlier in the steps. This ensures consistency and ease throughout your editing journey. In no time, your polished, professional-quality Reel is ready to impact your Instagram feed.
How to Add GIFs and Stickers to Instagram Reels on PC
When standing out on Instagram Reels, adding your flair through elements like GIFs and stickers can make a difference. Not only does it entertain your viewers, but it also breathes life into your Reels. Using a tool like Animotica, you can easily accomplish this. Let’s see how:
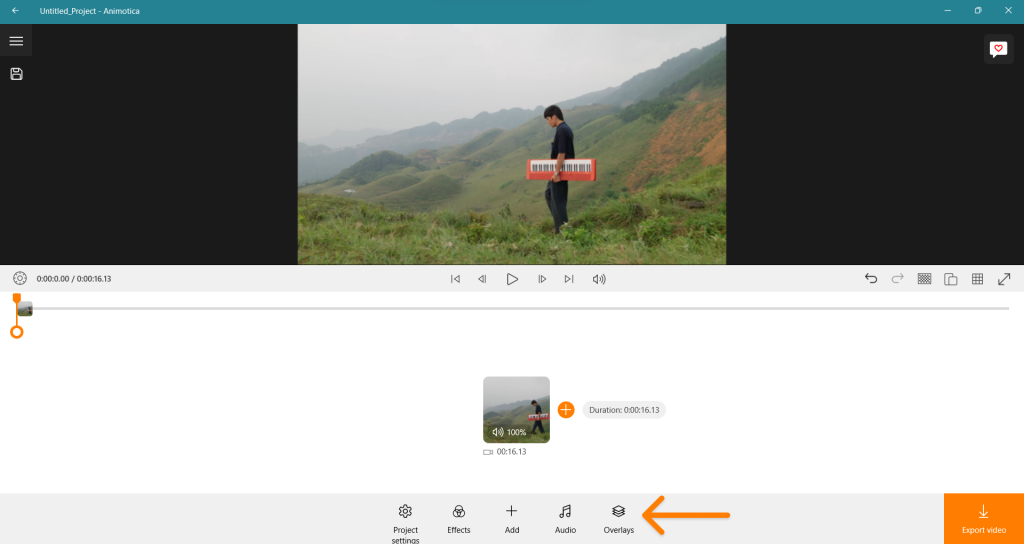
Step 1: Direct Your Cursor to the ‘Overlays’ Tab
Start by hovering your cursor over the ‘Overlays‘ tab, which is just under the video preview on your screen.
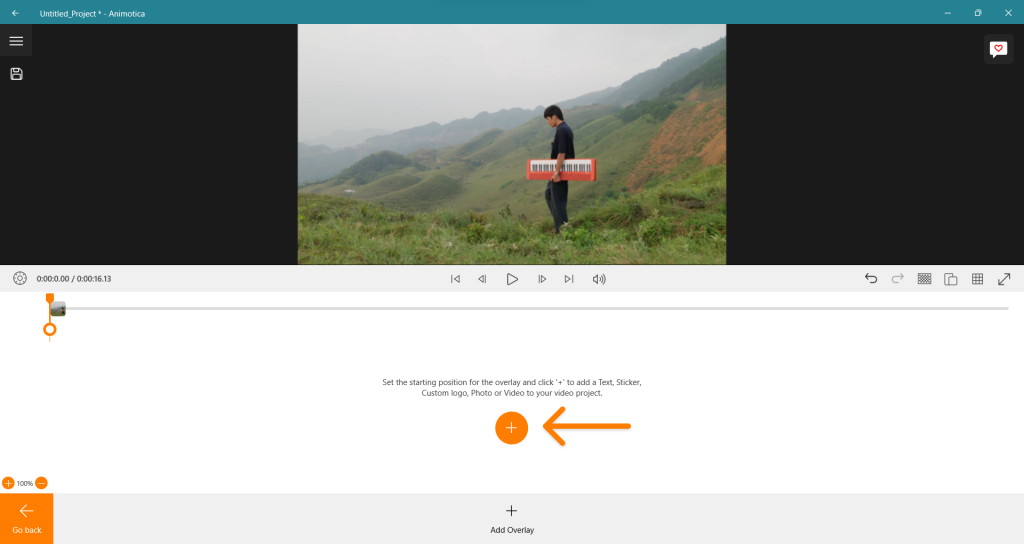
Step 2: Hit the ‘Add Overlay’ Button
Now, it’s time to get creative. You can start infusing your Instagram Reel with unique animations and effects by clicking on the ‘Add Overlay‘ button.
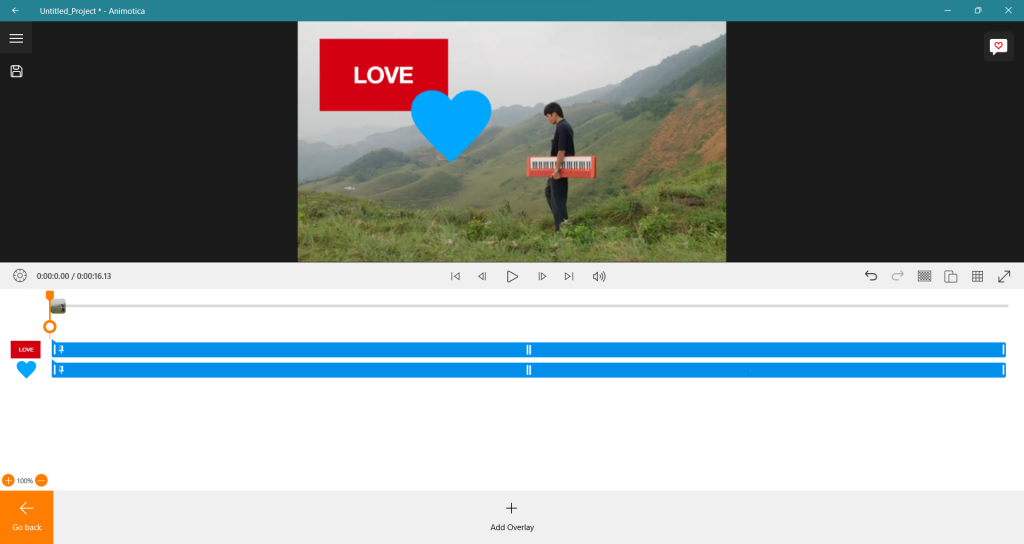
Step 3: Choose GIFs and Stickers
Animotica offers various inventive fonts and delightful stickers to add to your video. Utilize these to craft a dynamic and engaging Instagram Reel that commands attention.
How to Remove the Background of Instagram Reels on PC
As you continue producing attention-grabbing Instagram Reels, you may wish to explore additional editing features like removing the background of your videos. You can quickly achieve this effect thanks to Animotica’s potent tools, even while operating from your PC. Here, we’ll guide you through the process step-by-step.
Step 1: Upload your Preferred Background
Next, hit ‘Add photos/videos’ within the app to upload the backdrop of your choice for your Reel. Remember, Animotica allows you to choose between a still image or a video as your background, enhancing your freedom of choice and allowing your creativity to soar.
Step 2: Upload your Main Clip as an Overlay
Ready for the next step? Click on the ‘Add‘ button. Browse until you find the ‘Overlays‘ section. Here, you have an option to upload a photo or video. Search your PC for your video, and upload it.
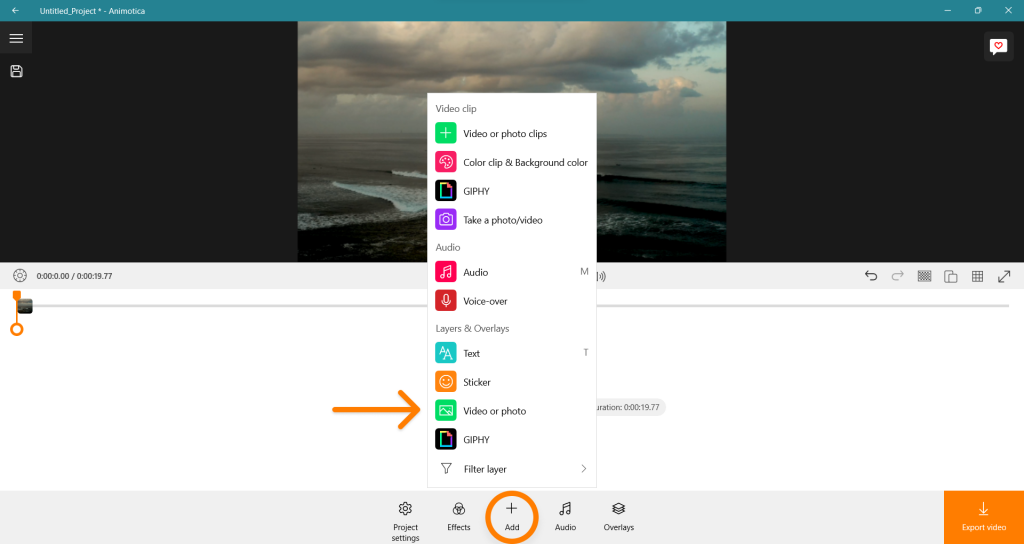
Voila! You’ve successfully added a video overlay to your Instagram Reels, a unique touch your viewers will appreciate!
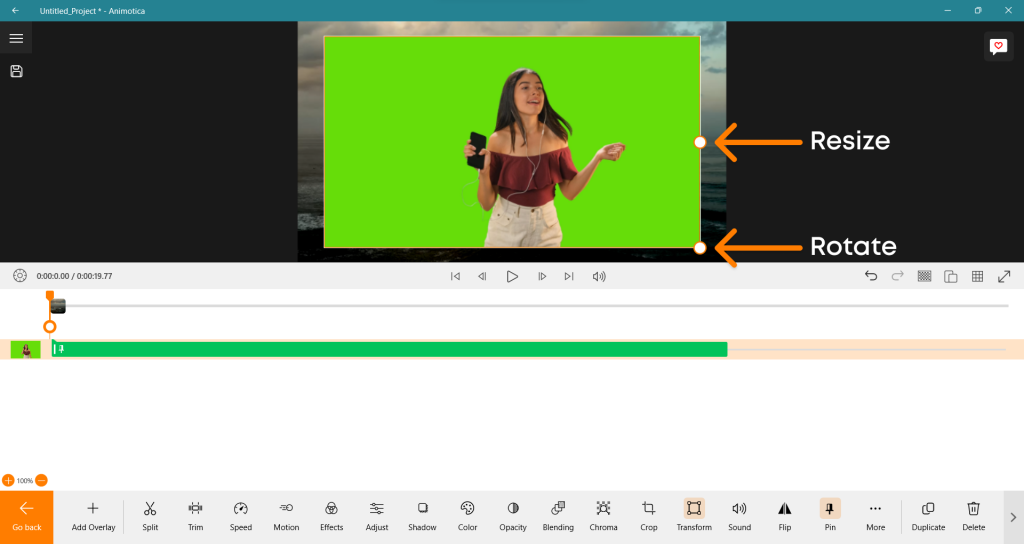
Step 3: Enlarge your Overlay and Select Chroma
If you notice your overlay appearing smaller than anticipated once uploaded, there’s no cause for alarm. You’ll observe two rings on the uploaded overlay clip, similar to those shown in the screenshot. To increase its size, drag the first ring in hand until the overlay fully encompasses the background – it’s as straightforward as that.
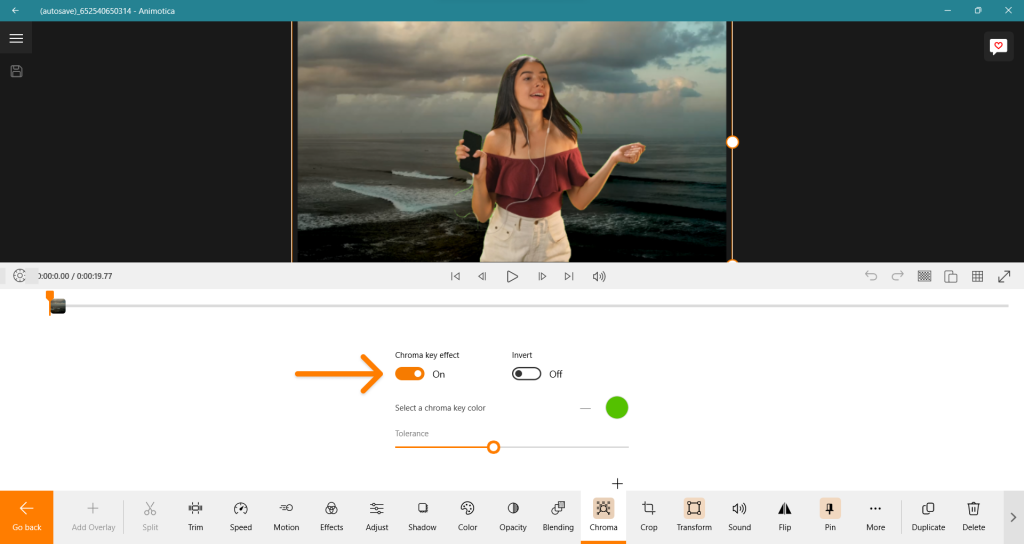
To activate the Chroma Key Effect, click on Chroma and flip the switch alongside ‘Chroma Key Effect‘ to the ‘On‘ position.
Wrapping up
Crafting exceptional Instagram Reels is no longer confined to your mobile device. With Animotica’s powerful video editing tools, you can elevate your content from the comfort of your PC.
Animotica empowers you to make creative edits that capture attention and boost engagement on Instagram. You can trim and edit videos, add GIFs, stickers, captions, and sound clips, and even craft an eye-catching slideshow. With its intuitive and user-friendly interface, you can quickly master the platform and create high-quality, professional reels that dominate the competition.
So why hold back? Transform your Instagram Reels content today. Download Animotica today and unlock a new era of digital creativity!
FAQ
What is the Best Video Editing Software for Editing Instagram Reels on PC?
If you’re looking for the perfect solution to edit Instagram Reels on your PC, then Animotica is the best video editing software to consider. This user-friendly video editor, specially designed for Windows, offers various features to refine and enhance your Instagram Reels, enabling you to produce high-quality videos quickly.
Highlight Features of Animotica for Instagram Reels:
Since its humble beginnings, Animotica has evolved with powerful features that make it an excellent tool for creating appealing Instagram Reels. Here are some of the additional capabilities you can look forward to using on the platform:
- Video Trimming: Sick of fiddly touchscreens? Nimbly cut, split, and trim video clips using the precision of your mouse and keyboard.
- Custom Transitions: Seamlessly link clips with attention-grabbing transitions. Animotica offers a variety of swoops, dissolves, and more.
- Text and Subtitles: Add polish to your Instagram Reels with custom text in various font styles, colors, and effects. You can also include subtitles to make your content accessible to all viewers.
- Color Grading and Filters: Edit like a pro with advanced color correction tools. Add custom filters to transform the look and feel of your clips.
- Green Screen: Free up your creativity with Chroma Key effects. Layer clips, remove backgrounds, or transport your subject to exotic locations.
- Overlays and Stickers: Express your personality with playful decals, whether emojis, graphics, or custom images.
- Audio Mixing: Bring your videos to life with sound effects, voiceovers, and music tracks. Edit the audio in Animotica for a fully customized Reels experience on your PC.
Animotica is shaping to be a noteworthy pick for editing Instagram Reels and standing out from the crowd. While mobile apps might be convenient for quick edits on the go, when you want to take your Reels to the next level, settling down with Animotica on a larger screen can pay dividends. By familiarising yourself with available feature sets and experimenting with their use, you can take your Reels from ordinary to extraordinary.
What are Some Tips for Creating Engaging Instagram Reels?
Creating engaging Instagram Reels can significantly amplify your online presence. Here are a few tips to help you make the most out of your Reels:
- Plan Your Content: Have a clear idea of what your video is about before you start filming. Developing a storyboard can help you visualize your plan and ensure your content is coherent and engaging.
- Utilize the Full Screen: Instagram Reels are designed to be viewed vertically, so leverage the full screen for your content.
- Create High-Quality Videos: Make sure your videos are clear and crisp. With Animotica, you can edit your Reels on a PC, allowing for precision and high-quality outcomes.
- Add Effects and Transitions: To make your Reel more dynamic and exciting, add effects and transitions. Animotica offers many options, from filters and overlays to advanced impacts.
- Use Text Wisely: Too much text can be distracting and hard to read. Use it sparingly to ensure your message is clear and concise. With Animotica, adding, editing, and customizing text is a breeze.
- Choose Appropriate Music: The right background music or sound clip can set the mood of your Reel and make it more engaging. Animotica allows you to add any song from your audio library.
- Keep It Short and Sweet: Instagram Reels can be up to 60 seconds long, but that doesn’t mean they have to be. Short, concise videos often perform better because they quickly get to the point.
In summary, using Animotica for editing your Reels can significantly upgrade their overall quality and appeal, helping you create more engaging content for your viewers.
Can I Edit Instagram Reels on a Mobile Device?
Editing Instagram Reels on a mobile device is not only possible but also the traditional way many content creators initiate their process. Instagram’s app provides a handful of native, straightforward editing tools on its platform. However, to maximize your Reels’ potential and spruce up your content to a professional level, a more advanced video editing suite such as Animotica can prove valuable.
While mobile video editing apps also exist, the smaller screen size and lack of a fine-touch input like a mouse can limit your control during editing. Captions can be hard to type and position, overlays can be challenging to line up exactly, and transitions can be tricky to implement smoothly.
Animotica, on the other hand, allows you to harness the power of a fully-fledged video editing suite from the convenience of your PC or laptop. This gives you more control over the final product and a higher-quality Reel for your followers to enjoy.
Is it Possible to Post Instagram Reels from PC?
Absolutely! Even though Instagram is primarily a mobile platform, uploading your refined Instagram Reels from a PC is entirely doable with the help of specific tools. Here is a convenient step-by-step tutorial to guide you through the process:
- Fire up any web browser and visit instagram.com; following that, log into your Instagram account.
- Click on the icon represented by the “+” symbol.
- Next, select the ‘Select from computer’ option.
- Finally, select the enhanced video you wish to upload as an Instagram Reel.
Once done, follow the directions to pick a cover image, pen a captivating caption, add a location, and voila! Your video will be uploaded directly as an Instagram Reel.
Using a PC to create and post Instagram reels is undeniably advantageous. An expansive screen space facilitates viewing, editing, and enhancing your videos, leading to better refined, professional-grade content. Plus, it’s convenient, especially for those who spend considerable time on computers for work or personal use.
So, flaunt your creativity, use Animotica’s features to design eye-catching Instagram reels, and shine in social media!