
A school project video is one of the best ways to try out the career of a professional video editor, actor, or director.
Think about it. You can sink your toes into the water without raising the stakes. After all, what’s on the line? Your grade? Come one, everyone and their mother will get the pass as neither your teacher nor your classmates are treating the project seriously.
You should.
For starters, you can kick off your YouTube career and start earning thousands of dollars from the comfort of your couch. Then there’s the fact that you’ll beat your competitors into the ground with close to no effort (they don’t take the project too seriously, remember?).
Just walk the extra mile, spend an additional hour or two, and explore the amazing world of video editing while passing the assignment with flying colors at the same time!
So here are the steps on how to make a perfect video for your school project.
Contents
Step 1 – understand your audience

This may come out as a shocker, but not everybody likes Star Wars. There are people who hate the Lord of the Rings movies. There are those disliking the Green Mile.
Sure, neither of them take away from the cinematic perfection these flicks are, but their opinion means the world if these viewers are the only ones to see the movies and judge them.
Same can be said about your own video. It can be a cinematic perfection generously sprinkled with after-effects and technical know-how, but if your audience – or in the case of a school project video your teacher – dislikes these kinds of things, you are probably just wasting your breath.
Additionally, your audience is quite windy. They’ll care for a cause today and reject its very essence tomorrow. Don’t become a yesterday’s meme – pay attention to the trends.
Let’s imagine you are shooting a video about your adorable pooch. Here’s a handy checklist for you to consider:
| Question to Ask | Questions related to your video (examples) |
| Who is watching? | Are there any cat lovers in the room? |
| What are they like? | Are they active and love to have fun or serious and don’t waste the time for entertainment? |
| Why are they here? | Do they wish to learn something new? Do they have a reason other than dogs are awesome? |
| Why would they watch your video? | Is there enough context and content to trigger an emotional response, or will they be there only because they “have to”? |
| Why should they watch your video? | Is there something new/educational/entertaining/valuable in your clip? |
| What do they care for? | Are they concerned with the problems dogs face on the streets and how people treat them? |
| What don’t they care for? | Do they really want to hear what kind of pooches are most common in their area? |
Step 2 – Define a clear message
Speaking of understanding your audience, it’s also your job to make sure they can understand you. If you really want them to give a damn, pick a theme for your video, narrow it down to a single message, and work from there.
Explaining why 2 times 2 is simpler than explaining the same concept in a video about the effect the tides have on the population of blue whales in the Pacific.
School Video Project Ideas
Speaking of a theme, here’s a handy list of video project ideas for high school. Don’t be shy to use it as your cheat sheet.
- Personal narratives are awesome. Make the video about you and show off those aspects of your personality you feel others are missing. Alternatively, try to compile an interview of what others think about you. This way you’ll engage your audience in advance and maybe learn something new about yourself.
- Whiteboard animations are super-effective if you need to get your point across. Think a PowerPoint presentation to support your report, but animated and with all kinds of awesome bells and whistles.
- Stop-motion animations are a bit tedious to make, but the results are very much worth it.
- You can teleport yourself to magical places and different realms with the power of the Chroma Key effect. All you’ll need is a green screen and the Animotica app to help you out along the way.
- As for what your video should be about, try making a book trailer, convey a powerful message about the environment into an animated short, or share a loving thank you note with others. These kinds of projects are without a doubt made to be A material.
Step 3 – Set up the lights
Light plays a quintessential role in the quality of a video. The trickiest part about it is that a single misplaced light bulb will make an otherwise astonishing product look amateurish.
One of the biggest no-no’s here is overhead lighting. The shadows it casts are unflattering, to say the least. Filming near the window, on the other hand, is a quaint little trick.
The type of light plays an important role as well. A soft light will remove all shadows from your actor’s faces. Hard light can create dramatic emphasis and set up the mood.
Either one is good for a certain purpose. The choice is on you. Who are we to step between a creative genius and their work?
- If you are looking for soft lights, have two light sources on both sides of the camera. This way they’ll cancel out the shadows they cast.
- Hard lights are usually set on one side: left, right, or below (but never above, remember?)
Step 4 – Work out the shot
If you’ve ever watched a video on YouTube, you know that vertical shots and shaky cam suck. Luckily, these things are easily dealt with. Simply set up your camera on a steady surface and you are good to go.
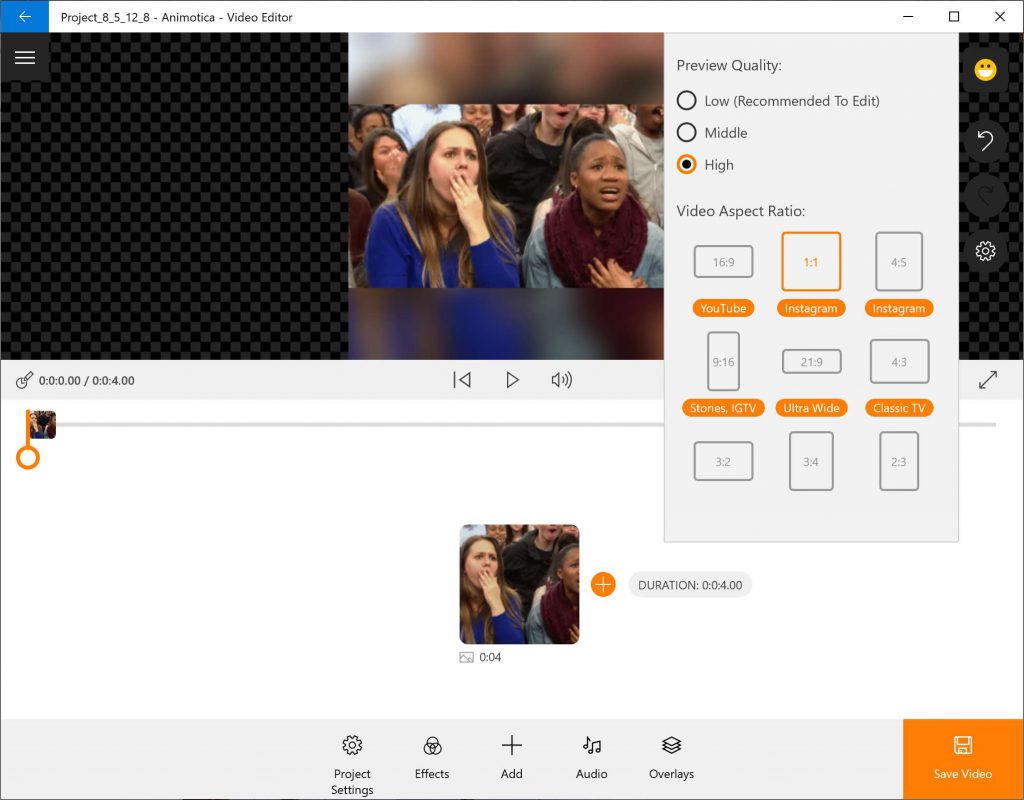
As for the aspect ratio, you can flip and turn your videos in but a handful of clicks with the Animotica movie maker.
Step 4 – Put your finger on the Rule of Thirds
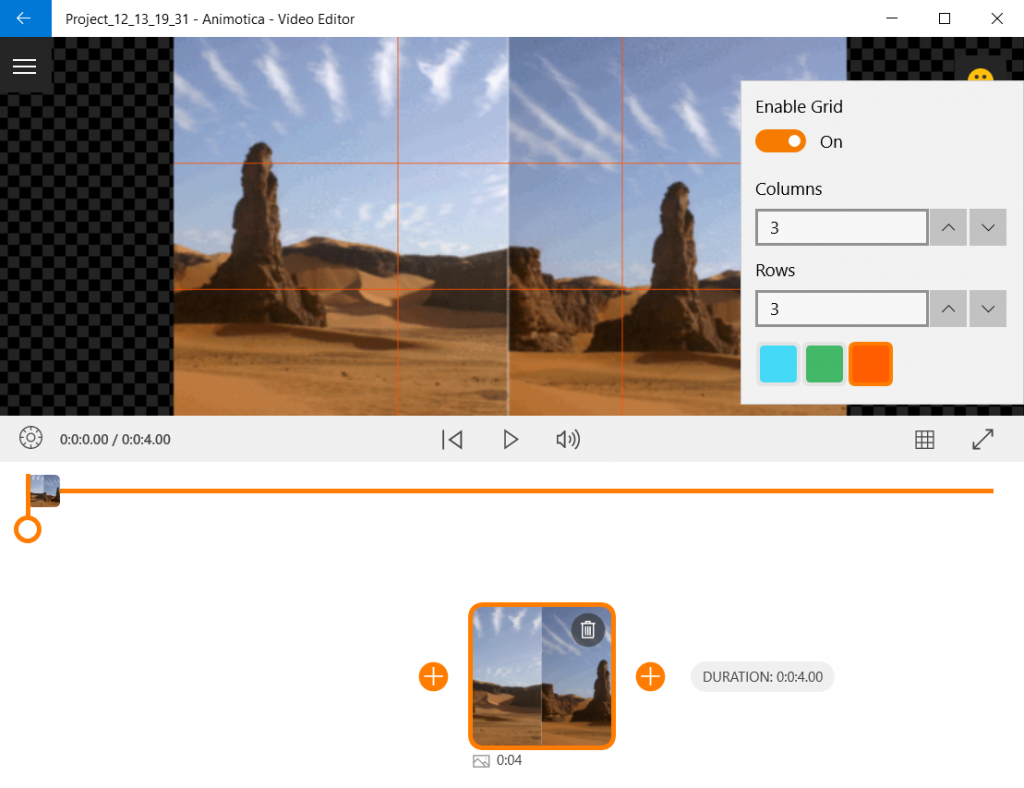
Imagine there’s a 3X3 grid laid over your shot. The points where the lines cross are your areas of interest. Place the object you are filming along those lines instead of keeping it square in the middle, and add a couple of additional objects, important to the shot onto the other dots.

Congrats, you now know more about composition than 99% of professional YouTubers! This is how you can activate Grid in Animotica.
Step 5 – Be the start of your own show!
If you are going to focus your next project around you or one of your classmates, practice your camera presence. Make a few shots in the test mode, see how the light affects the face, check if the mic picks up the voice, and try out some of the coolest acting tips popping up in your head. Don’t be afraid to experiment!
What’s next?
You’ve armed yourself with a couple of school project video ideas, learned about some of the coolest film making tips to give you an edge over the competition, and learned several secrets of the video editing trade. The rest is up to you.
You can edit your videos with Animotica and the best part is, it is available to schools for free! You can apply for your free license here.
Design, shoot, create, edit, experiment! And don’t forget the part about winning science fair projects for high school with your astonishing creations. Here’s how you do it!


1 Comment
Pingback: Animotica Excels At The Educational App Score With Pitch-Perfect Reviews - Mixilab Blog